-
Lactobacillus: From Yogurt to Beer?

Objective and Hypothesis
The objective of the experiment was to isolate lactobacillus (LAB) cultures from store-bought yoghurt and see if they could be used in a beer. I hypothesized that I would be able to isolate at least three different mixed LAB cultures from different yogurts. Of the LABs that were isolated I predicted only one of them would be able to manage maltose to the degree that we could use it for a sour beer. I did not think that most of the cultures would survive in a maltose exclusive zone.
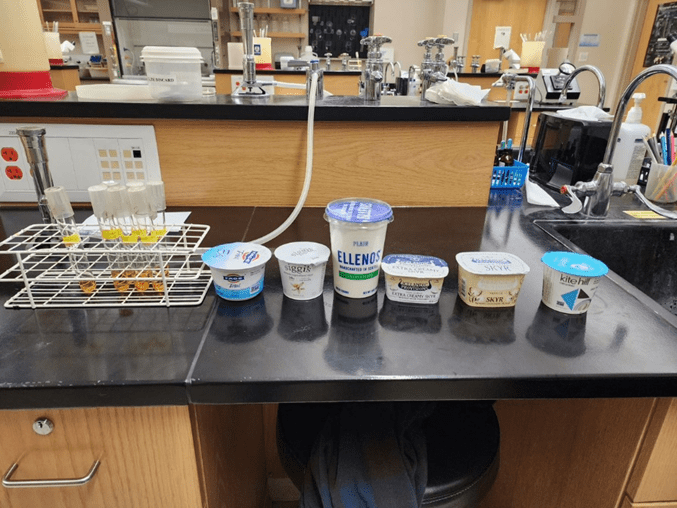
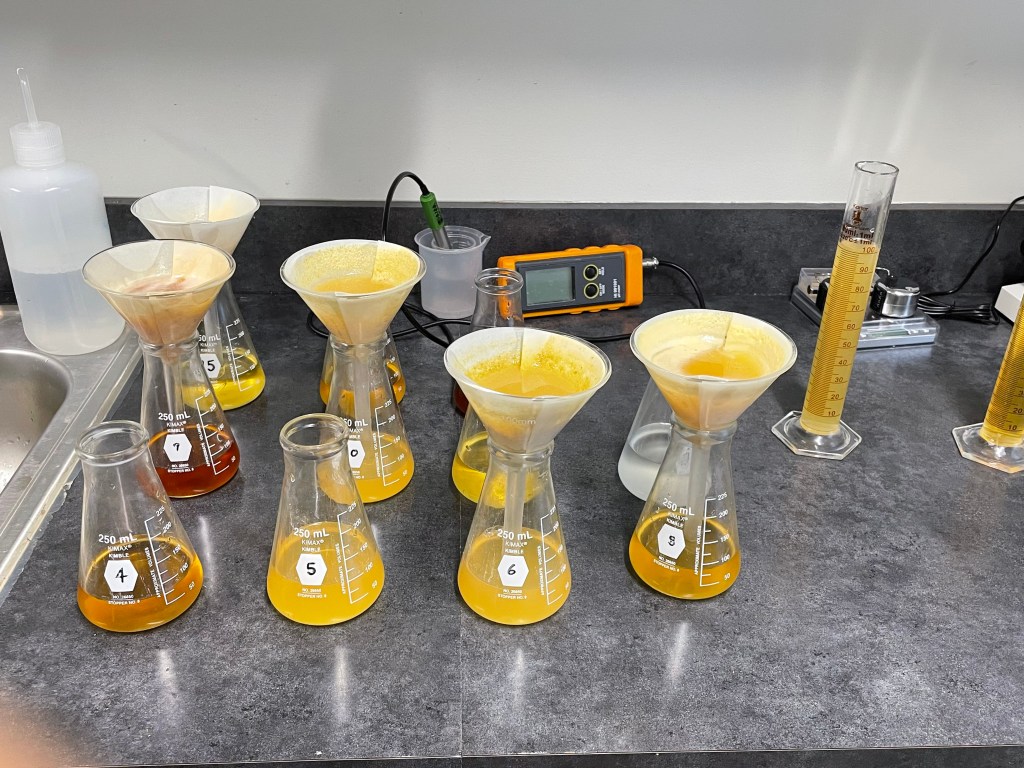
Figure 1. Yogurt choices for isolation. Methodology
To test the hypothesis, I selected six yoghurts from Fred Meyers, prioritizing those that had little to no additional flavoring. I got Fage plain, Siggis vanilla, Ellenos plain, Icelandic Provisions Skyr both whole milk and vanilla, and finally Kite Hill. During each stage of inoculation, I followed the method of running a metal loop over fire, then waiting at least ten seconds after removing from heat before touching it to a sample, tube, or plate. This process was repeated for each individual sample, tube, and plate, ensuring no bacterial contamination.

Figure 2. MRS broth in anaerobic chamber for incubation. 
Figure 3. Plated LAB on MRS and TSA plates pre-incubation. For the first stage I took a sample from each of sample and inoculated tubes of liquid MRS agar. We also inoculated a tube with a control that was later replaced with a different control due to lack of growth (new control: L. Brevis LP 672, 26). The goal of this was to grow the colonies before spreading onto dishes, thus avoiding spreading any other yoghurt byproducts that might be mistaken for colony growth. After 24 hours we had growth in all the tubes (except the original control, so we replaced it.) and after holding it on a shake plate we cleansed the tubes with CO2 before placing them in a candle chamber to remove any oxygen to stimulate further anerobic growth. After an additional 24 hours all seven tubes had better growth, so I plated them on MRS and TSA agars. Since each sample grew in liquid MRS we knew that they would grow on MRS plates. However, we chose to also plate on TSA in case any different colonies isolated on such plates performed differently in the final test. To plate I used the quadrant streak plate method, making a total of 14 plates. After growing for a week all 14 plates had some growth except for Icelandic Provisions Skyr whole milk TSA. It is of note that the MRS plates had significantly larger colonies than the TSA. Each sample, apart from the whole milk skyr TSA, was moved onto the next and final trial. A medium to large colony was selected from each plate and used to inoculate a tube filled with malt extract broth. This would test the ability of the LAB to survive and thrive in an environment consisting of mostly maltose, like that of beer wort. As a bonus, the malt extract broth started out as purple and would change color in response to a change in pH, indicating LAB growth. After another week of waiting the results were in.
Results and Conclusions
Each sample had been able to process maltose to a striking degree. We came to this conclusion because the color of the malt extract broth had changed from purple to shades of yellow. Each yoghurt LAB sample had turned a light shade of yellow, indicating a statistically significant drop in pH. However, the control, L. Brevis, had not yellowed as much as the rest, reaching a shade of yellow notably darker than the rest. These results lead me to the following conclusions. First, my hypothesis was wildly incorrect. I had expected only three samples to survive the final round of testing, and for only one of to reach a level to which I could use it in a beer. However, all the yoghurt samples seemed to process maltose better than the control sample that had been proven to work in sour beer. This leads me to my second conclusion. Either the method in the test was flawed or the original question was. I have a feeling that I asked for the meaning of life and got 42 for the answer. The question may not be can LAB found in yoghurt process maltose, but rather to what degree do we want it to. It may be that the yoghurt LAB samples would out compete yeast during kettle souring if not killed off before yeast inoculation.

Figure 4. Plated LAB samples on LAB and MRS plates. 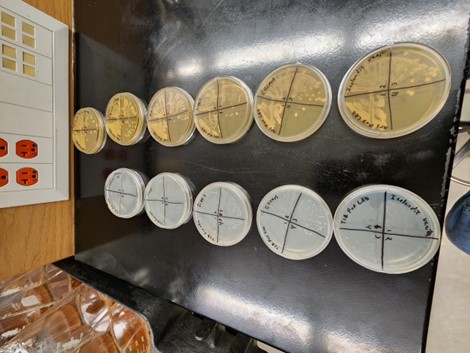
Figure 5. Post-growth of LAB on MRS and TSA plates. The next step from here would be to use at least one of the yoghurt LAB samples in a beer to sour. While it is not realistic to make 13 different brews for testing, it may be wise to choose the sample based off aroma characteristics. While not part of this study I did notice that the Icelandic Provisions had some of the strongest pleasant aromas that persisted throughout the trials, where as the Fage had the weakest. It would be worth going ahead with two brews, one with the control LAB and another with the Icelandic LAB. If I was to conduct this next test, I would not ask cand the Icelandic LAB work, but rather to what extent. It may even be worth doing trials with different exposure times if the wort pH drops too fast.\

Figure 6. Maltose broth tubes inoculated with LABs. 
Figure 7. Maltose broth tubes after incubation. Experience & Knowledge Gained
While I did not meet the hypothesis in this experiment I was pleasantly surprised by the results. I am still a bit skeptical as to the validity of the experiment due to the failure of the first control sample. However, it may be that time in cold storage has made the first sample inert. The sample was not new to put it lightly. Overall, I had fun with the experiment. There were times it was like watching paint dry as I waited for my tools to cool between samples, but I was happy to see progress in all my samples. I also want to note that although my research question may have been wrong given the results, I do not regret asking it because it opened the door for a new question. One final note, I also learned that TSA kind of terrible at growing lactobacillus, at least compared to MRS.
-
Sourdough Bread and Hydration Levels

Background
This project started very ambitiously with the intent to see the effect of different levels of hydration in the dough. I started the process with three levels of hydration: 80%, 100%, and 120%. By hydration I mean the percentage of water content to flour content. For example, if I had 1000g of flour and 800g of water this would be 80% hydration. This resulted in a messy flour soup for the two higher hydrations and after baking didn’t result in anything that resembled bread. I then adjusted my hydration levels to a lower spread of 70%, 75% and 80%. This yielded much better results for the 2nd method, so I moved on to the third round of baking which was then blind taste tested. I will discuss the methods used in the preparation of the dough, as well as the blind taste test, and then finish with my pictures of the final process. I hypothesized that there would be no statistical difference in liking between the hydration levels.
Preparation
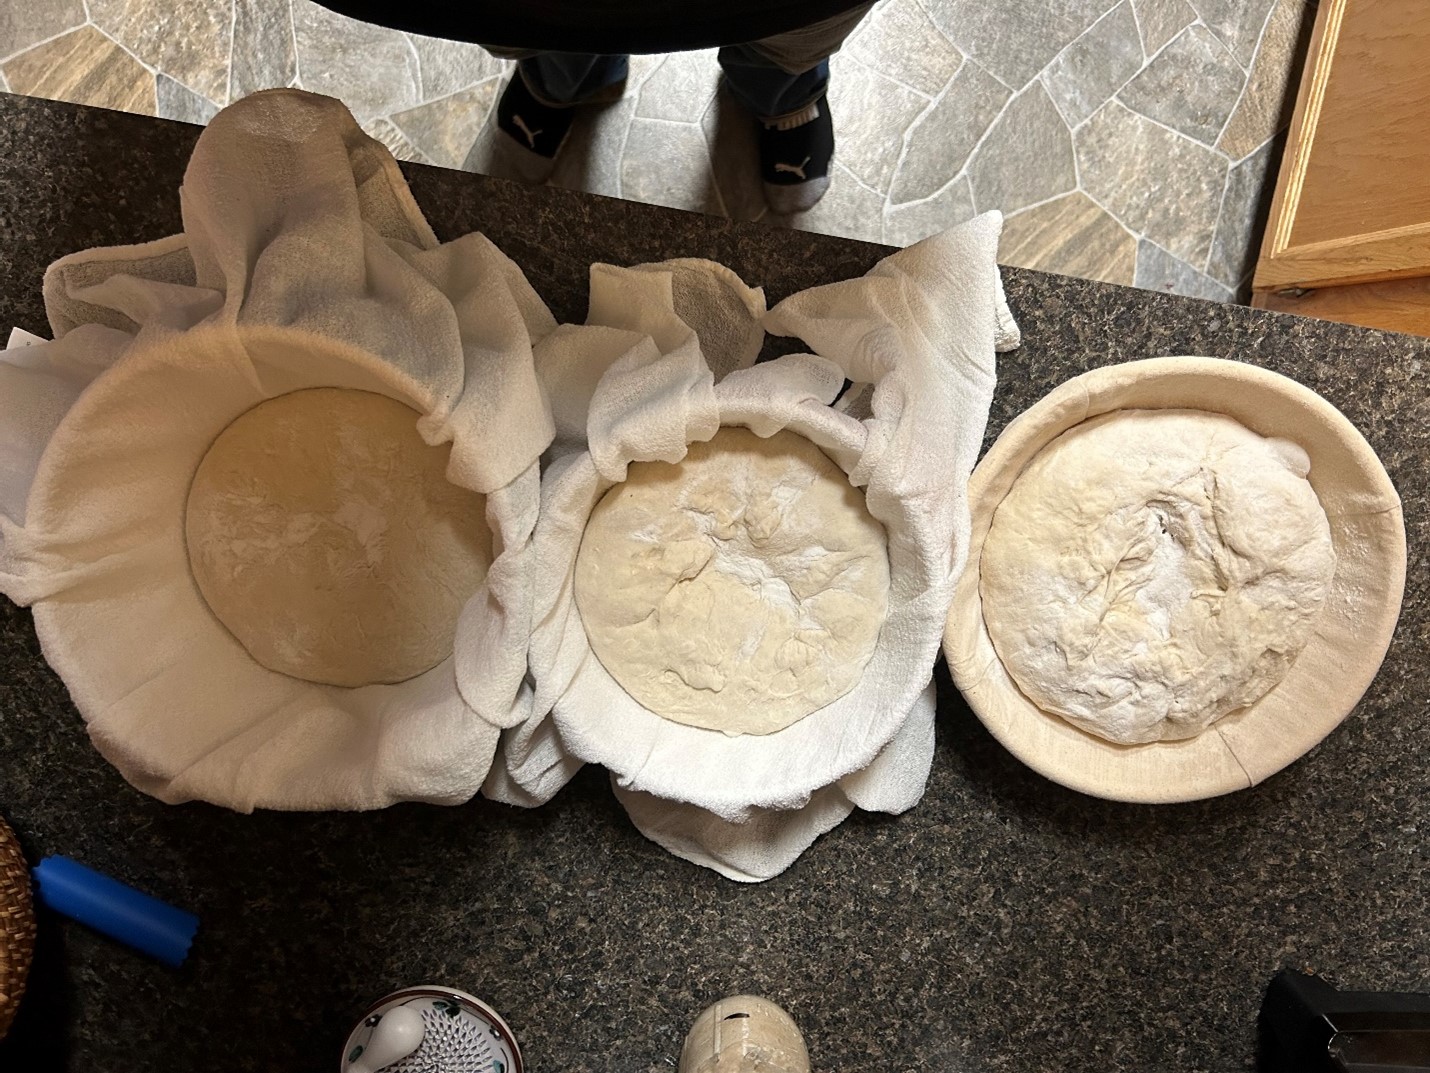
The process of sourdough always begins with the starter. I chose to start a new starter at the beginning of the process. This seemed to be a challenge for me for the rises that I was hoping to get out of my dough, so I ended up adding one packet of commercial yeast into my jar of 800g of starter. I then used 300g of this starter divided evenly across three doughs, so 100g each. I then added water temped at 80F for the respective hydration levels to each dough, for 70% I added 350g, for 75% I added 375g, and for 80% I added 400g. I then added to each dough 500g of flour, 30g of honey, and 11g of salt then mixed. I let the mixture proof for an hour then performed 4 rounds of stretch and folds to add strength to the dough, with 30 minutes of proofing in between the folds. Following the folds I then let the dough proof for another hour and then started the first round of shaping. Letting the dough rest for another hour I then performed the final shaping, placed the dough in the banneton, and cold-proofed it in the fridge overnight.


Baking Process
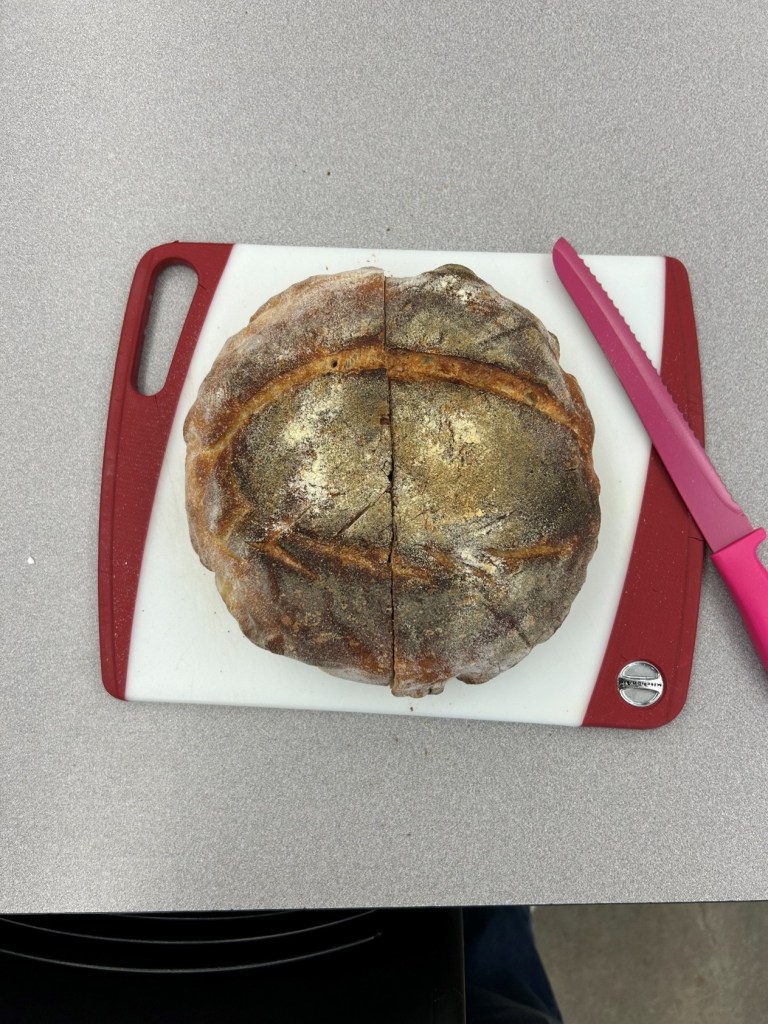
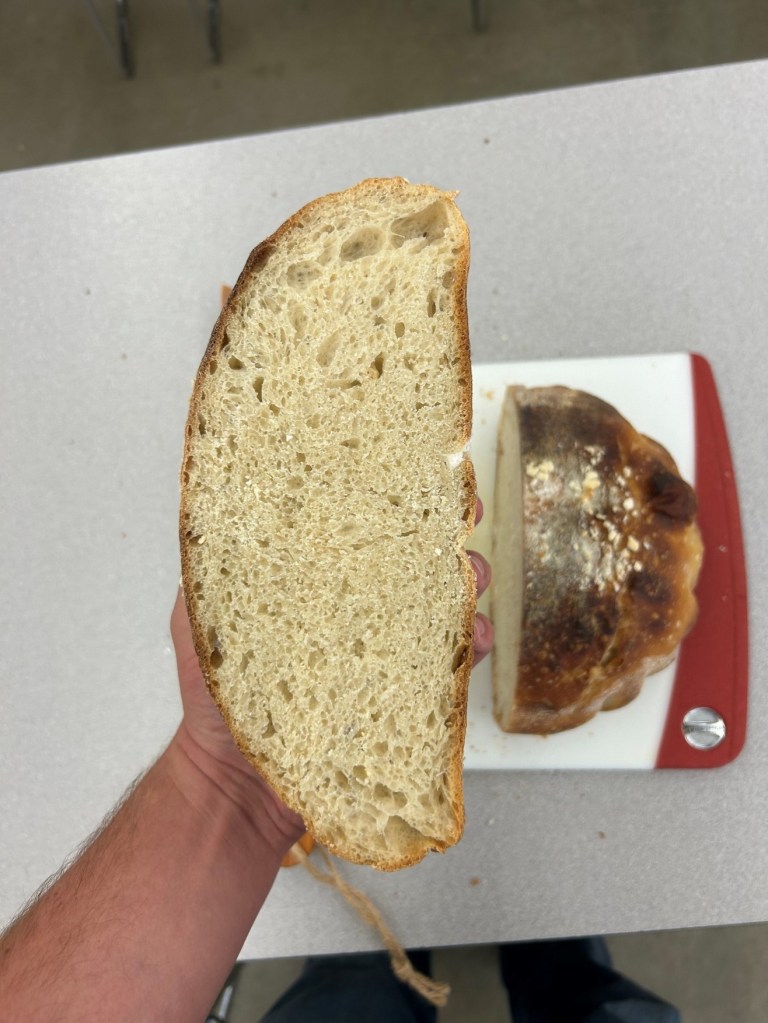
After cold-proofing the dough overnight I preheated the ovens to 500°F and placed the Dutch ovens in the oven. I let both the Dutch and the oven come to temp over an hour just to make sure we had an even temp. I then scored the doughs and placed them in the Dutch ovens as quickly as possible. I baked all the dough for 15 minutes covered then removed the lids of the Dutch ovens. After about another 10 minutes I temped the doughs progressively until they reached an internal temperature of 200°F. I placed the now-baked breads on wire racks to cool, labeled respectively of course. I then let them cool openly for about a day.

70% hydration loaf after baking. 
75% hydration loaf after baking. 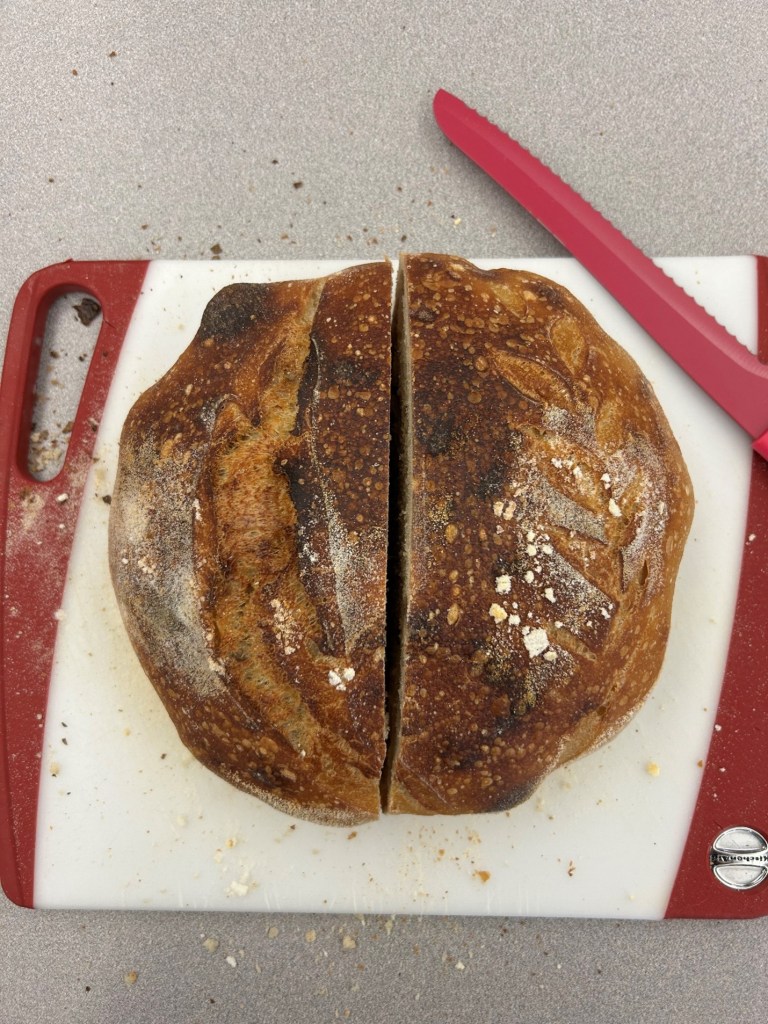
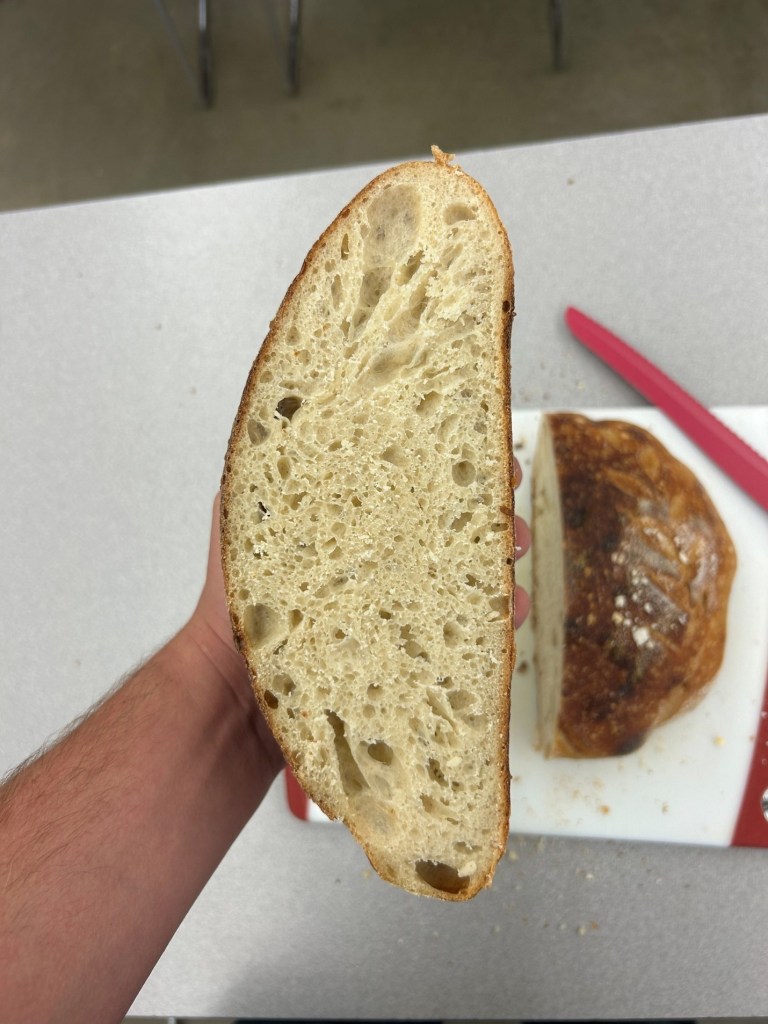
80% hydration loaf after baking. Sensory Analysis
To do the blind test I assigned each bread a random three-digit number, and then randomly allocated the three-digit number to either Group A, B, or C. The 70% hydration loaf was Group B and was assigned the number 167. The 75% hydration loaf was Group A and was assigned the number 725. The 80% hydration loaf was Group C and was assigned the number 986. I then took each participant and assigned them to a tasting order, For example, participant A’s order would be B,A,C; Participant B’s order would be C,A,B; and so on. We gave 8 participants samples in their order asking them to perform a hedonic test.
The hedonic test was conducted on a scale of 1-9; 1 being dislike extremely and 9 being like extremely. Treatment B (aka 70% hydration) had a mean of 7.5 with a standard dev. of 0.93. Treatment A (75% hydration) had a mean of 6.38 and a standard dev. of 1.69. Treatment C (80% hydration) had a mean of 7.38 with a standard dev. of 0.92.
Conclusions
My hypothesis was correct. I don’t think that the results constitute a statistical difference between the different hydrations. Being ranked 70%, 80%, and 75% accordingly. However, it was interesting to see the different likings and I believe with a larger sample size we might be able to see a better result. All and all I think if I had more time, I would bake several loaves of each hydration and hopefully gain a larger sample size. However, for the time being, I don’t think there is enough evidence to say that the hydration level affects the liking or disliking of the bread with any statistical significance.
-
Session Mead: Raw vs Baked Honey Experiments
Objectives
There were two objectives to my experiment. The first objective was merely to find out if my knowledge of beer creation could translate over to mead creation. Specific to this case, the creation of session mead, a lower alcohol variant that contains only 3-6.5% ABV. The second objective of the experiment was to examine the differences between raw honey and baked/dried honey in the creation of mead.
Hypothesis
Our hypothesis was thus. We believed that we would succeed in creating a session mead regardless of the type of honey used. We predicted that the meads would come out to about 4.5 to 5% ABV and present an aroma of apricot, stone fruit, and white wine grape esters. These aromas would come from the Lida Kveik ale yeast we used. We did not predict any specific aromas to come from the honey due to lack of information regarding where the honey came from or what flowers the bees took pollen from. However, we did note that this area was the most uncertain. Since aroma compounds present in honey is under researched, we extrapolated predictions based off articles from Science direct and the National Library of Medicine. Based off this data we predicted that heating the honey would cause many of the volatile aroma compounds present to denature. In addition, any glucose oxidase present would denature, resulting in a lower production of hydrogen peroxide levels and thus lower bitterness levels. Finally, heating the honey would activate any β-glucosidase if present leading to a higher sweetness and ABV in the final baked honey mead.
Experimental Design
To test the hypothesis, we made two separate batches of mead. One using raw honey and the other using baked honey using the following resources:
- Five baking pans
- Two carboys
- Water (25lbs per batch)
- Lida Kveik ale yeast
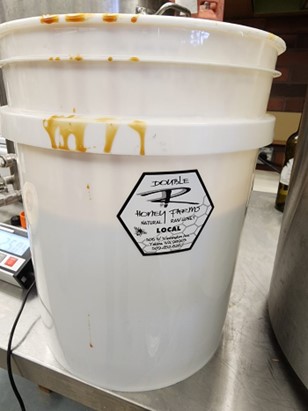
- 6 lbs. of honey, (3lbs baked, 3lbs raw).
- General cleaning/ sanitizing supplies
- Two kegs
- Eighteen bottles (bottle conditioning)
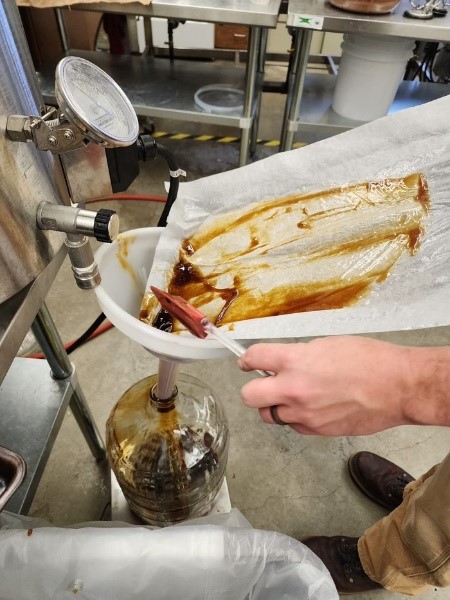
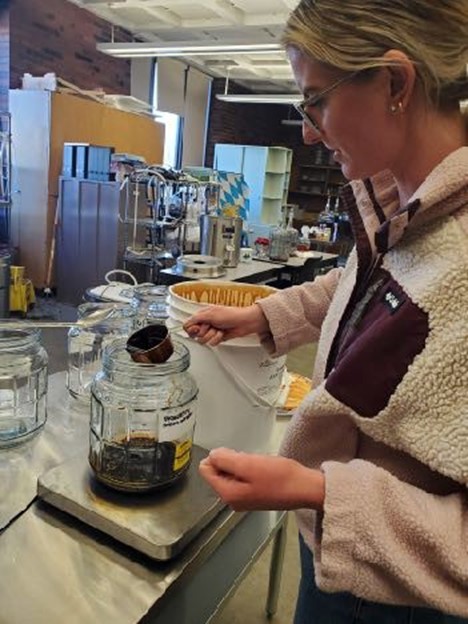
To treat the honey, we measured out 3lbs over five baking sheets. We then let them sit in the ovens for about a week before we were able to continue the experiment due to time constrains. The next week we baked the honey at about 160 degrees Fahrenheit, the activation range for β-glucosidase, for about three hours. Afterwards we used some of our warm water to loosen the honey off the sheets and scrape as much as we could into the relevant carboy to form our must (mead wort). To top off the batch, once we had all the honey dissolved in, we released the remaining ponds of water needed into the carboy and mixed by shaking. The batch of raw honey was significantly easier to work with. We were able to measure the 3lbs of honey directly into the carboy and fill with 25lbs of warm water. To finish off both meads I went and performed a cell count for the yeast to ensure its viability and determine how much we needed to pitch. We came out to 99.8% viability with 8.163 x 10⁷ cells. Based on this data Brian then pitched 600mL of yeast into each carboy. Prior to pitching the yeast, we also measured the gravity of each, both coming out to 1.036 sg.


Results
After two weeks the meads finished fermenting and were ready for transferring and testing. Unfortunately, we did not get the ABV that we were shooting for, however the ABVs that we did get are of note. The raw honey mead came out to be 4% ABV, whereas the baked honey mead came out to 4.5% ABV. As for sensory components, the raw honey mead had a very forward floral honey and apricot aroma. The taste was lightly sweet and slightly watery, dissipating quickly. The baked honey ended with up with an earthy honey and slightly sour aroma. The body was notably tart and sweet, coating the throat for longer than the raw variant. The same remained true of both mead variants after force carbonating in kegs, however the carbonation ended up muting the aromas in both.
Conclusion
Based off the results I would conclude that the original hypothesis held true overall. At the time we took the specific gravity I was not convinced there would be a notable difference due to both coming out to the same number. However, I believe that baking the honey at 160 degrees Fahrenheit did activate the β-glucosidase and the outcome presented itself in the difference of 0.5% ABV and the increased sweetness in the baked mead. Unfortunately, I was not able to measure the glucose oxidase or hydrogen peroxide levels in the finished product due to lack of relevant measuring equipment. However, I believe it may be possible that the hydrogen peroxide levels reduced, and the lack of bitterness ended up leading to an overall tarter flavor in the baked mead. There is also the possibility that our honey became infected with a wild yeast while sitting in the ovens during the week we were unable to bake.
As for the raw honey mead, it went according to plan, coming out with the expected aromas and flavors despite the yeast being technically for ale. However, I am unsure whether it presented a stone fruit or white wine aroma because I realized after the experiment that I have not had either.
I had a great experience and was genuinely surprised to see that my hypothesis proved true. I know it was based off science, but I was not sure if the specifics would correlate in the manner that I predicted due to the lack of information on how the enzymes performed in mead. The only thing that did not go quite to plan was the ABV. It is quite possible that the yeast type or amount of honey influenced this. We are bottle fermenting a gallon from each batch, so we will see what those get up to in about a month.
Overall, I am happy with the experiment. I learned how to make mead successfully. More than that I learned just how similar it is to brewing beer. Although the materials and methods were different, we still relied on enzymes to break down higher chain sugars so yeast could feed on them. We still manipulated volatile aroma compounds both in the wort and in the yeast to create a desired aroma and flavor pallet.
Future Research Questions
Now that I know I can make mead and that using raw or baked honey does have influence, I am curious how other factors may affect a finished mead. How might the sugars in adjuncts such as huckleberries effect the efficiency of yeast? How does the raw honey used effect the mead? Does the pollen used during honey production effect the aromas present in a finished mead?
-
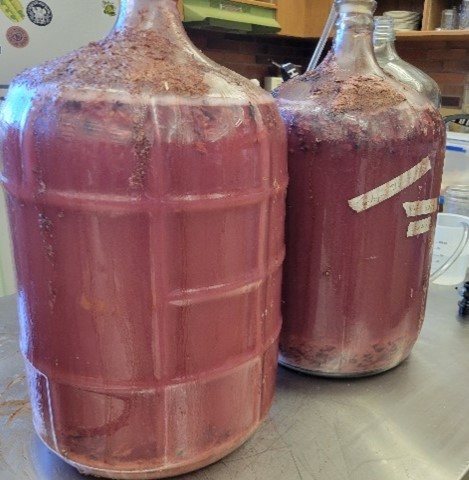
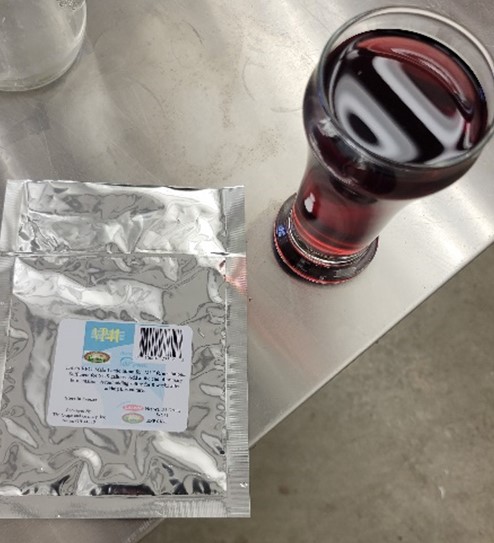
Cabernet Franc Trials
Grape Processing, Fermentation, and Aging
This fall quarter for my Craft Brewing Practicum project I decided to make wine. I have recently been thinking about what kind of career path I want to take after graduating this spring, so this project has been my version of a test run at being a winemaker! Essentially my goal for this project was to see if I could make wine from grapes to fully fermented, oaked, and aged wine. I predicted if I was given the resources, I would be able to make a quality wine that people may like and want to drink.
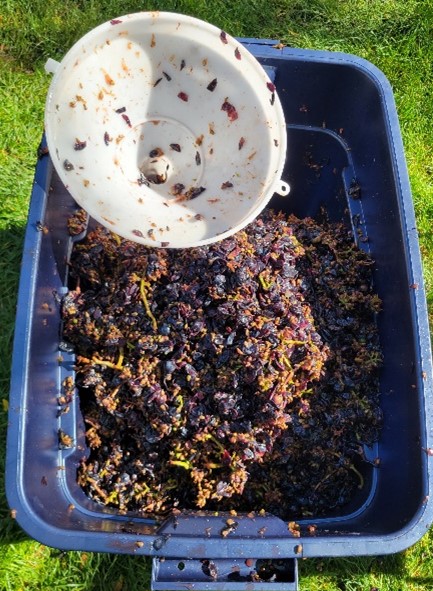
My research began with first collecting wine grapes which as a college student with limited resources is usually hard to come by. But to my luck, the CWU Wine Studies program was putting on a grape stomping event. I got in touch with Jill Clark (head of the CWU wine department) who was more than happy to give me the grapes and juice for my project. In the end, I ended the day with two vessels worth of Cab Franc grape juice and skins donated to the school/me via local winery Gard Vintners.

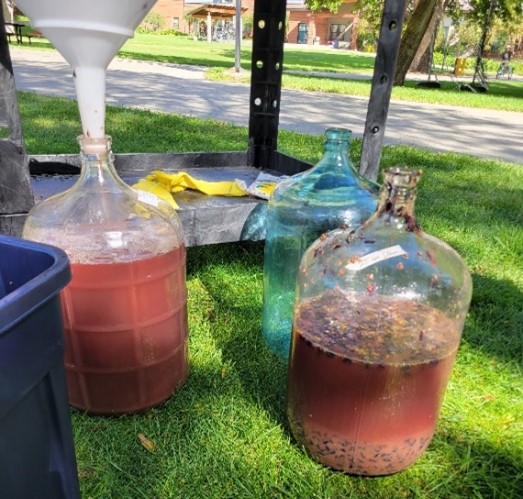
To make them different I added two different wine yeast strains in each of the Cab Franc carboys, I started coming in daily through the whole primary fermentation process to get pH and Brix readings as well as shake the vessels around to keep the yeast active and carrying out fermentation for my wines. Around mid-October/November, we took the wine off the skins and yeast and transferred it back into the vessels moving the daily test into just weekly tests to avoid too much CO2/ O2 getting into the wine.

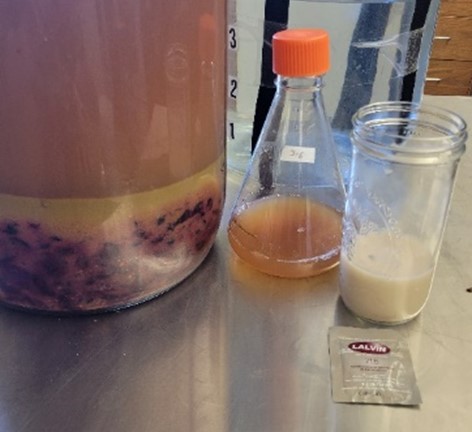
Wine Yeast Strain Wood Chips Wine #1 Torulaspora 316 + Lalvin 71B Wine Yeast French Oak Chips (Medium Roast) Wine #2 Lalvin D-47 American Oak Chips (Light Roast) 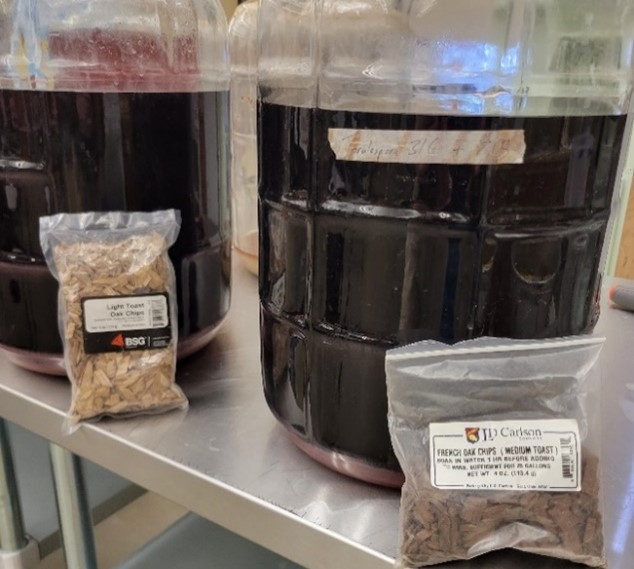
I am going to leave the wine to age over the Christmas break and then come back in the winter quarter to take the wine off wood chips and bottle. I do have plans to continue my use of this wine during the winter quarter by creating a sensory panel to compare my wines against two store-bought Cab Francs so that I may be able to get some feedback on my winemaking skills and what I should be looking to improve on my future winemaking endeavors.
I had a wonderful time during the duration of making my wines! I have put so much time and research into them with the help of lab tech Brian that they are my current pride and joy. We have been tasting them along the way and I have been more than happy with the progression of the palate. I cannot wait to take the wines off wood chips and see what the people think about my creations. To be honest I’m just proud they’re turning into a drinkable wine meaning they both successfully went through fermentation. I got to experience firsthand what it’s like to make wine from getting full grapes and watching them go through a “pressing” process via stomping to adding yeast to the grape skins and juice and making wine. I got to experience a great portion of the science aspect that comes into play like testing the wine’s pH and Brix levels every morning to make sure the fermentation process is staying on track as well as getting a sense of how long we should leave the wine on the skins and the yeast before taking it off to age with the woodchips to mimic the desirable making of red wine in barrels. This allows the wine to develop more secondary and tertiary notes like leather, vanilla, and light roast, which help to complement the green pepper, herbal, and pencil shaving characteristics of the Cabernet Franc, resulting in a more balanced and appealing flavor profile. I essentially learned the basics of making wine and loved it! I can confidently confirm becoming a winemaker is on my list of potential careers I want to explore post-college life.
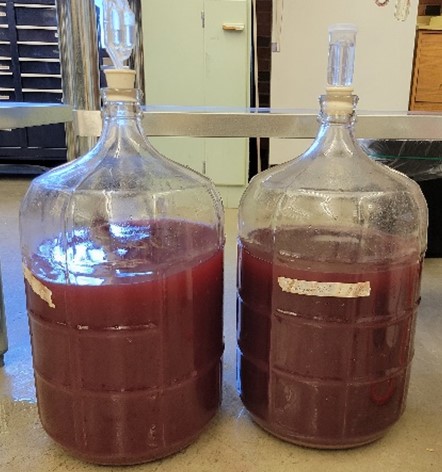
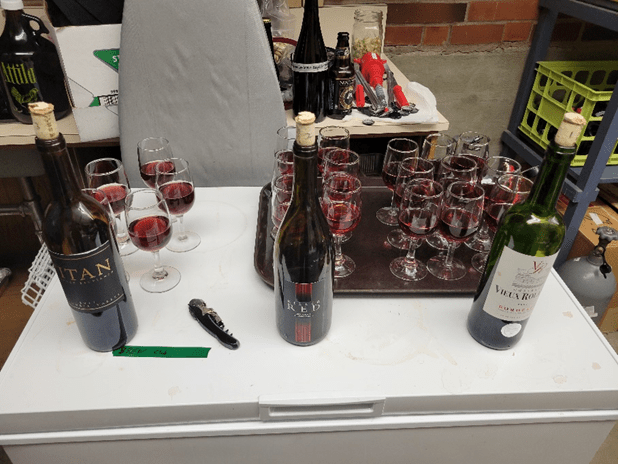
Sensory Analysis of Wines
This winter for my Craft Brewing Practicum project I spent the quarter continuing my wine-making endeavors having made three Cab Francs all with different yeasts and treatments applied. At the end of the fall quarter, my wines were all left to age on different wood chips for about a month. After the wines were done aging, we began the bottling process which consisted of racking the wine off the wood chips and into recycled wine bottles and hand-corking them. To give the wine time to age in the bottles we left them in a dark back room and got onto the main research of this quarter’s project. I wanted to get feedback on my finished wines so naturally a blind tasting was the best way to do so. Working with Professor Sasaki to come into some of his classes and have his students be a part of my blind taste tests. I took the time to create two different surveys for the students to fill out while they were tasting the wines, one was all about the drinker’s personal wine history and knowledge while the other pertained to the Cab Francs they were tasting. The main thing I was looking to find out from the blind tasting/ surveys was what people thought about my wines and what I could do in the future to create a better product.
The structure of the two blind tastings we set up was simple yet effective. I assigned each of the wines I made to a number and poured them into glasses to let the student’s blind taste test while they filled out my surveys.
Wine Treatment Wine #1 Cab Franc, Lavlin D-47 Yeast, American Oak Chips (Light Roast) Wine #2 Cab Franc (Blended), French Oak Chips (Medium Roast), American Oak Chips (Light Roast) Wine #3 Cab Franc, Torulaspora 316 + Lavlin 71B Yeast, Acid Blend, French Oak Chips (Medium Roast) After both sessions of my blind tastings, I was able to get a total of 12 people to taste my wines and fill out the surveys I created. After taking the time to look over the results of the surveys it seems wines one and three were the crowd favorites both being liked for different reasons. Wine #1 was loved for its light body and tannins with an approachable coffee and cherry flavor while Wine #3 was loved for its heavier tannin profile and high acidity having flavors of chocolate, coffee, plum, and sour cherry. Wine #2 was not very well loved as it was described as having a water-like consistency and tasting of plastic red fruit.
Based on the combined results of the surveys:
- Wine #1 – Cab Franc Lavlin D-47 + American oak light roast woodchip.
- Wine #3 – Cab Franc Torulaspora 316 + Lavlin 71B + Acid blend + medium roast French oak chips.
These two wines were the crowd favorites I believe these were the favorites based on the treatments I did to them like adding the acid blend to Wine #3 helped bring up the acidity in the wine making it appear to have a more complex flavor profile. I liked the flavors of chocolate, coffee, and stone fruit that were extracted from the medium roast French oak in Wine #3.
Overall, this experience of making wine from grapes to getting a blind tasting of said wine was something very eye-opening for me in terms of my future career as a winemaker, as the first wine I’ve ever gotten to make I’m very happy with the results of these Cab Francs and now have some real experience of experimenting with wines to know what kinds of wine I want to make in the future as a winemaker.
-
Strawberry and Lemonade Wheat Beer – What Yeast Strain Is Better?

I wanted to find out what yeast strain works best with different fruit flavors of wheat beer. My question is what yeast strain works with what fruit better? Saisonstein Monster or the English yeast? Will the head retention/ carbonation hold up in the English yeast or will we have to force carbonate off the bat?
Based on brewing an apple wheat beer a few months prior I suspected that the English yeast may be better because the carbonation/head retention lasted longer in the long haul. I also think since I had to force carbonate the English yeast it may have sustained the carbonation longer than the Saison because the Saison batch we didn’t need to force carbonate.
We started the brew on March 5th and used both white wheat malt and pilsner grain for the mash. I decided to brew the base wheat beer and add the fruit additions once the batches are split and let them start to ferment.
The additions I did make during brewing the base wheat was adding a pinch of 45, 45, 10 Citric, Malic, Tartaric directly to the post-sparged wort to adjust the pH and it goes well with the citric fruit components. I also added Fuggle hops 30 minutes in separated the wheat beer into 4 separate batches:
- Strawberry + Saison Yeast,
- Strawberry + English Yeast,
- Lemonade + Saison Yeast and
- Lemonade + English Yeast.
I then measured out the lemonade which was 4 tubes in each of the two batches. Then I measured out 1.25 lbs of strawberry concentrate in the last two batches. After the fruit additions I pitched both the strawberry batches at a rate of 2 x 10⁷ cells/mL and both lemonades at 1.9 x 10⁷ cells/mL. The original gravities for the brews were as follows: Strawberry + English at 19.4°P, Strawberry + Saison at 19.1°P, Lemonade + Saison at 18.2°P and Lemonade + English at 18.3°P.
I learned so much from doing this practicum since I got more hands on experience brewing beer. I started to feel more comfortable with the brewing process and now I feel like I kind of know where to start when I am off on my own.
-
The Mead Calculator
Hi! I’m DJ Johnson, and this quarter I wanted to make mead. Last Spring, I made braggots (a beer/mead fusion) and during that process I experimented with The Mead Calculator from https://gotmead.com/blog/the-mead-calculator/ and noticed that it gave some interesting options for additional sugars. In fact, it had so many options that I wanted to test just how accurate it could possibly be.
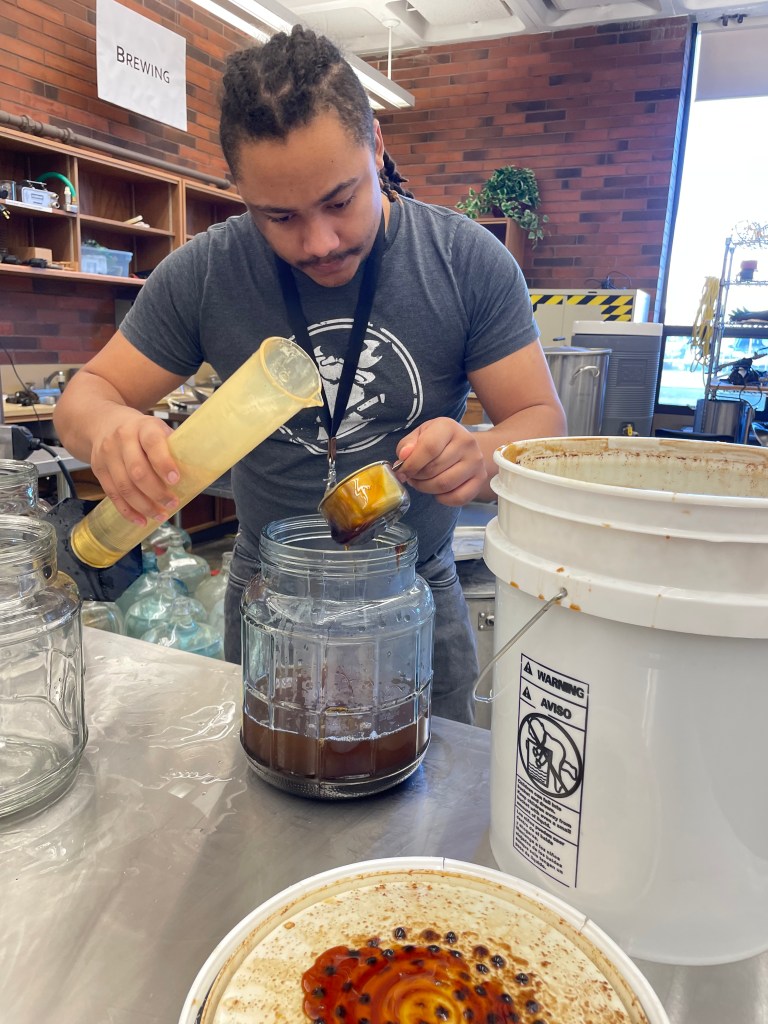
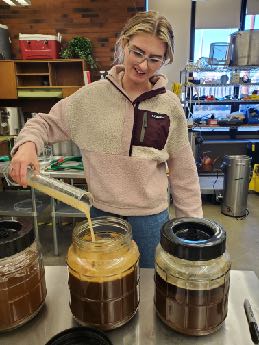
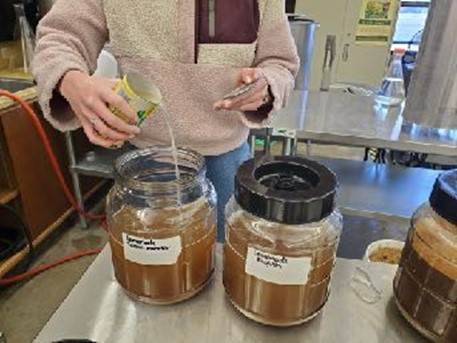
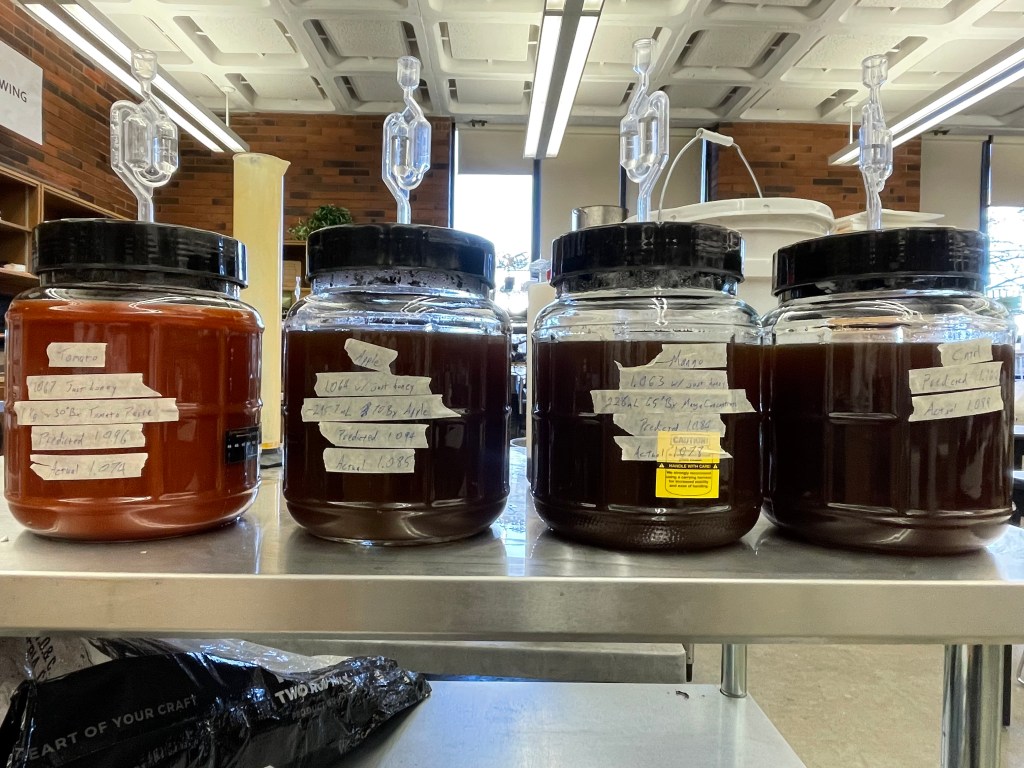
The calculator wasn’t exactly easy to use in my experience and additionally, it had so many options for additional sugars that I doubted it could be accurate on all of them, so I hypothesized that it likely wouldn’t be very accurate. The calculator has default sugar contents on all of the additional sugar options, but it doesn’t factor in the idea that sugar content can fluctuate or that people might be using concentrate for additional sugars. Since I decided to use concentrates (because the amount of fruit that I would have to use would be absurd) Brian and I had to run calculations to figure out the approximate sugar content for each of the additional sugars. Speaking of, we decided to go with one mead with just honey, one with apple concentrate, one with mango concentrate (which we ended up with significantly less than promised from our supplier), and one with tomato paste (with no added sugars or preservatives). During our brew day, we had to make some changes on the fly as we tried to determine different brix values of our ingredients to better calculate the estimated gravities.
I have some final insights, the main one being that the calculator isn’t exactly accurate, but it is decently consistent, with the initial calculations for SG being off by 0.009 for apple, 0.006 for mango, 0.011 for the honey control, and tomato was an outlier being off by 0.022 (however this could likely be because we could not determine the brix of the tomato paste to get a more accurate calculation). Overall this data is aligned with my hypothesis, meaning that this calculator can be useful for making mead, but should not be solely relied upon.

Some additional data to be considered beyond the experiment is that the control and the mango meads didn’t really take the yeast very well, but the tomato took it almost too well. Another thing to consider, the tomato had a white ring around the top of the must which I fear may be mold, which is strange because I’ve had worse conditions to make mead in and I’ve never encountered mold. This makes me think that there was something potentially wrong with the tomato paste but I’m not sure how or what.
Overall I really enjoyed this experiment! It gave me some recipe concepts that I’ll likely be trying sometime in the future! -
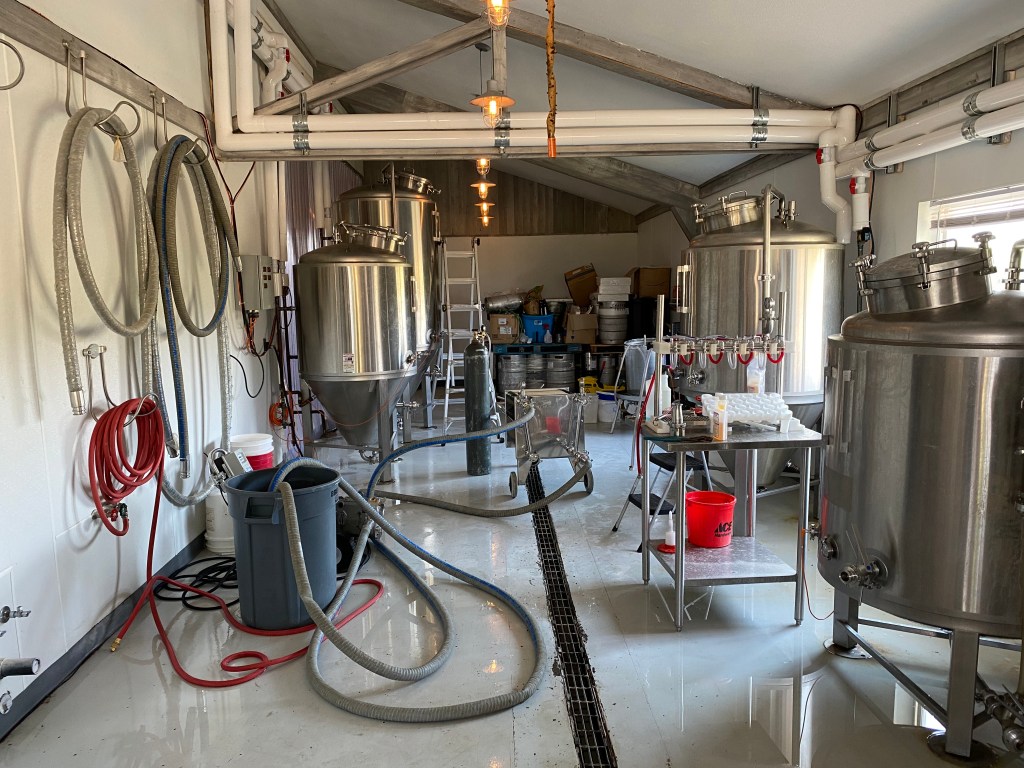
Internship at Wildman Brewing
Hello, my name is Gerrick Sweet and during the 2023 Fall Quarter I had the opportunity to do an internship with a brewery close to my hometown.
The brewery is Wildman Brewing Company and I did my internship under Ryan Porter. He is the head brewer at Wildman and was incredibly accommodating to me and able to teach me a ton not just about brewing but the business side and the other factors at play (like having proper floors and water usage!)
Most of my days consisted of canning, kegging, and cleaning... 
Although I did have the chance to take wort readings and other important readings! Ryan didn’t just give me the daily chores of canning and kegging and doing measurements. We also talked quite frequently about the business aspect of running a brewery and the logistics. Everything from staffing to how the cash flow is managed to ordering ingredients for the beer and long-term planning of brews to make and sales orders.
Along with the other people I had a chance to work with and meet, lots of them emphasized the importance of having a deep passion and fire for the industry. Especially if you’re gonna risk putting your money and living on the line and trying to make a business work.
Doing this internship gave me a deep understating and appreciation for what it takes to run a small brewery. The long hours, countless trial and error to perfect a recipe, even dealing with unexpected events like a fermenting vessel failing. I have a big heart for this brewery near my hometown and I am incredibly thankful for them taking me under their wing for the month I was with them!
-
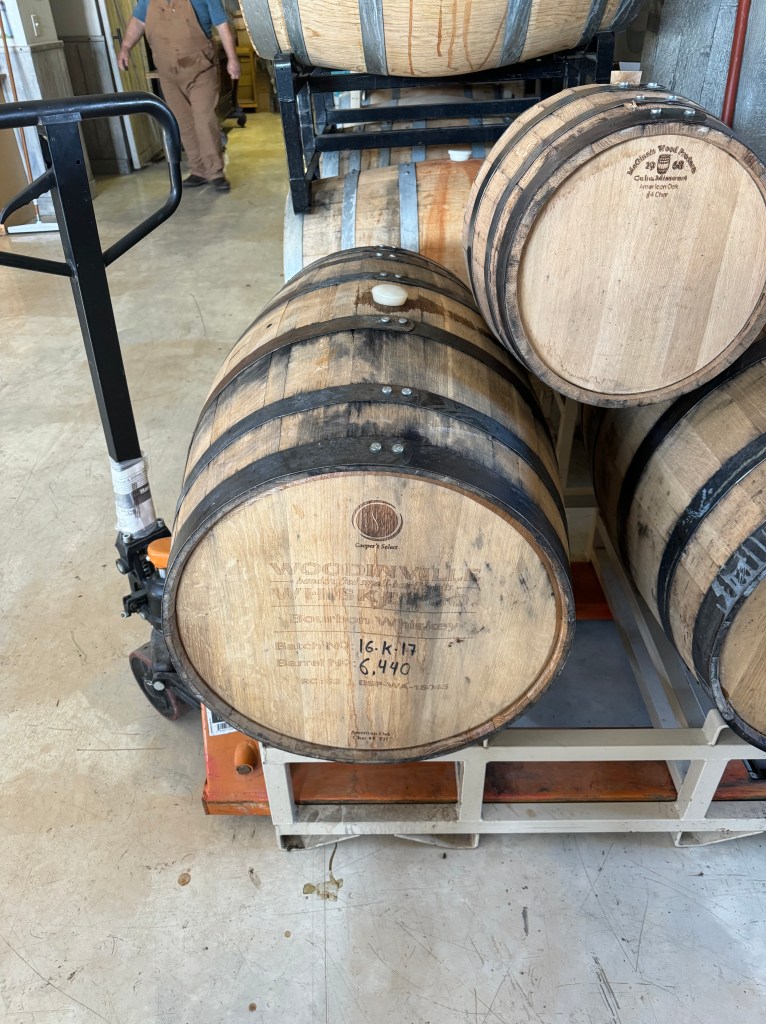
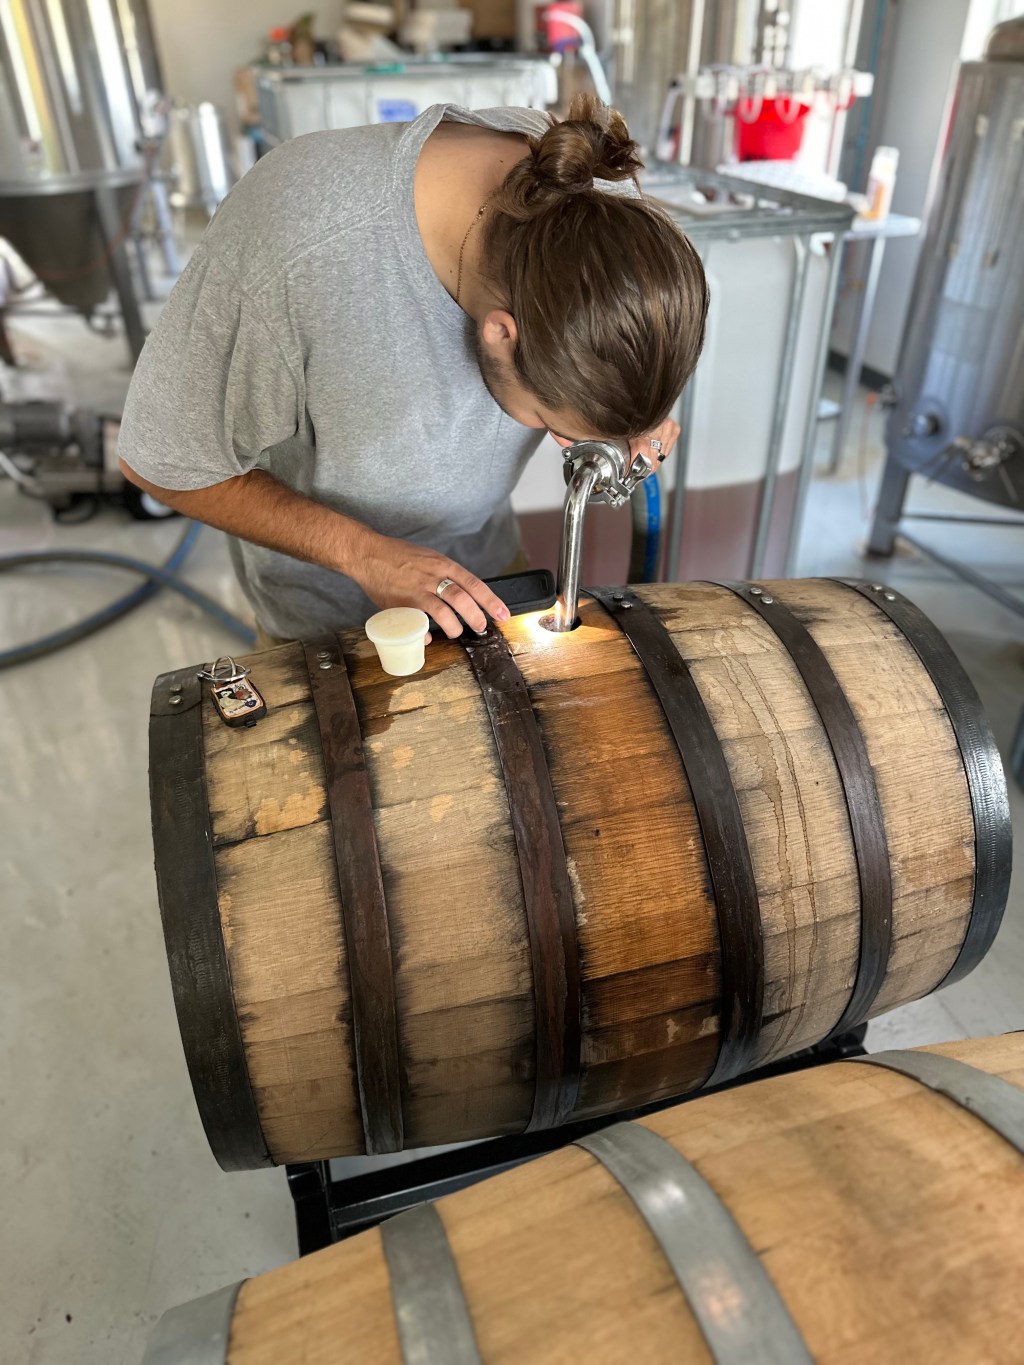
Bourbon Perry Cider

Hi, my name is Cody Barthels, and I have been working on making a Perry cider at my work Wheel Line Cider. I wanted to do something different than I’ve done before, so instead of brewing a beer at home I took my practicum to work to make a cider.
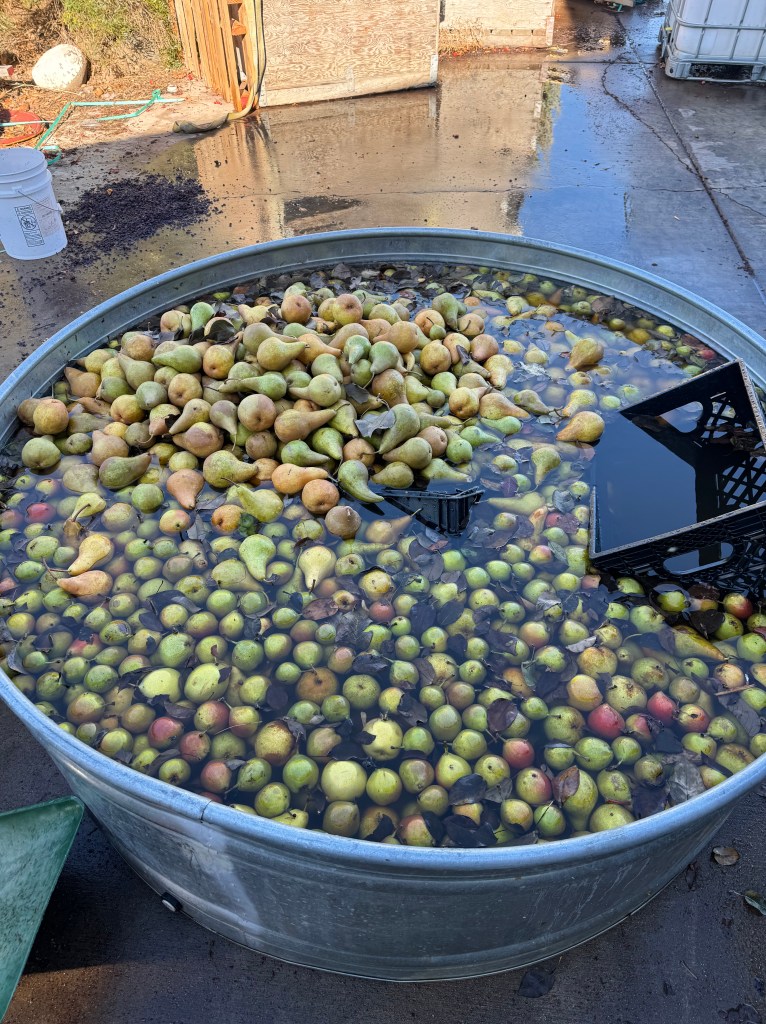
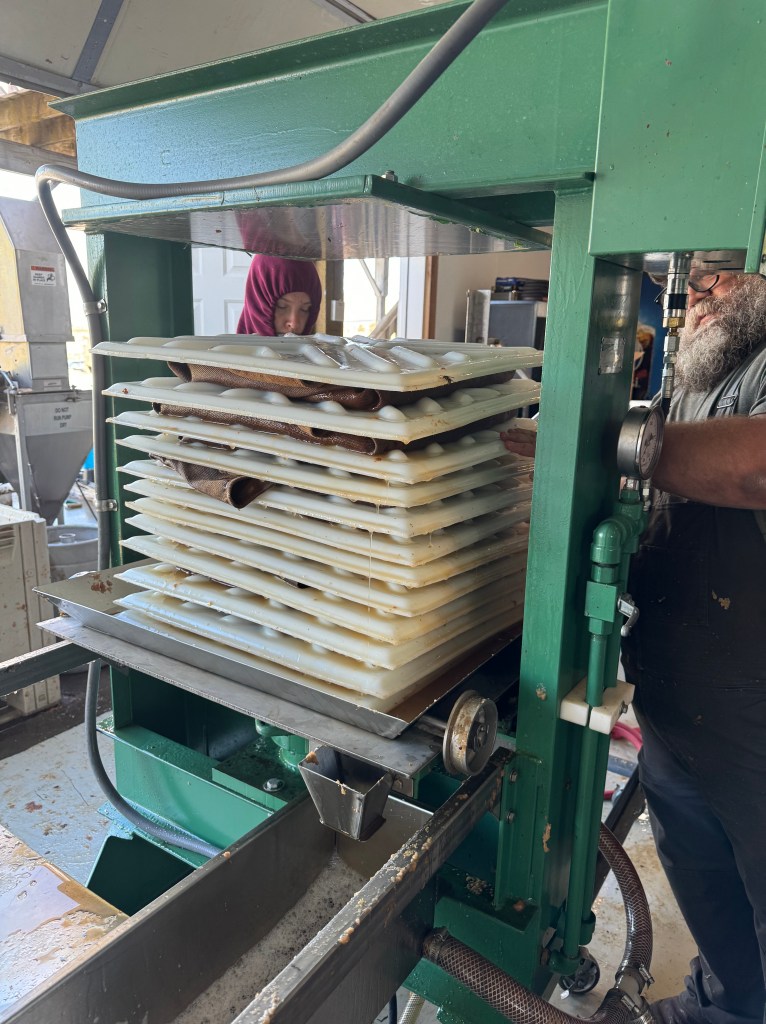
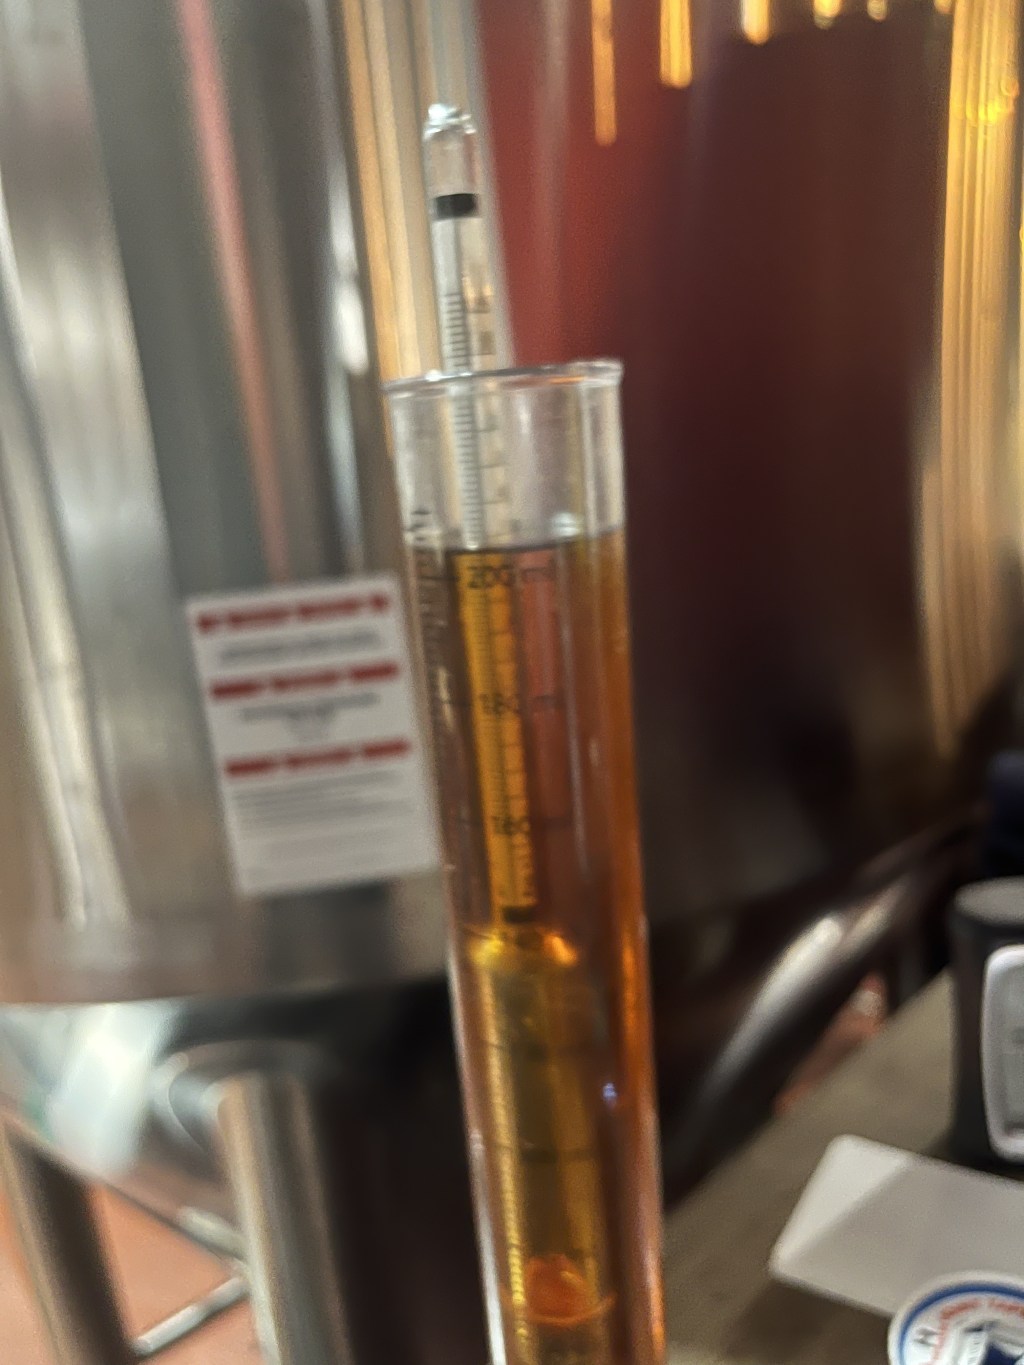
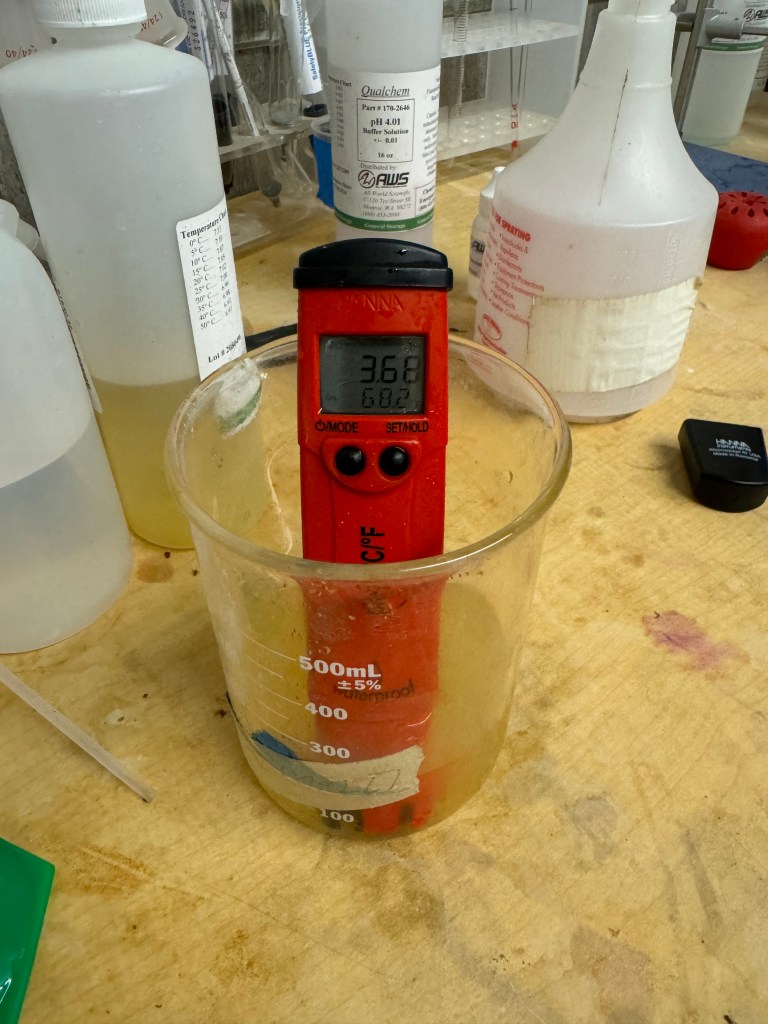
I thought making a pear cider would be really fun since I love pears and they turn into a great cider. So on one of our pear pressing days we filled up one of our bourbon barrels with 53 gallons of fresh pressed pear juice and this set up my project for the quarter! Immediately after pressing I took samples and measured pH, the brix, temp and flavor of cider. The starting pH was 4.29 with a brix of 14.0 and the temperature was 63.3. I poured some in a glass and tasted it, it was a good perry flavor and had a syrupy texture and mouthfeel.
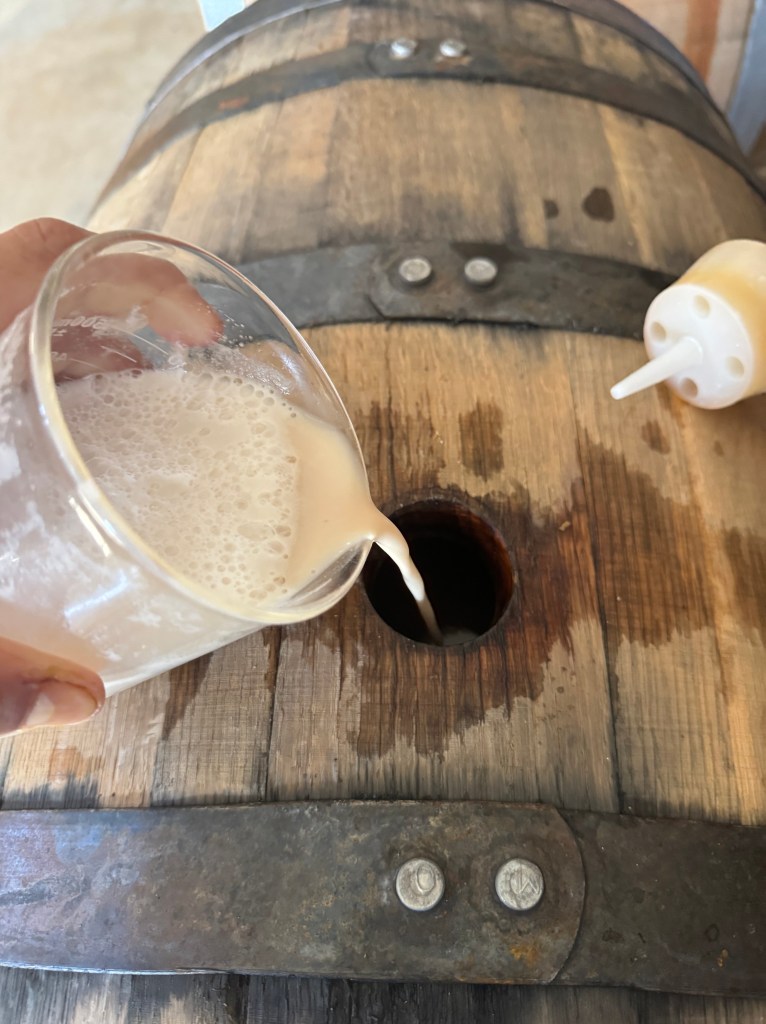
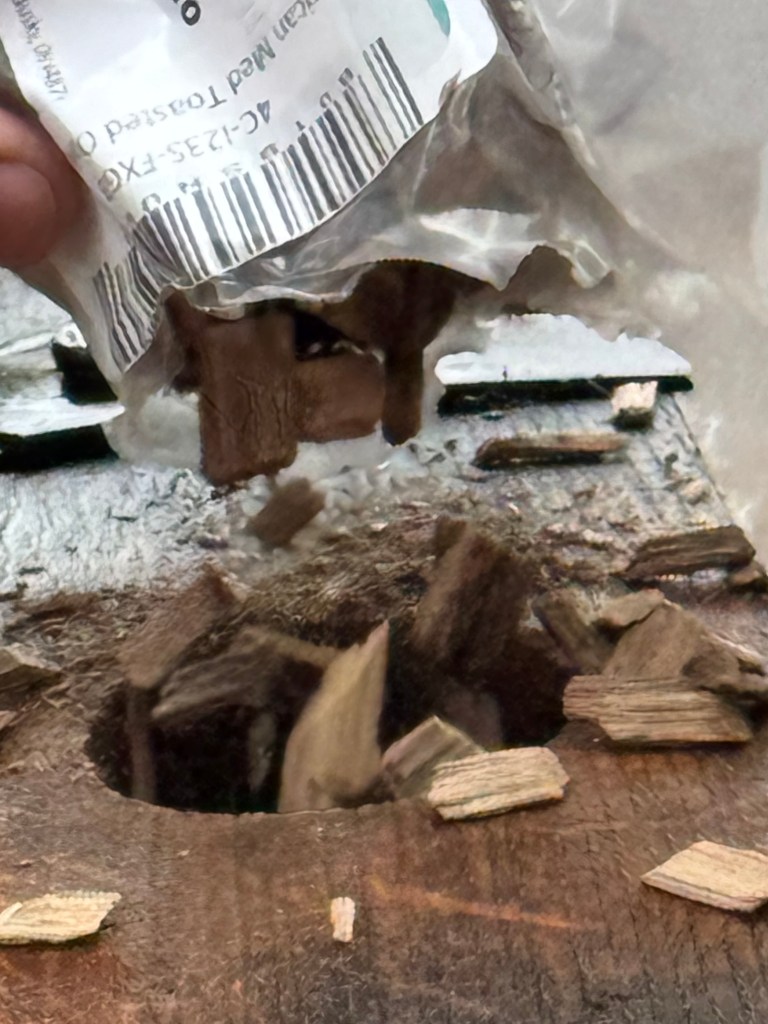
I inoculated it with a yeast called Melody which is supposed to enhance aromas. I went ahead and measured out 60g and put that into the barrel. I then added my first SO2 addition which came out to 61ppm (parts per million) which gave me 21 grams to add. I also threw in another addition called Cinn-Free which is an enzyme to help reduce formation of phenols.
After 2 days I went ahead and took samples to measure everything I needed and decide if it’s time for some nutrients or not. I took a reading of the brix and got 11.8 which was great, meant the cider was going through its process. The temperature was 65.6. I decided I wanted to add my first yeast nutrient addition which would be fermaid k, which is supposed to assist with fermentation. I measured 48g of fermaid k and mixed it with water then poured it into the barrel. The next day I took another reading and was at 8.8 brix and a pH of 3.79, I decided a 2nd nutrient add would be great for where the cider was at. I measured out 48g and mixed it up with water and poured it in. Now it’s time to let it do its thing inside the barrel while I continue to take readings to know when to add my second SO2 addition.
For the next few days the data looked like this:
October 17: Brix- 5.6 pH- 3.58
October 18: Brix- 3.2 pH- 3.73
October 19: Brix: 1.9. pH- 3.58
October 20: Brix- 2.0 pH- 3.73
October 22: Brix- 2.0 pH- 3.75
October 23: Brix- 1.9 pH- 3.65
October 25: Brix- 1.5 pH- 3.68

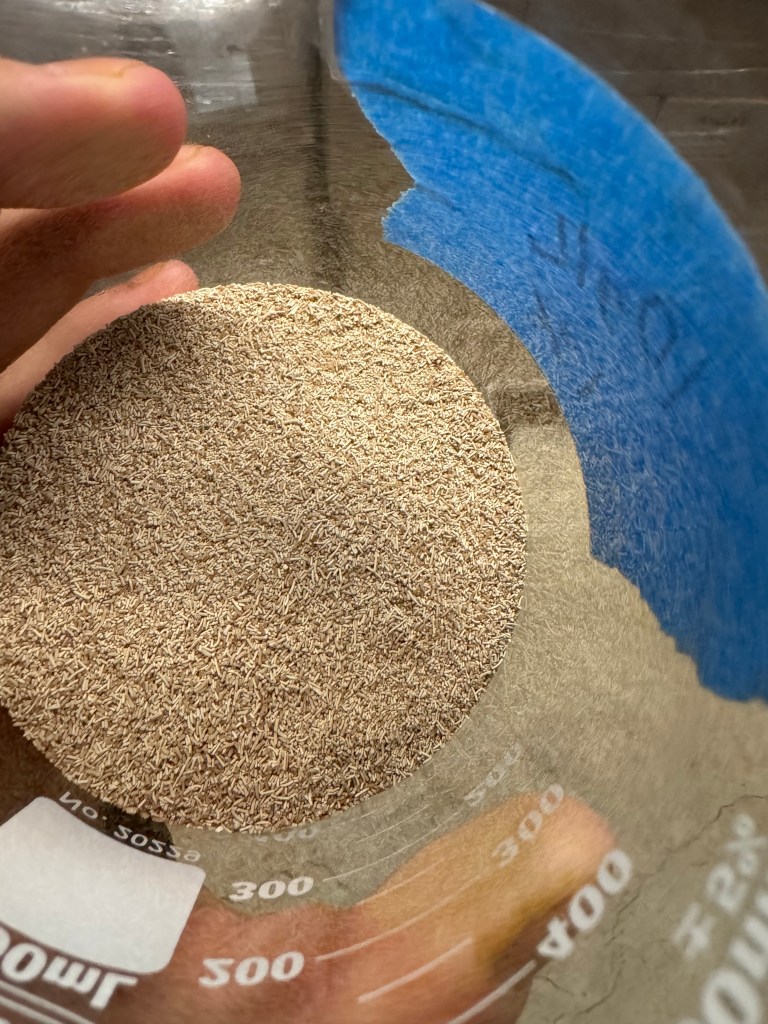
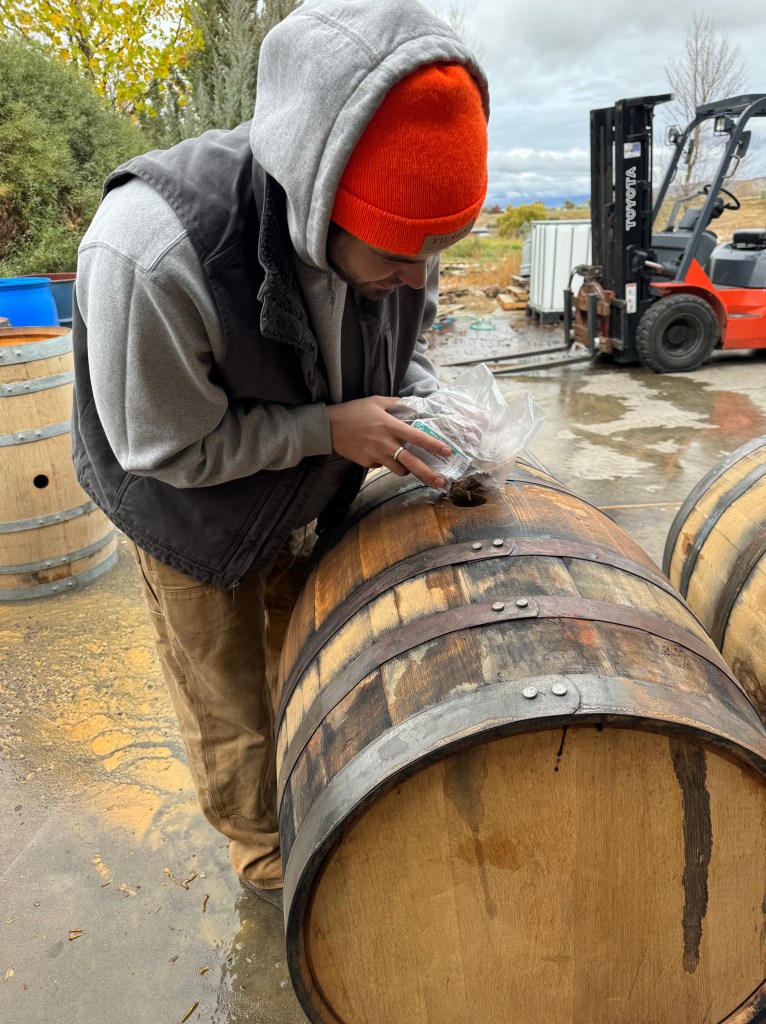
On October 25th it was time to rack the perry cider from one barrel to the next to get it off all the gunk at the bottom of the barrel. I set up the pump and got everything situated for the process. I cleaned and sanitized a barrel for my cider and then was able to rack from one barrel to the next taking my time and not rushing the cider into the new barrel. After the cider was finished racking into the new barrel I added 16oz of light oak chips into the barrel. Now I will wait and let the cider sit and I’ll keep an eye on it for my SO2 additions. Until next time!!

-
Rueben’s Brews Internship through the Mosaic State Brewers Collective
Hi! I’m DJ and this past summer I took part in an internship at Rueben’s Brews in Ballard as part of their packaging team at their production facility called “The Canning Line”. I had this amazing opportunity because of a few connections through scholarships which led to me meeting the owner of the Metier Brewing Company, Rodney Hines, who was benevolent enough to allow me to get connected with the Mosaic State Brewers Collective, a little later than I should have. The MSBC is a program built from a collaboration between Metier and Rueben’s, seeking to bolster the statistically low number of people of color in the brewing industry by offering internships, mentorships, and opportunities to youths who have interest in the industry.
The Beginning:
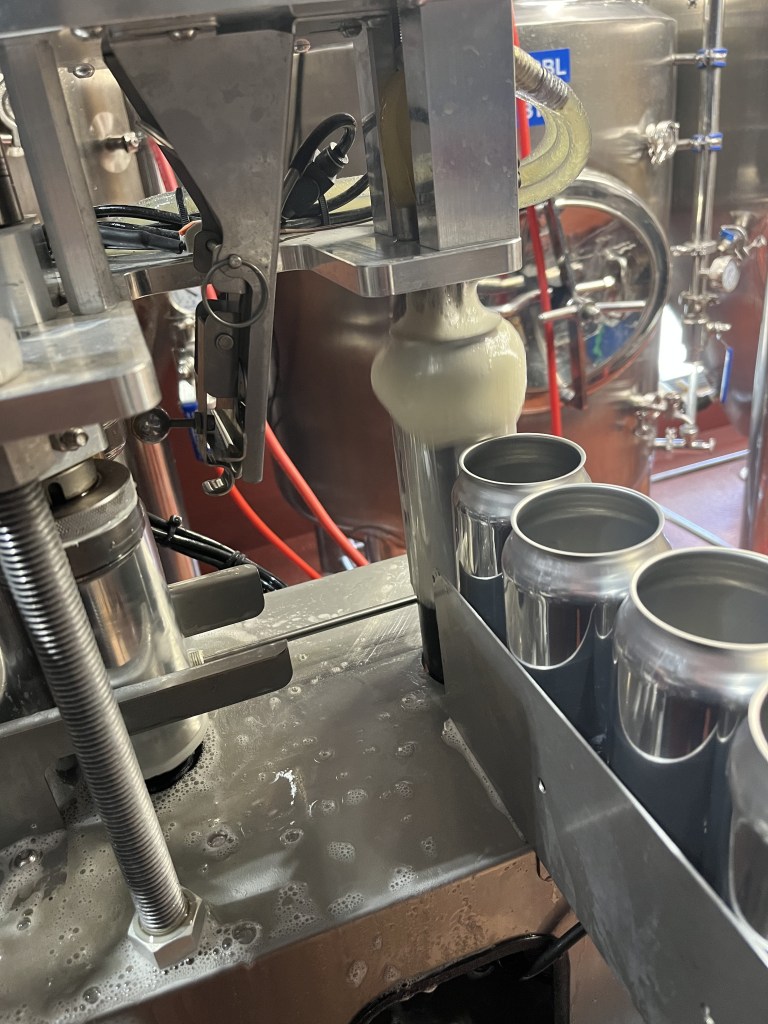
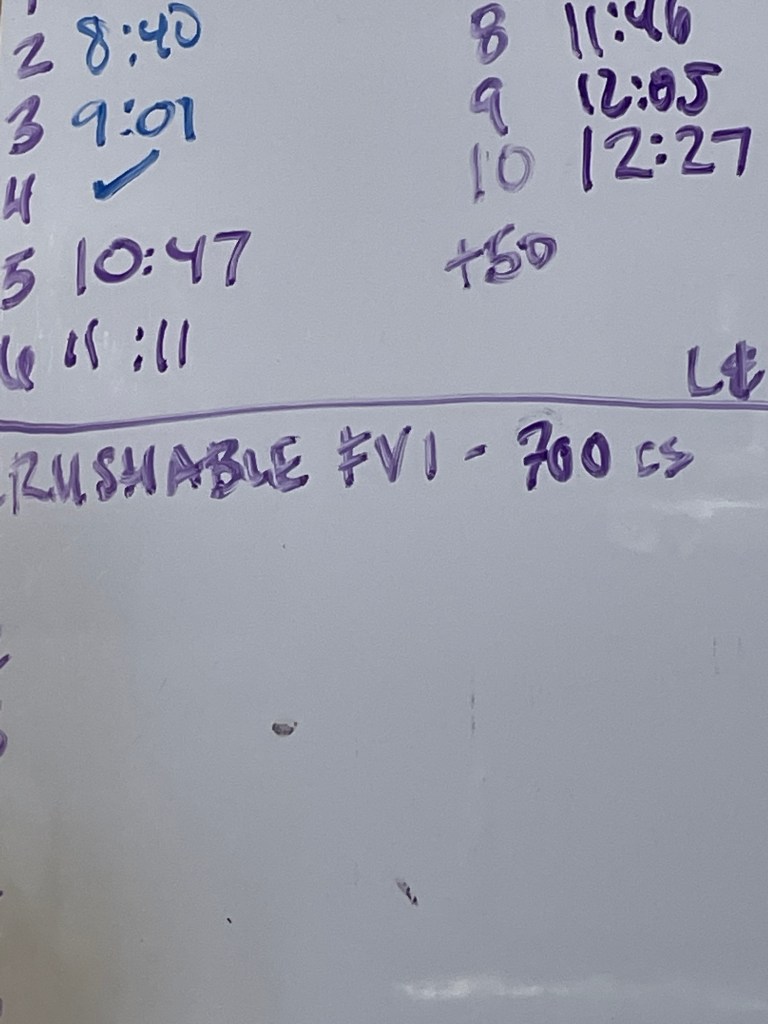
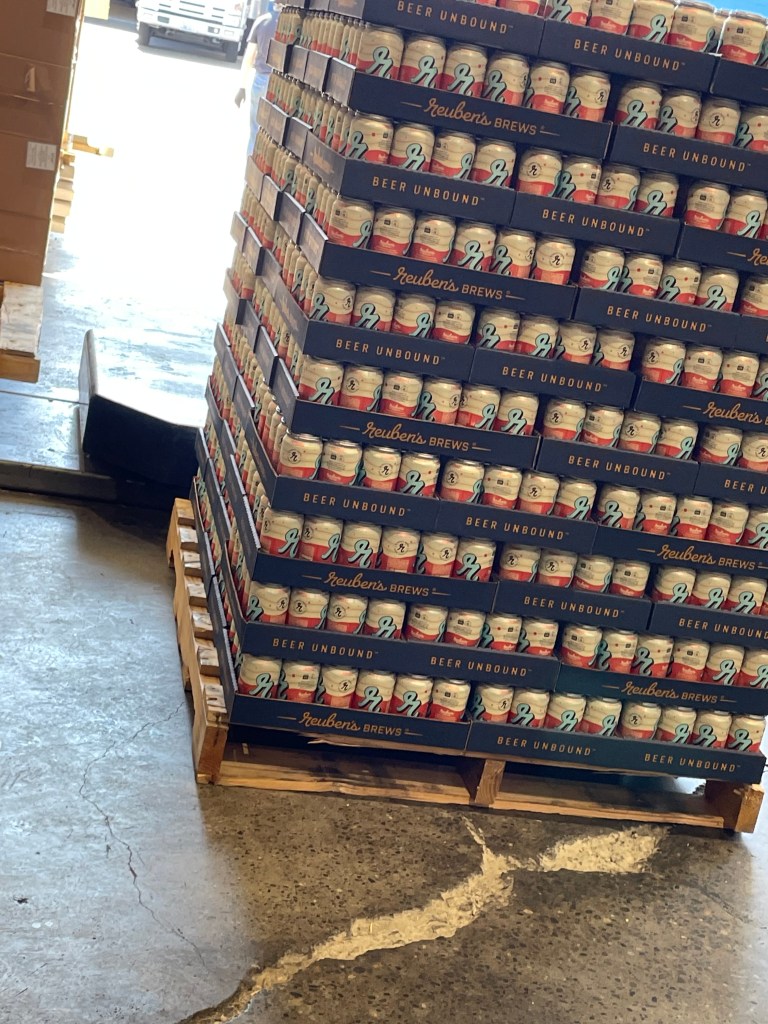
I have worked on the canning side of a brewery before, so the initial bit wasn’t getting used to something entirely new, it was more getting used to a larger scale environment. The premise is pretty simple: take six packs of cans off the line and put them into a box, 4 six packs per box, then put the box on a pallet until you have ten layers, ten boxes per layer and you repeat that until you’ve reached the target amount. Ideally the required kegs (known as 50L and sixth-bbl) have already been done before you reach towards the target amount (which you can find on a small whiteboard on the profill or through the email that you receive at the end of each day detailing what the next day will hold) because sometimes there is more or less beer than what was predicted so you want to make sure that you have enough to fill kegs and cans.

Additionally, I also became forklift and electric pallet jack certified which was something that I did not expect, but it made sense considering that its quite difficult to move pallets with about 225 gallons of beer packed on them. Something that you pick up very quickly is that malfunctions happen more often than anyone would like, so you have to know what to do during those moments of unscheduled down time. The most common activity, of course, is cleaning. From taking out the trash and recycle to scrubbing the cones of fermenting vessels, there is always something to be done for deep cleaning.
The Middle:
Every month, the different departments get together and have a full company wide meeting where (coupled with a presentation) everyone has a huge open floor discussion where they discuss goals, people come up with different ideas for beer, they discuss potential collaborations for the future, and anything else that happens to be on the docket. The July meeting, I had the amazing opportunity to shadow the Sales Representative, Larry Rock, who in addition to taking me on a sales ride-along, gave me his thoughts and advice as well as his business card should I ever have further questions or need some help navigating the industry. A couple things that he said which stood out to me were: “it’s important to have not just a representative from each department meet, but to have every single person involved in the discussion process to prevent departments from living in a bubble.” and “it’s important to self reflect to understand what people want and what will sell so that you aren’t making product that people won’t buy.” Sound business advice aside, I also learned that they use a nitrogen system to push liquids around not CO2


The End:
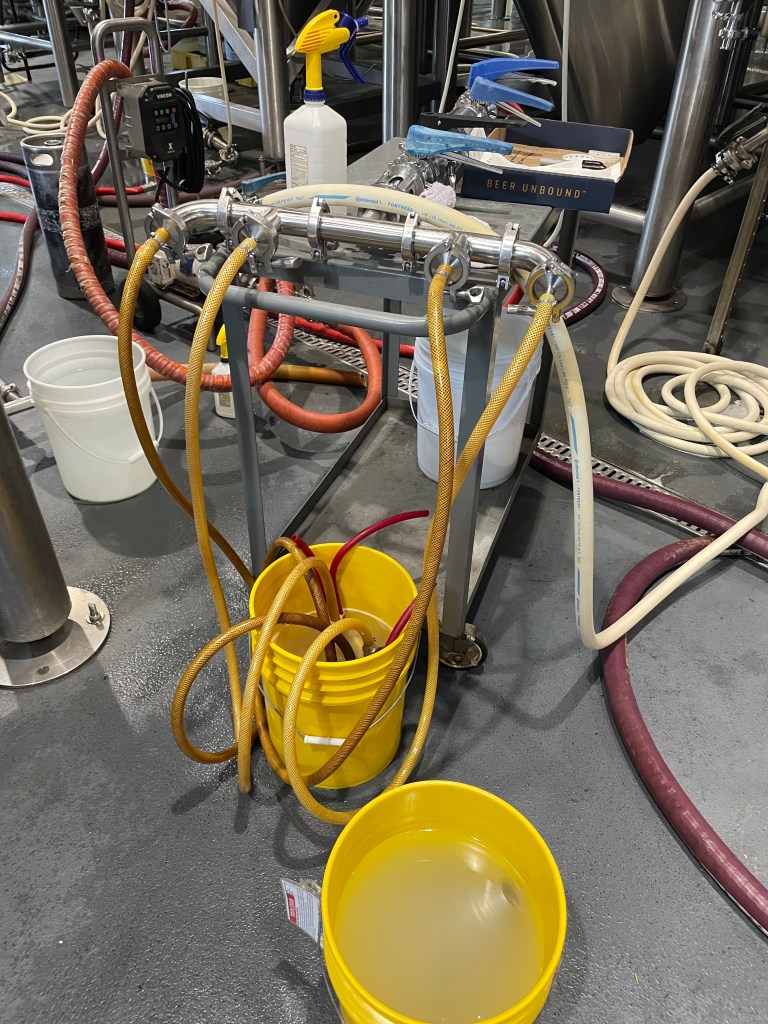
From there, it was more of the same. Besides the machinery malfunctions of course. If the canning process gets interrupted at any point that can cause a critical build of of cans on the conveyor belt that need to be put into boxes which will trigger an automated shutdown of said conveyor. Needless to say, that is not conducive towards the longevity of the equipment. But besides that, I had a wonderful opportunity to shadow a new brew lab technician! I would have preferred the senior technician (who was the person I had to beg to set up this shadow up by the way) but despite basically learning alongside me, he knew quite a bit and was as helpful as he could be. The brew lab was small but it was certainly packed with different equipment and stations. They had a station for cell counting (to determine the health of yeast being used and to decide whether or not a batch of yeast can be pitched for another batch of beer), they had a station for VDK testing for diacetyl (that buttery off-flavor), they had equipment for pH testing, gravity testing, a distillation apparatus, and even a spectrophotometer to better determine which beers could be crashed! All of this, packed into the small (and luckily airconditioned) brew lab.


After the lab shadow, the rest of the internship mainly consisted of more of the same. However, there were more and more malfunctions with the profill to the point in which it couldn’t properly fill the cans which luckily the x-ray sensor would detect and boot those cans off the line, which in this case was pretty much all of them.
Final Thoughts:
I really enjoyed this internship. I feel like this was an invaluable experience that I could never get with only classroom learning. It was great to see how this company really fit into its community, as well as some of the inner machinations of progress and logistics. I do regret how timid I was at times, those situations really prevented me from getting ahead of work tasks as I would constantly be looking for approval and confirmation that I was doing things correctly. As I was able to see, the whole process is a delicate balance and I didn’t want to risk thinking that I knew how to do something, only to find out that I had been doing it wrong and my actions have cost my coworkers and the company time and money. At the same time however, I would often feel vindicated as I would inquire further as to how and when I should be performing a task, and through that I would learn something that wasn’t initially explained to me, or was only hurriedly explained to me during an infodump. When I think about it, how could I not be timid when a single mistake could cause the loss of hundreds if not thousands of dollars down the line?
To not end on a potentially sour note, here is a picture of the largest fermenting vessel that they have, it’s so big that it wasn’t brought into the build, they had to build it pretty much as part of the building! (about 190bbl!)

Multiple times did I had the lovely opportunity to scrub the outside of that massive cone with a highly diluted caustic solution and spray it off with hot water!
-
Wheel Line Cider Internship
Working at Wheel Line Cider has given me a lot of experience, specifically working hands on with big fermentation tanks, pumps, lab work, and being up in an orchard! My first week there was such a great experience, my boss Nate had just finished up on a hibiscus cider that he had made. The coolest part about that week was that I was able to sit down with him and taste and smell the cider and write down any notes that I caught from the cider. We ended up combining what we had written down and made tasting notes on the label for the cider.
My second week on the job felt like the longest time because it was bottling week. The hibiscus cider was done and ready to be bottled. It’s only Nate and I in the cidery so while he filled each bottle I would cap them one by one. By the end of the day we had filled and capped over 800 bottles of cider, and that was just one day of bottling.
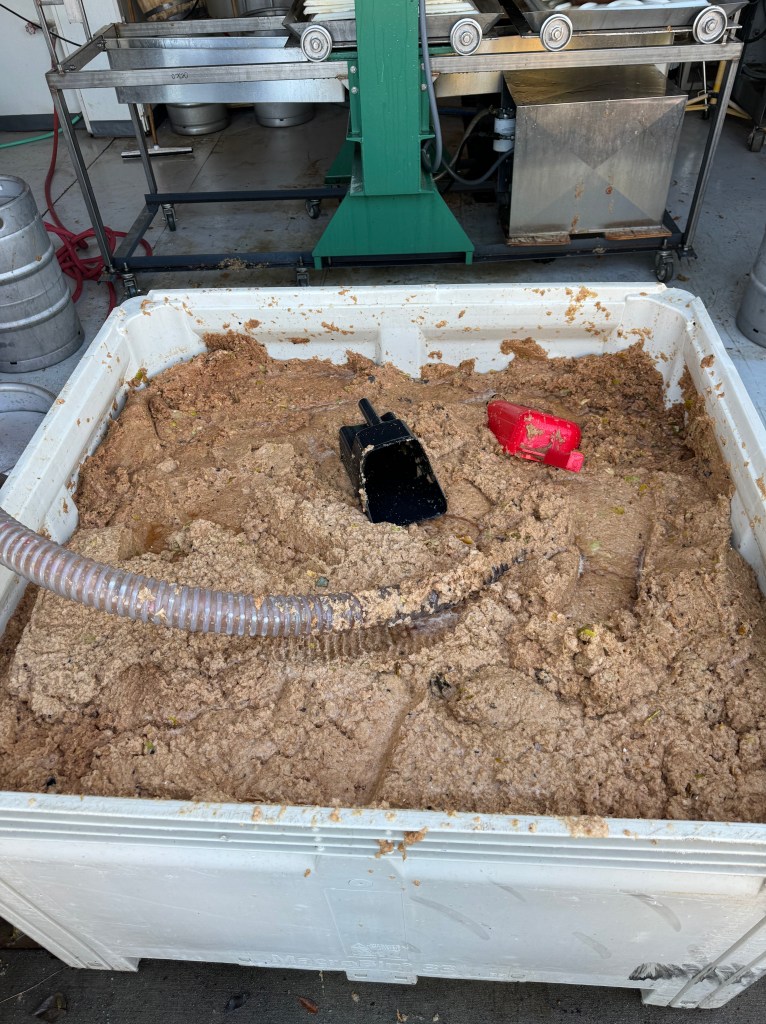
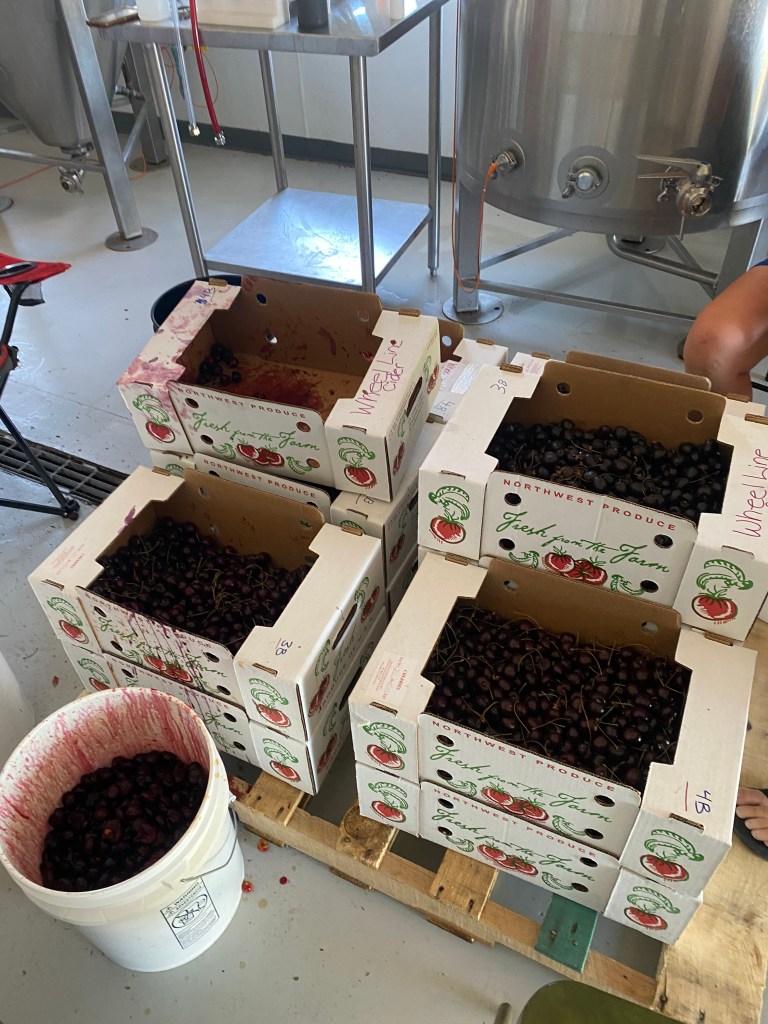
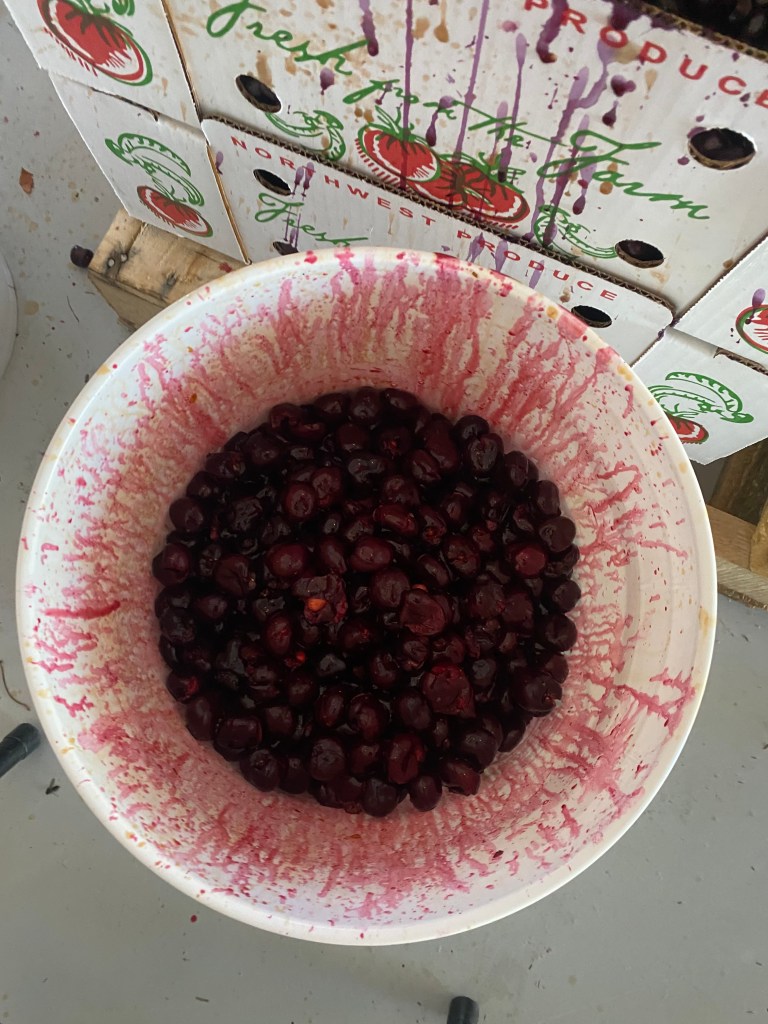
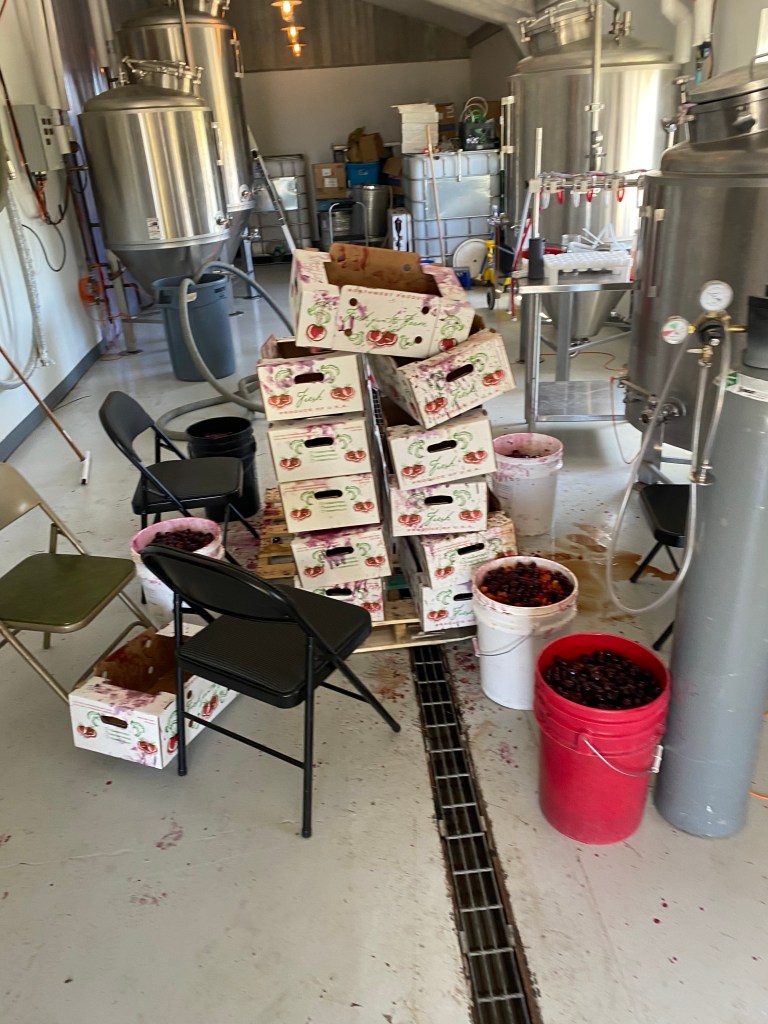
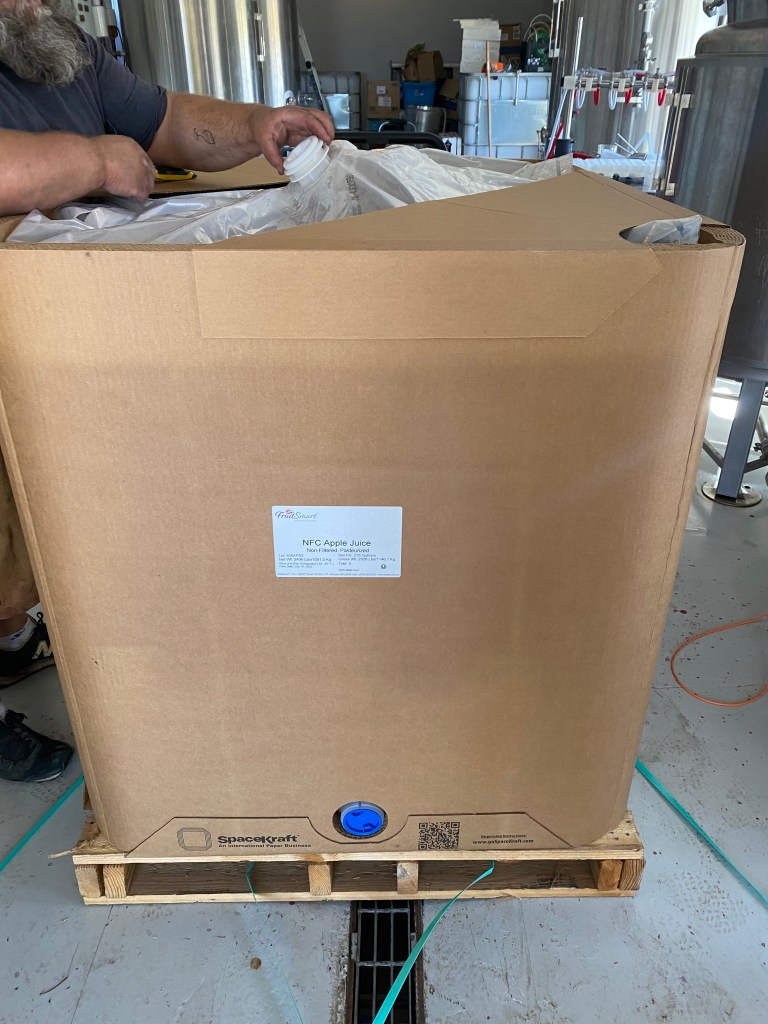
The third week in was the busiest we had been all summer. The hibiscus cider was out of all our tanks and bottled up into boxes. Next we had about 300 lbs of cherries being ordered for our next cherry cider. I was in charge of cleaning the tanks that day, and by this time I was able to CIP without any supervision and could thoroughly do a good job with each wash and sanitation. The day after the tanks had been cleaned and sanitized we had received all the cherries for our cherry cider. We started just around 9:30 and began de-stemming and squishing each individual cherry which lasted about 6 hours. After that we pumped 8000 lbs of fresh apple juice into 4 tanks so we could get ready for our cherry cider and our hopped cider.
Week four and five we did a lot of lab work as well as cleaned and fixed up some of our oak barrels. I learned how to correctly measure pH and brix using a few different options. I also have been learning about all the different fining agents and nutrients we add to the cider. I have been able to set up a bubbler system in the lab and make solutions to test the pH using a titration system. We also have been keeping a close eye on our two ciders that are fermenting and adjusting the glycol when needed as well as any nutrients that need to be added for the yeast.


One of my favorite days at work was the second week of August when my boss and I went up into the orchard and tasted each individual apple and tested the brix of each kind of apple. This was a great experience to see how it’s all done as well as learn about each type of apple and some of the history behind some lost apples they have found.
These last few weeks we have been focused on one thing only in the cider house. We had to get both of our current ciders in the tanks racked into totes and back into the tank and then bottled up, which will be this week. Harvest is coming up and we need to have everything cleared, cleaned and sanitized before harvest starts.
My most recent day at work we filtered each cider through our filter with cellulose pads. This is a very long and slow process, most of the time you’re just watching the filter and paying attention to the pressure and adjusting anything on the pump or filter that needs to be adjusted. After each tank has been emptied and filter is done being used we use SO2 and citric acid with a bunch of water and blast it through the filter using the pump to clean everything out and have it ready for next time.
My next goal is to put the hops in two of our tanks which will be a dry hopped cider and then start bottling the dry hopped cider as well as the cherry cider. This will be our last cider before harvest and I am really looking forward to picking the apples and pressing them to make our juice for our very own ciders we make!