
-
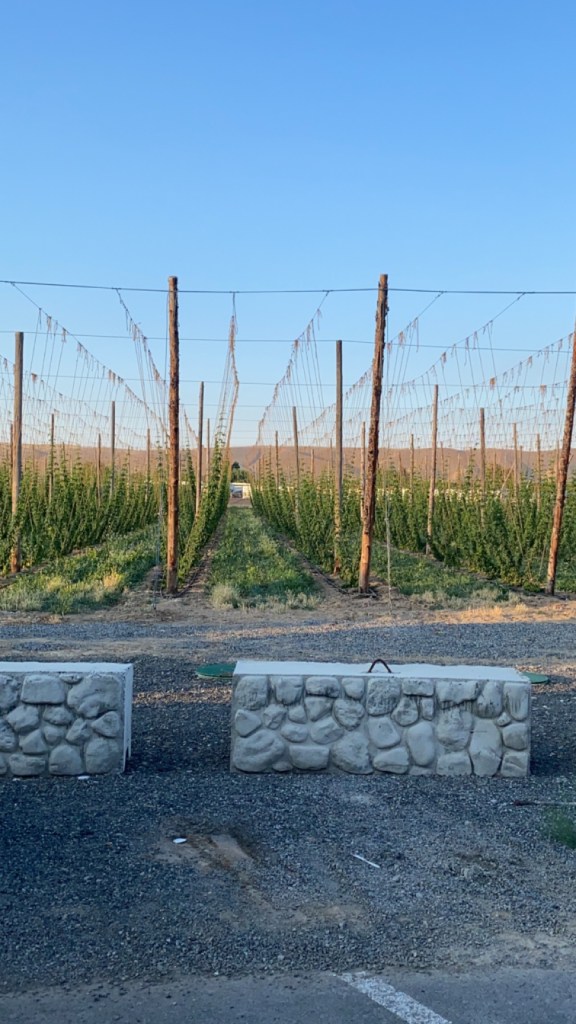
Bale Breaker Summer Internship
Entry 1:
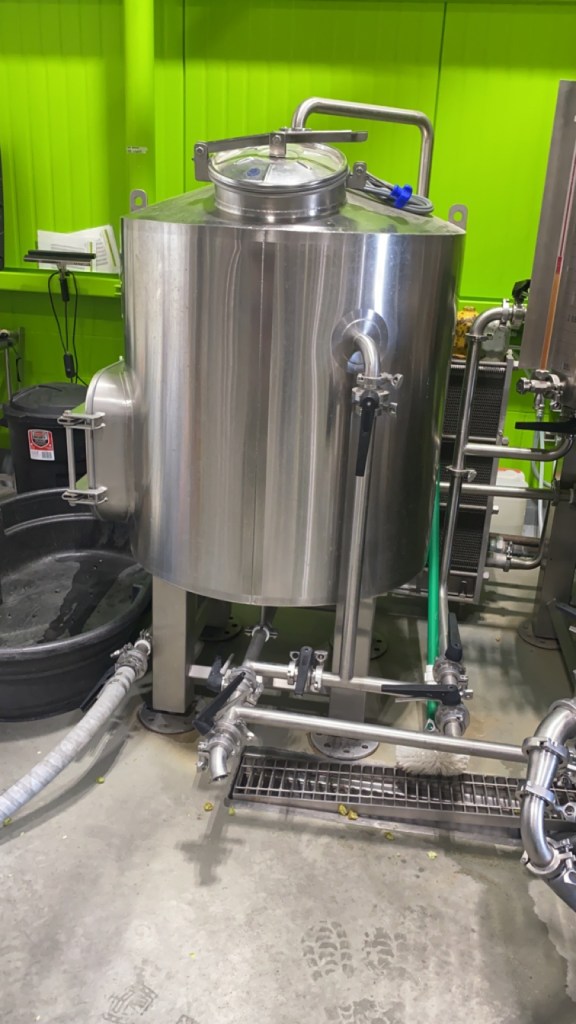
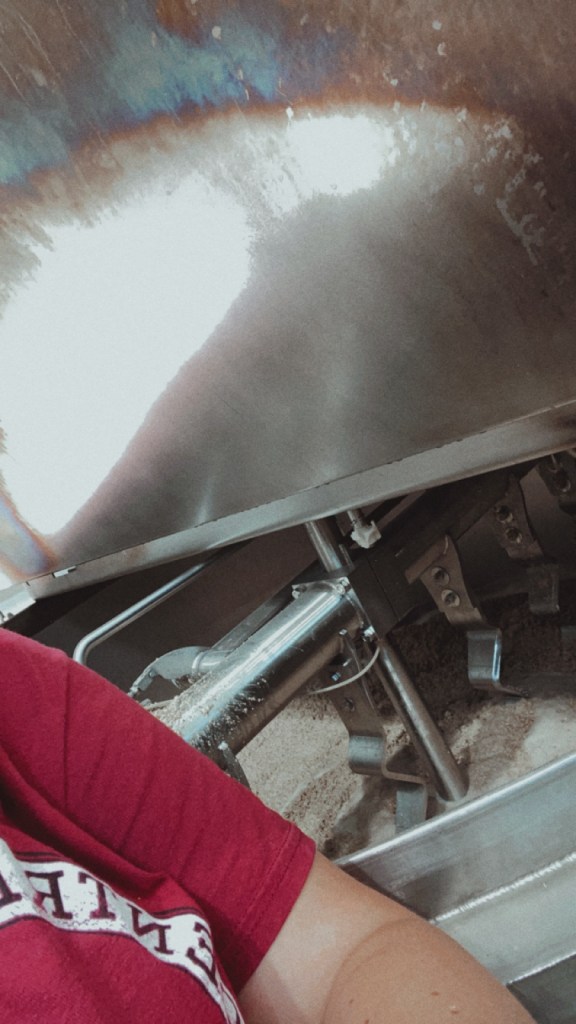
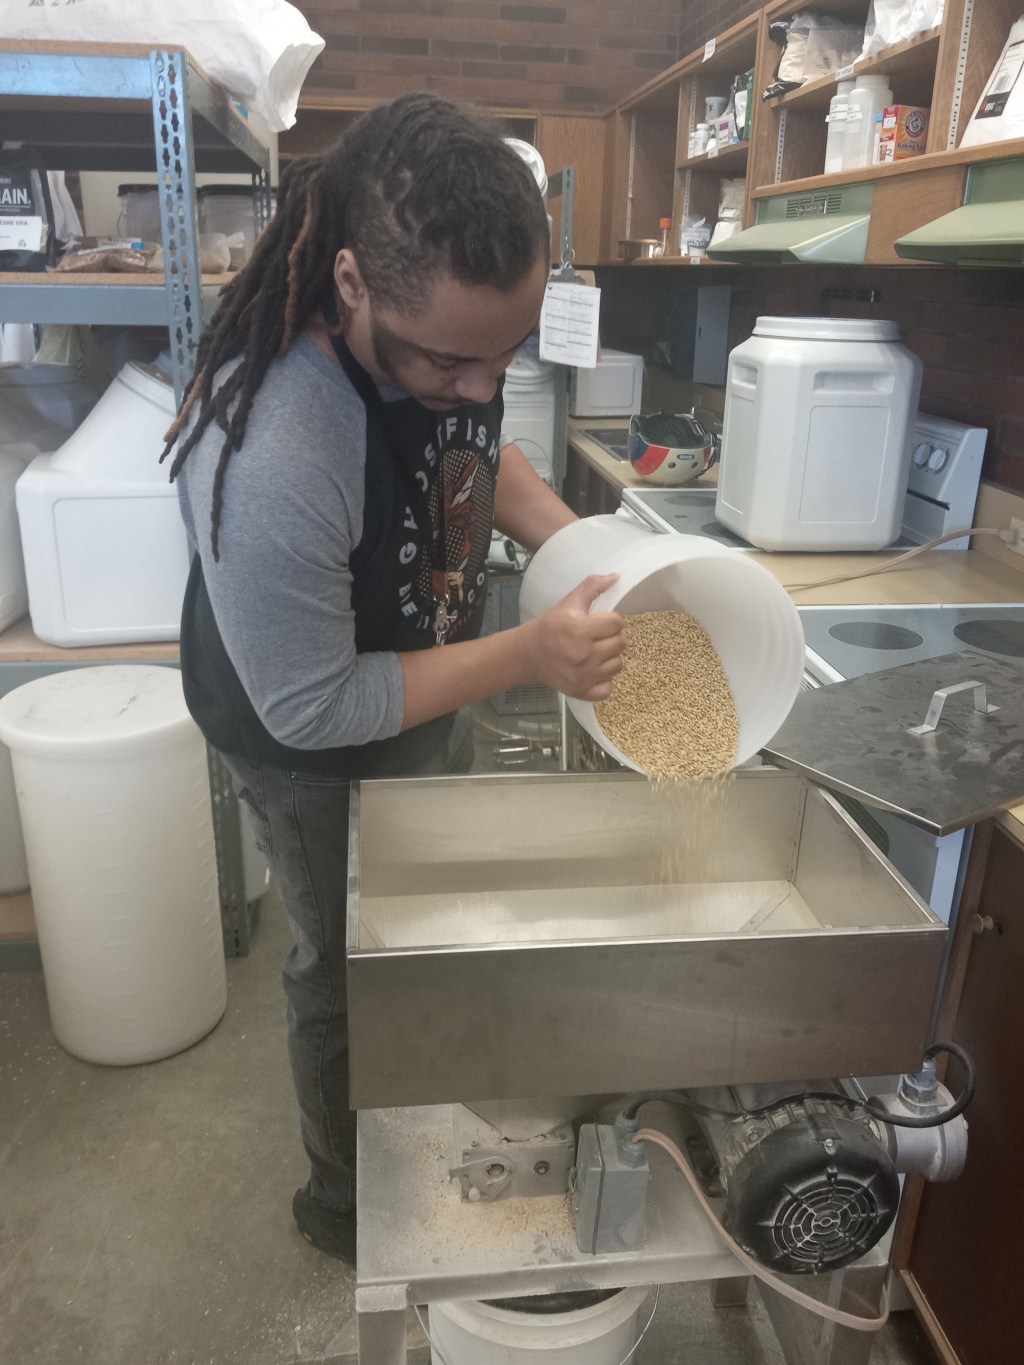
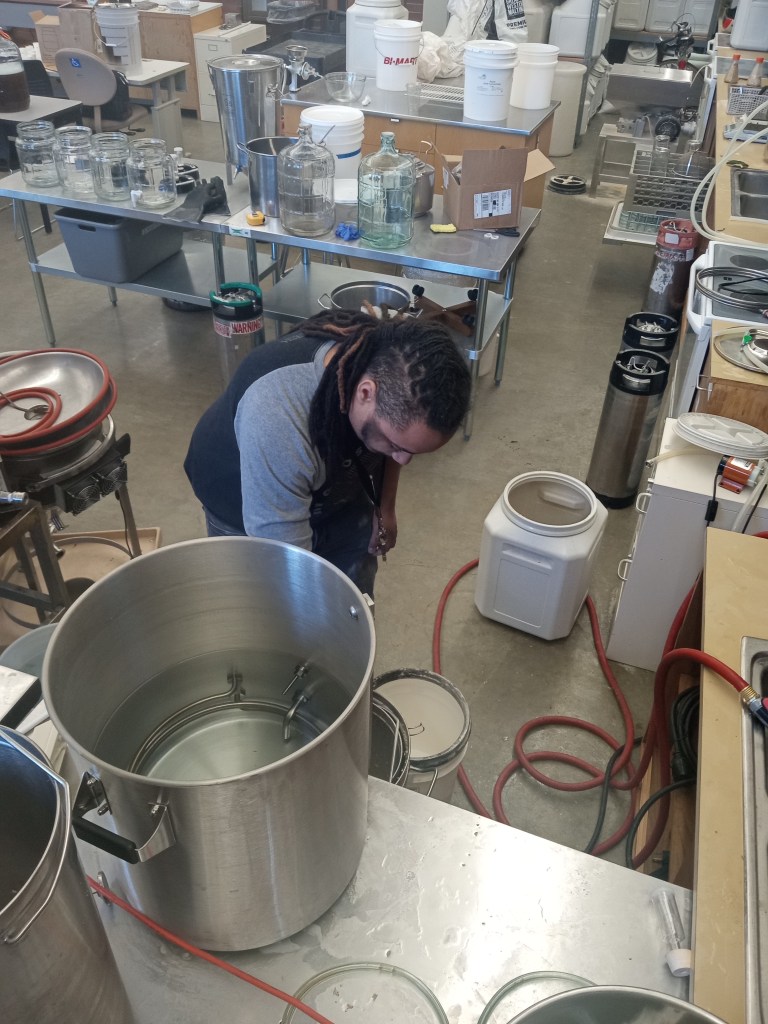
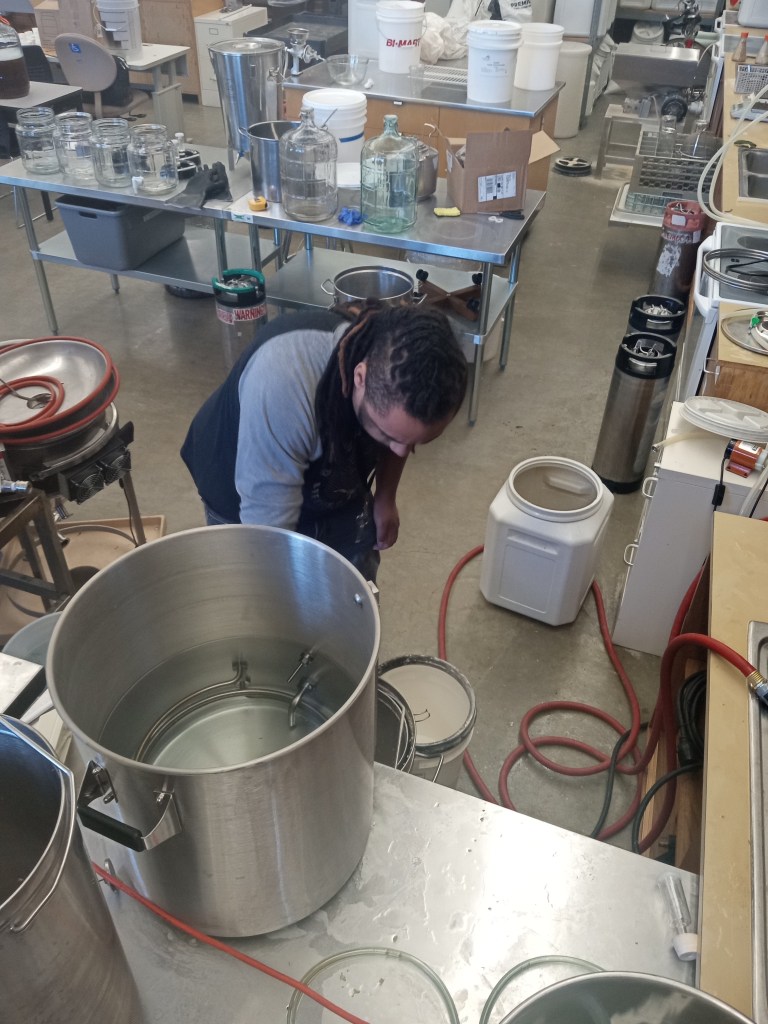
Weeks one and two have been the craziest and the most overwhelming experience. I moved all my things to Yakima for the summer the day before I started, unpacked, and started getting ready for work the next day. June 8th is when I began at Bale Breaker and I ended up having a 102-degree fever, but I went to work anyway because I didn’t want to miss my first day and make a bad Impression. I later found out I had a really bad case of strep throat so I missed my second day of work. Other than being sick my first week, I showed up for day three and learned more than I have about this industry and how the brewing equipment worked. This is by far the biggest brew system I have ever worked on so I was very overwhelmed with all the information the first two weeks. Although there was a lot to take in, I learned a lot and was able to get forklift certified so I could run totes to dump hop residue from the kettle and whirlpool to outside tanks. I also attended the annual ALES for ALS charity event that Bale Breaker puts on every year.
Entry 2:
Week three and four I started in the lab doing yeast cell counts and beer stats. I was in charge of beer stats all summer long. I would go to the listed fermenters on the clipboard, take samples from the sample port, filter the yeast out of the beer, and check the PH and the plato of the beer during fermentation and make sure everything is going as planned during the fermentation process. I was able to ask a lot of questions to brewers and people in the lab so I did end up still learning a lot. I also started taking pure yeast samples and making sure that the yeast that was being pitched in our brews that day was good and healthy post-harvest. Instead of doing yeast cell counts the old fashion way, with a clicker, and blue dye, I was able to have the luxury of using a cellometer that basically counts the yeast for you, you just have to set up the slide. I also did solid counts for pure yeast samples and I would run those through the centrifuge and measure the solids that came from those yeast samples. I was also able to dry hop for the first time with one of our brewers. This was kind of a crazy experience dry hopping 90 to 120-barrel tanks up on a huge scissor lift. I learned a lot about why we put pressure on a tank before we dry hop and what happens when a “beer geyser” occurs.


Entry 3:
Week five and six is when everything started to click, I was understanding what lines went to where, how much to dough in, how to do VDK’s, and why we test for them. I really learned how important these VDK tests are. We are testing for diacetyl in our beer. It can cause a buttery-like taste and texture in the beer and it is also a sign of secondary fermentation which is bad, especially for a huge production company like Bale Breaker. The cause of the second fermentation is that there is something in our beer/tank that caused our yeast to wake up and eat more sugars after they already did that during primary fermentation. So I learned the importance of those and how to take those tests.
Entry 4:
Week seven and eight I still feel like I am learning so much. I spent a few days in the micro lab and took lots of sterile samples and made agur for micro swabs to make sure we have no wild yeast strains that have made their way into our beer. I also spent a lot of time in the cellar. I learned how to clean and entire tank from start to finish from caustic, to hot rinse, and PBW rinses too on all parts of the tank. By the end of my time in the cellar, I was able to completely take apart and put together a tank by myself and clean it from start to finish. This was really big for me because I wanted to be able to put on my resume that I know how to CIP fermenters from start to finish all by myself. The hardest part of being in the cellar was it is so much more manual labor than being on the brew deck. The hoses are heavy as it is, but they are also filled with water, and you are carrying these hoses with caustic that you can get on your skin, you’re going up and down ladders, trying to be out of everyone’s way who are knocking out their beer and pitching yeast, it looks like a mess in the cellar midday. So just trying to stay organized during the chaos and it being so much physical work was the hardest part. But I think I handled it pretty well and asked for help when I needed it. This next week I will be spending as much time as I can on the brew deck helping brewers as much as I can and also I will have a day in the pilot where we test out new recipes.

Overall Experience:
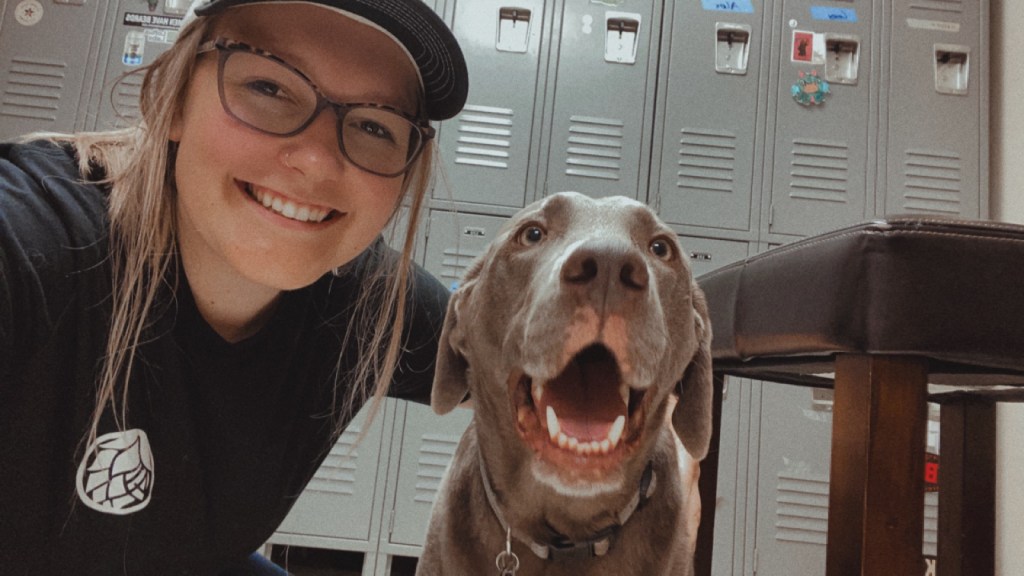
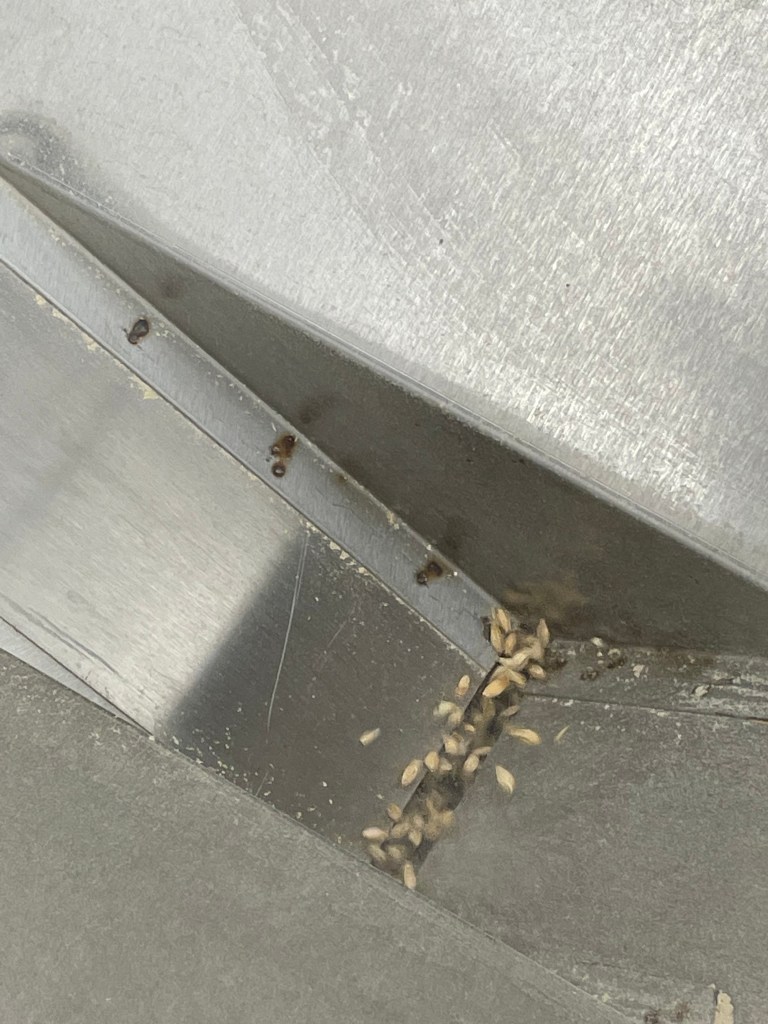
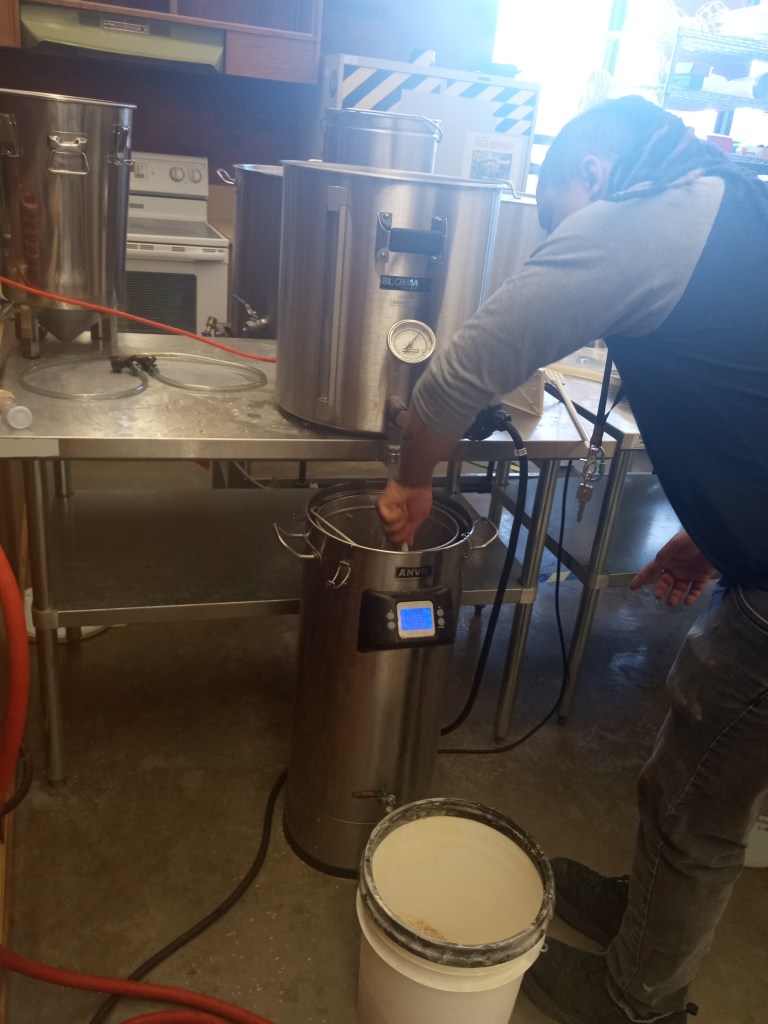
There is so much that I have learned over these eight weeks. I honestly feel like I have learned more in these eight weeks than I have over three years in college. Not that my classes and my program aren’t phenomenal, but in an industry like craft brewing, it is so hard to learn from a PowerPoint. Especially when I am a hands-on visual learner, I had an idea on what the industry was like, but I never understood it or really knew how the science factored into it until it was all out together right in front of me. The workplace was amazing, I had the best teachers and role models there, and they genuinely care about my learning experience. Not only did I learn about my Craft Brewing major, but I also learned a lot about my Business minor. I was able to sit down with all the owners and ask them about how they started, what they would do differently, and more. This was by far one of the best learning experiences I have ever had. Below are some fun random photos I took at work or related to work. My favorite coworkers are pictured too!

-
Soft Pour vs Hard Pour
Hello everyone, I am Cameron Nelson and for this quarter I decided to test if you could achieve a lower carbonation output by changing your pouring style to a hard pour instead of a soft pour when pouring a beer. For reference a hard pour is poured quickly down the middle of the glass and a soft pour is down the side of the glass slowly the reason I decided to take on this task was because of a common issue amongst all beer drinkers. Feeling full and bloated after drinking a few beers. As we all know if you drink a beer with a soft pour right off the tap in a reasonable amount of time you will be bloated and feel full. this is due to the amount of carbonation that is left in the beer which is then consumed by you. After a few test trials and conversing with my peers I came to the conclusion that if you use a hard pour technique it will allow the beer to off gas more than the beer that was soft poured. Therefore, making the consumer feel less bloated and allowing them more room for beer or food.
After coming up with this theory, I decided to take it to the lab using the pilsner I brewed last quarter. after setting the pilsner to about 12 psi I gathered my supplies. I used a 500 mL graduated cylinder, a stir plate, an Erlenmeyer flask a rubber stopper with a rubber house connected through the stopper. I then filled a sink full of water and submerged my graduated cylinder in the water. After setting up the sink with the stir plate near buy I filled the flask using a soft pour technique and plugged it as fast as possible. I took the flask to the sink and picked up the graduated cylinder leaving the open end in the water and the lower end vertically out of the water allowing the water in the cylinder to stay. With the hose connected to the rubber stopper I funneled into the graduated cylinder and placed the flask on the stir plate. At this time, I started a timer to see how long it would take for the beer to completely off gas. I repeated the same process twice once with the soft pour and again with a hard pour. I tried doing everything as quick as possible to ensure accuracy.
The results were as expected with using 300 mL of beer for both test the soft pour released about 270 mL of gas and took 8 minutes to completely loose carbonation. and the hard pour released about 185 mL of gas and took 6 mins to do so. In conclusion If you use a hard pouring technique, you can save your stomach from a little gas therefor allowing you to not lose your appetite too quickly.
-
GLUTEN-FREE BEER! Part 2
I ended my last post with me bottling my beer and putting them into a dark space for about 2 weeks. I explain further more towards the end!
Hello, my name is Cody Barthels and I am a senior at Central Washington majoring in Craft Brewing. The idea of this project was to create a 100% gluten free beer for my wife, who has Celiac, to be able to try and drink.
For this gluten free beer I decided to use sorghum for the grain, but in the form of extract. I read through many forums and blogs people have written about gluten free beers and recipes and found that many people had used sorghum in the form of extract, specifically from the brand Briess. So I decided to order two 3.3lbs of BriessSweet: White Grain Sorghum Extract so that I would have enough to make another batch sometime.
I wanted to make a pale ale style beer, so I started looking up some recipes that were using the same Sorghum extract I was using. I came across one on brewersfriend.com and decided to base mine off that. I then wanted to make sure the yeast I got was 100% gluten free and showed it on the package, so I got one pack of Lallemand Voss Kveik ale yeast. For the hops I didn’t want some with high AA (alpha acids), so I decided to go with a pack of SL Styrian Goldings from Yakima Valley Hops, which have a AA of 4.2%. I used the software on brewersfriend.com and put in all the types of yeast, hops, extract and other fermentable and used that to scale down the recipe I based it off from a 5 gallon to 1.5 gallons. It then gave me the estimated OG (original gravity) which was 1.046 and FG (final gravity) at 1.009 as well as the estimated ABV of 4.83% and IBU’s of 28.4.


On brew day I started with a good cleaning and sanitizing of all my equipment, including the sanitizing buckets themselves, and all my brewing equipment. After I let everything soak in PBW (Powdered Brewery Wash) and Star Sand, I was ready to begin my gluten free brew. I brought my 3 gallon kettle to a boil and measured out 2lbs of the BriessSweet Sorghum syrup and dropped that into the kettle. I started my 60 minute timer and let that boil for 15 minutes to create a good wort. I then measured out 0.3oz of the SL Styrian Goldings hops and dumped those in at exactly the 45 minute mark. I waited 30 minutes while that boiled and measured another 0.3oz of hops and dumped those in with 15 minutes left.
While that was boiling, I got my ice bath set up and started to sanitize a few pieces of equipment that go onto my fermenter. After it finished boiling I put it into the ice bath for about 45 minutes to get it down to about 60-70 degrees.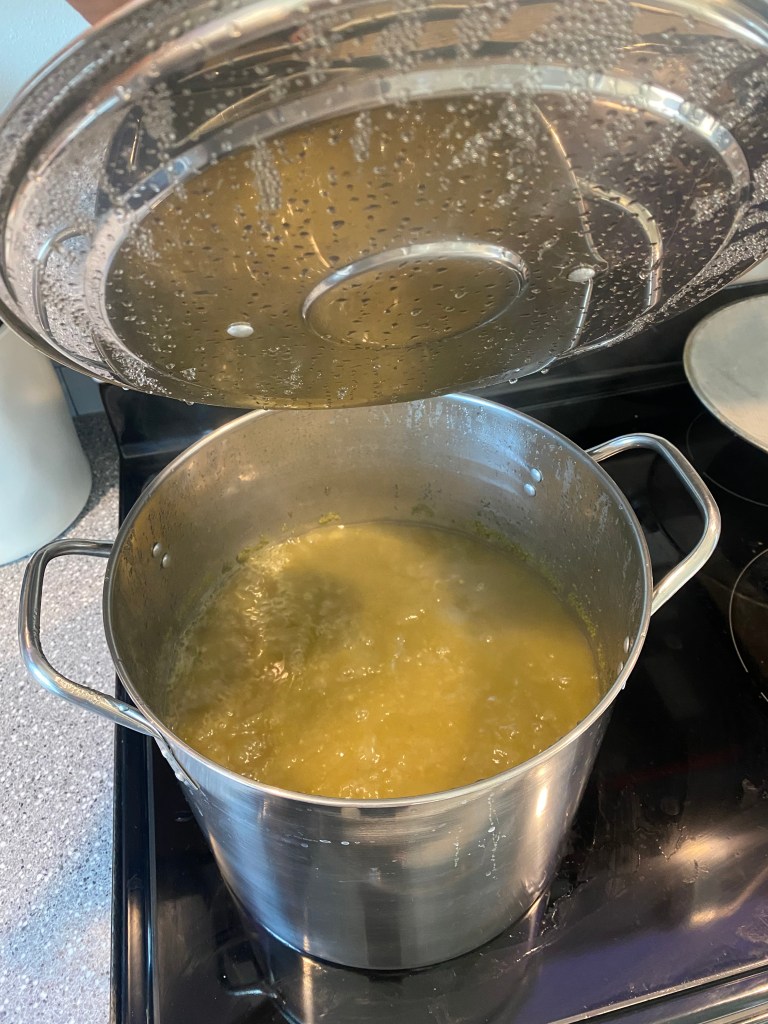
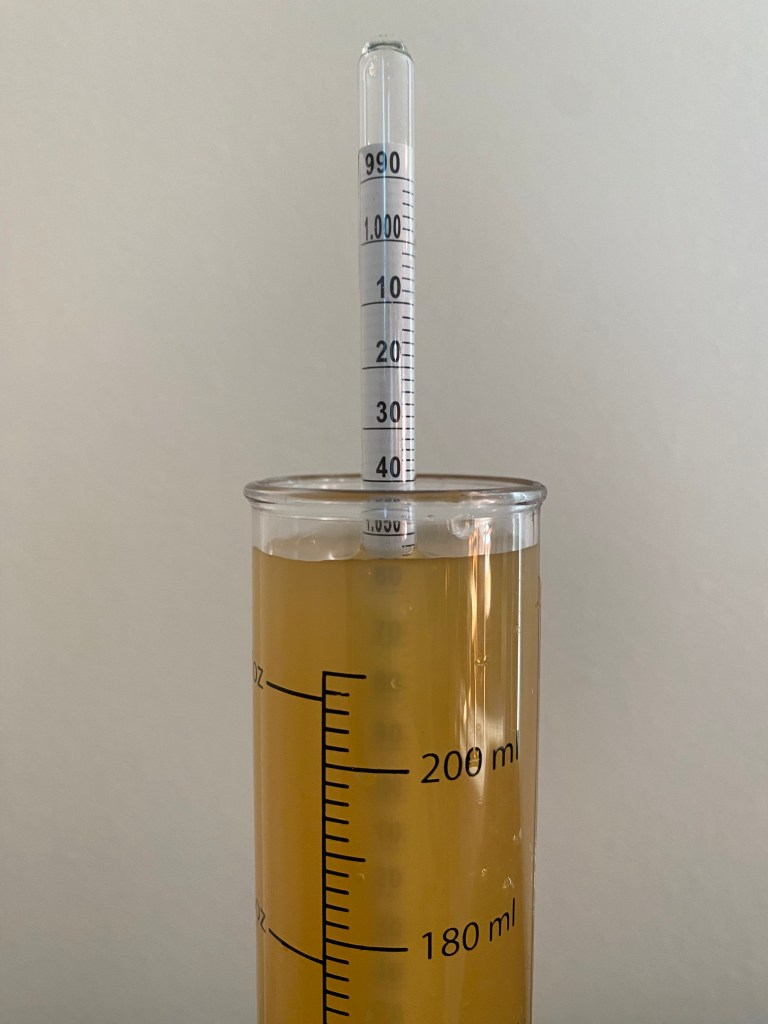
Once it reached 60-70 degrees I was ready to make the switch into my fermenter. I got my siphon and got my graduated cylinder full so I could take a reading for the original gravity, which landed at 1.054. I then started pumping the rest of it into the fermenter and gave it a nice swish around to aerate the wort. I then measured out 5.5 grams of Lallemend Voss Kviek ale yeast yeast and put that onto the top in my fermenter.
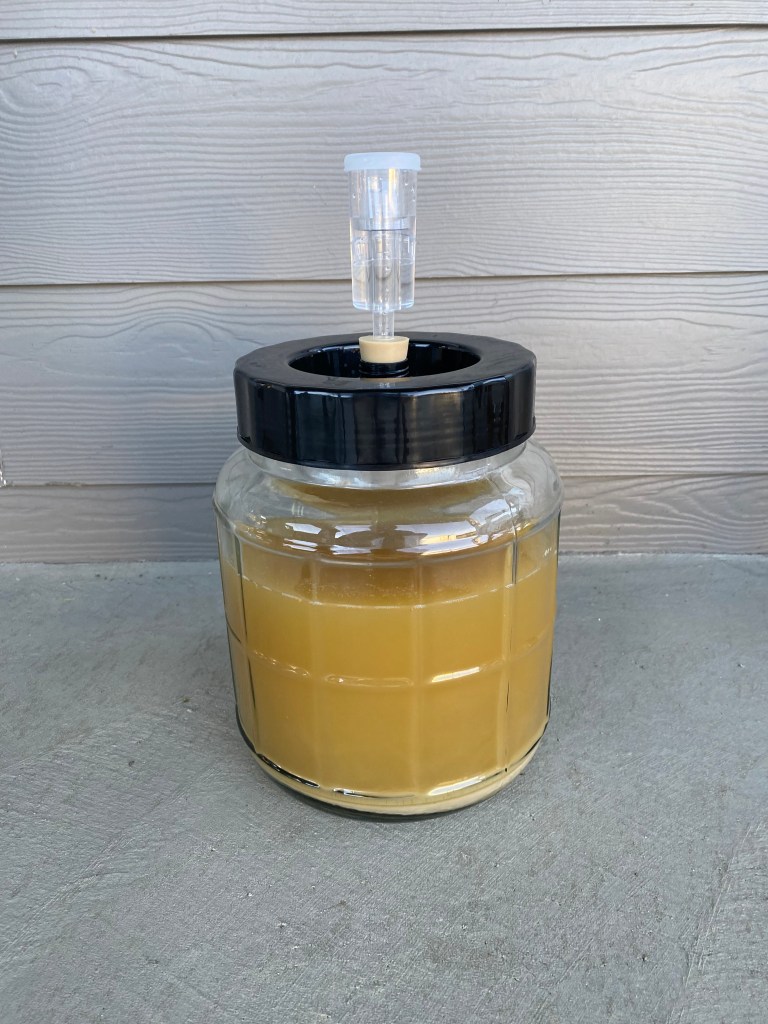
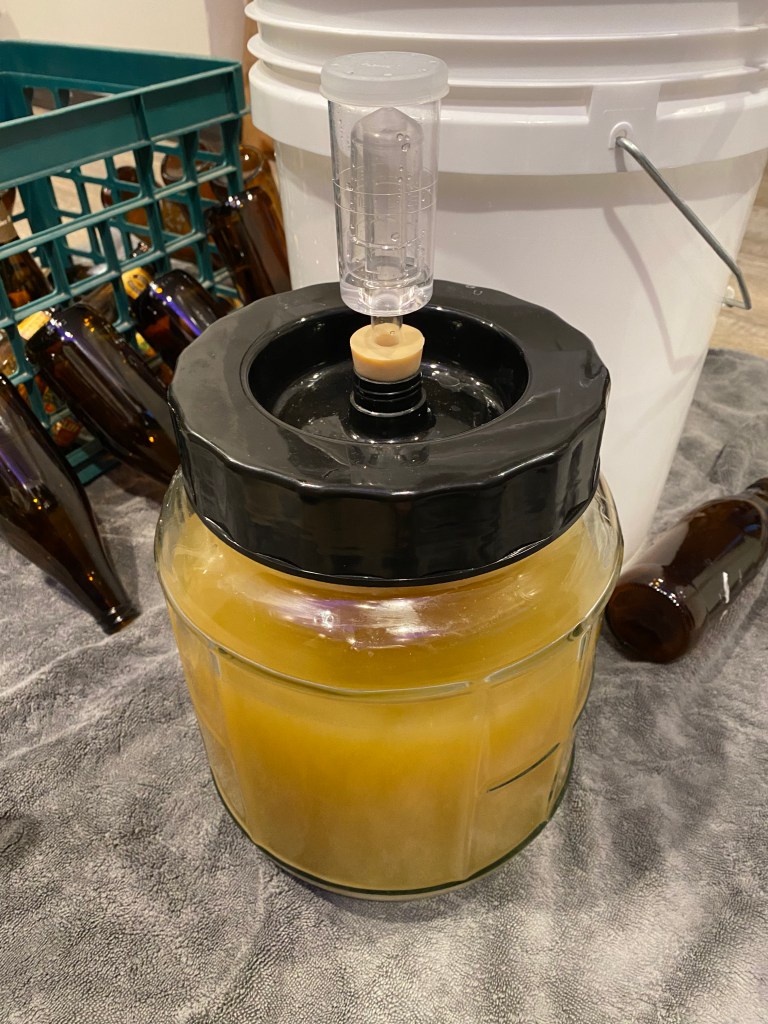
After everything was put into the fermenter and all air tight, I put the carboy into the closet away from light to start the fermentation process.

Two weeks later I took it out and decided to do a cold crash for 24 hours because it looked a bit too hazy for what I was looking for. So I moved it to the bottom of my fridge and let that sit for a whole day.
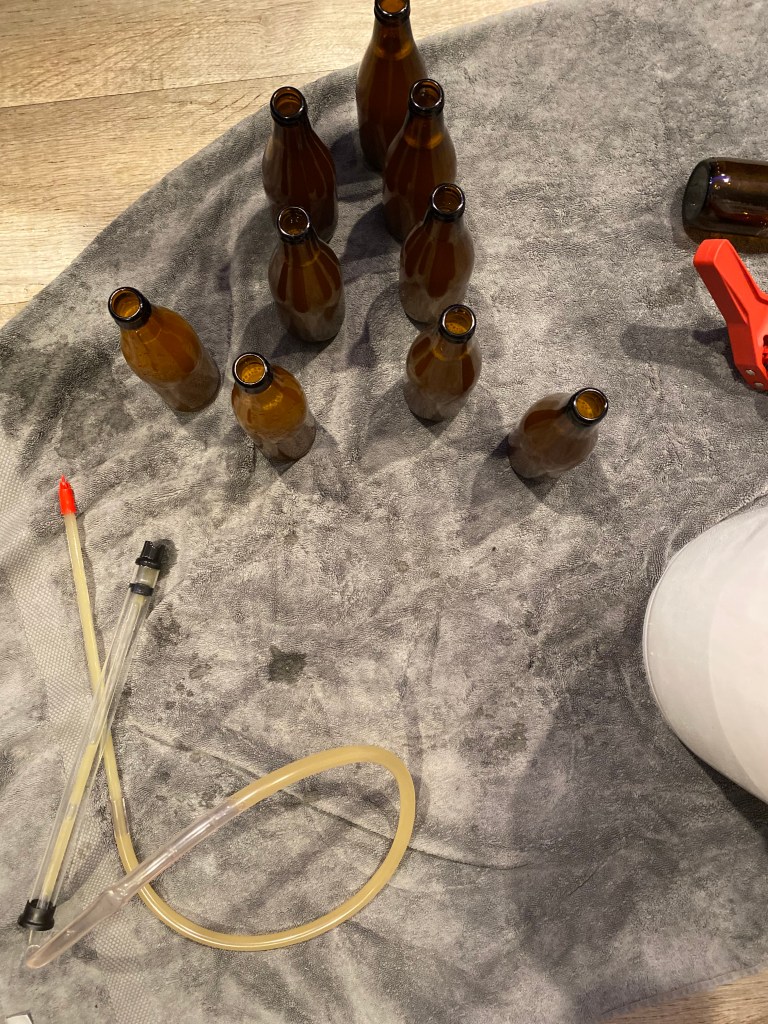
The next day was bottling day, which I was lucky to get a bunch of bottles and caps from my good friend Michael. First I fully cleaned and sanitized each bottle I was using and let those air dry so they were ready to bottle. I got my carboy out of the fridge and brought it into the kitchen. I took another reading in my graduated cylinder with my hydrometer and got a reading of 1.014. I then boiled 2 cups of water and added 1.15 oz of dextrose (corn sugar) and mixed that up until it was fully dissolved. After it cooled down, I dumped that into the carboy and swished it around so it got mixed up. I then gave my bottle filler and siphon one last rinse and started to fill each bottle. I was able to get 9 bottles, which I was very happy with. After bottling was done, I took all the bottles back up and put them into the closet to stay away from light and let them condition for another 2 weeks before drinking.
The purpose of bottle conditioning is to get the perfect carbonation and flavor for the beer. I let 4 of my bottles sit for 2 weeks and 5 bottles sit for 3 weeks. After the two weeks were up, I threw the bottles into the fridge to get nice and cold. I let them sit for a day or two before trying it.
I had tasted my beer 2 weeks after bottle conditioning and it had a small amount of carbonation and didn’t taste quite right. So I ended up leaving a few bottles to sit another week and then put them into the fridge.
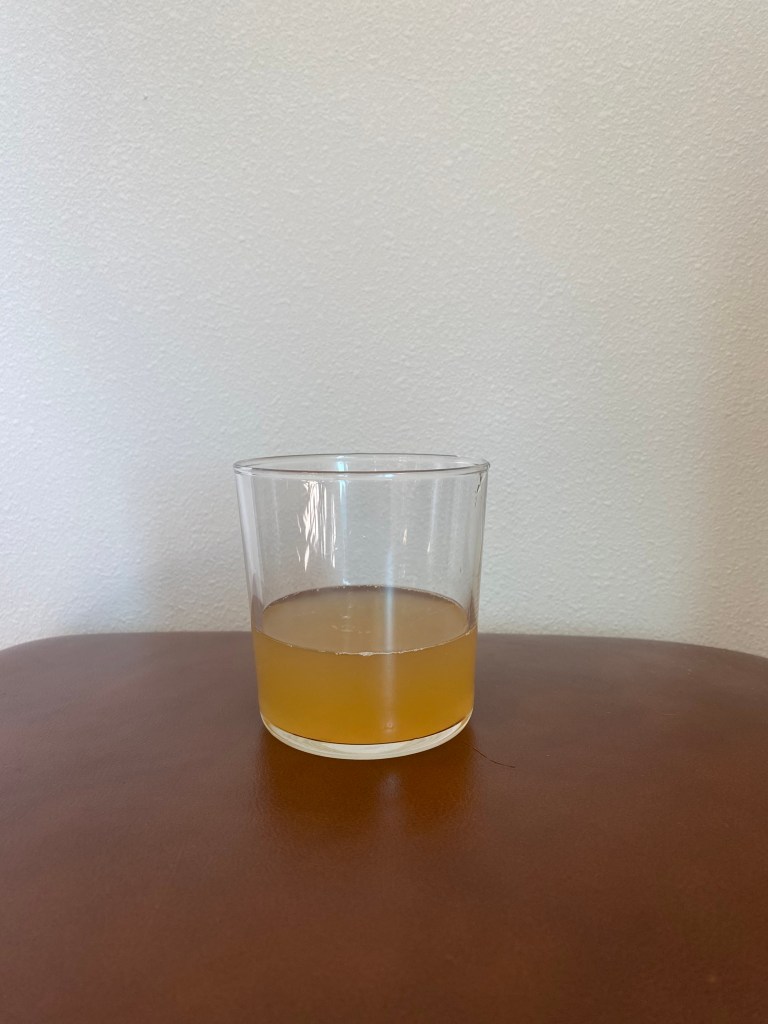
Conclusions:Everything turned out better than I had expected, it was a very fun experiment brewing with sorghum and seeing the differences between sorghum and other grains. The beer came out to just around 5.25% ABV which is what I was aiming for and the coloring was perfect!
Trying the beer with my wife was very exciting. The taste of the beer was very crisp at first with a heavy carbonation and bit of a sour aftertaste. I was satisfied with how the beer came out, especially since I used sorghum, and sorghum beer has some funky tastes and is supposed to have a bitter and sour taste.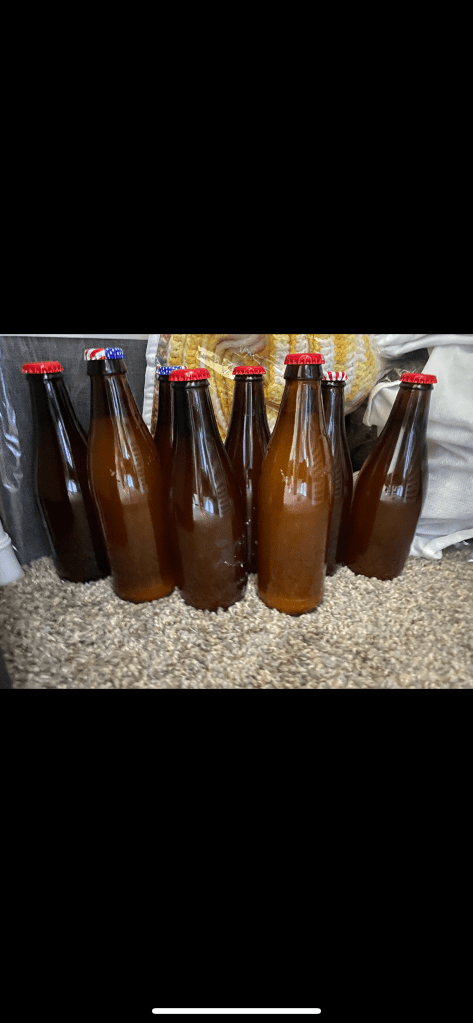
-
Impact of Temperature on SCOBY Growth Part 2
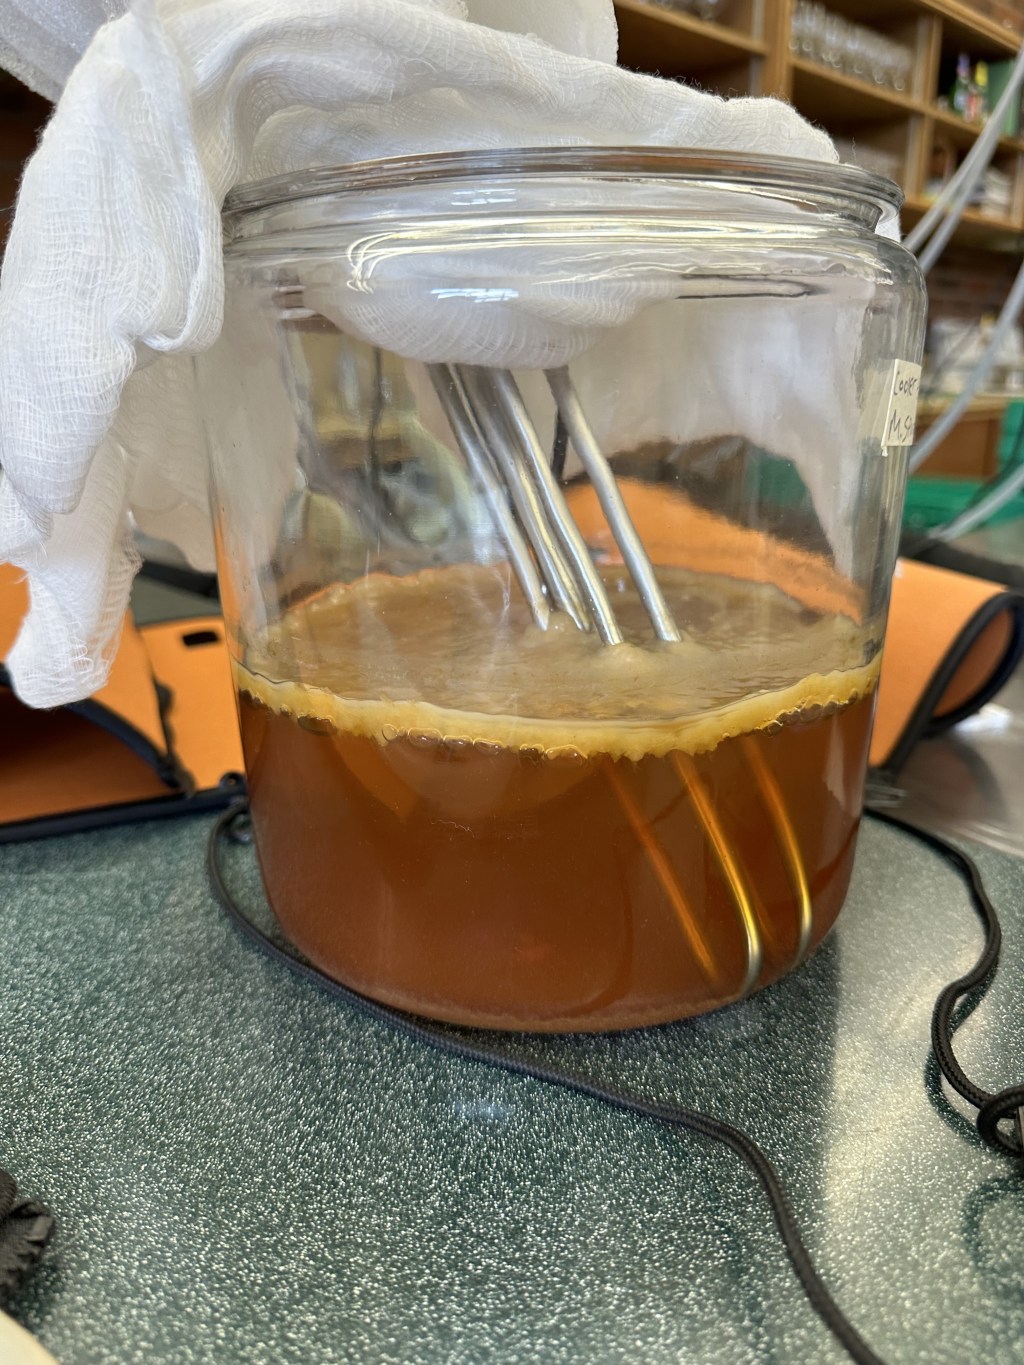
Hello, my name is Molly Spurrell and this is an update post on my SCOBY experiment. This was an experiment that looked at the relationship between temperature and SCOBY growth, as well as the microbial growth from the SCOBY solution (the sweet tea mixture that the SCOBY was growing in). The original post can be found here.
To do this, I kept three jars of sweet tea mixtures at different temperatures (64°F, 72°F, and 80°F) all of which had been inoculated with GTs Pure kombucha. These samples grew for 16 days, and over that time pH measurements were taken three times a week. Three sets of 50 mL samples were taken from each condition, one on April 26, May 5, and May 8.
For the microbiological tests, we performed a serial dilution on the original GTs kombucha, as well as each of the samples we had. We plated dilution ratios of 1:1, 1:10, 1:100, and 1:1000 on TSA, MRS, and YGP media. During the transportation of these samples, two were dropped, so we don’t have data for the 80°F sample from April 26 and the 64°F sample from May 8.
Results
All samples had growth on TSA, but the only samples that had growth on MRS and YGP were from the GTs Pure kombucha. All dilutions of the GTs kombucha had similar proportions of growth across the media, so I’ve only included a graph for the 1:100 dilution. The media that grew the most colonies was MRS, showing that there was a high amount of lactic acid bacteria present in the sample (Figure 1). The growth on YGP shows that yeast was able to grow, and the growth on TSA shows that acetic acid bacteria were able to grow.
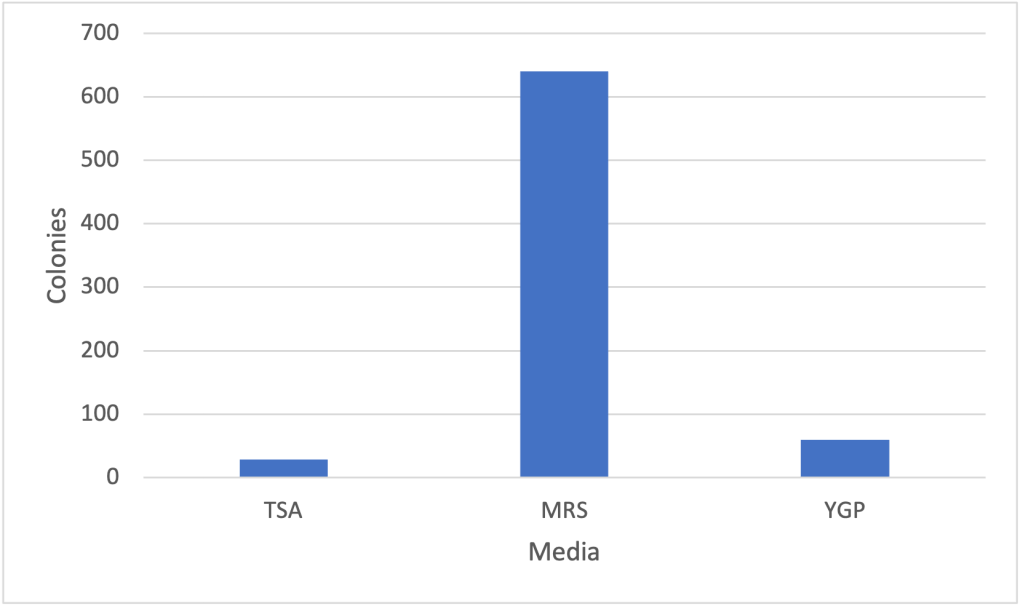
Figure 1. Cell colony counts for GTs Pure kombucha at a dilution of 1:100 on TSA, MRS, and YGP For all of the samples taken from the liquid of the SCOBYs, there was only growth on TSA. The growth across the dilutions was unexpected though, as there was more growth on the 1:1 and 1:1000, while there was very little growth on the 1:10 and 1:100 dilutions (Figures 2-5). This may be because these bacteria prefer a less acidic environment, and as the samples became more dilute, the samples and media became more neutral. Below are graphs showing the colony counts for each dilution, temperature, and date of sample collection.
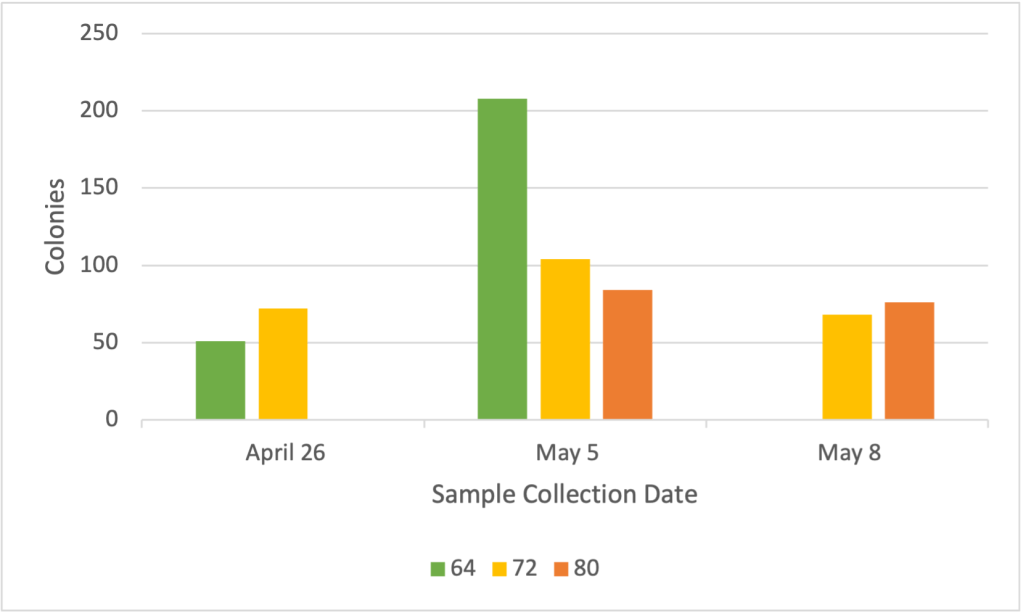
Figure 2. Cell colony counts on TSA with a dilution of 1:1 from three sets of samples taken over 16 days 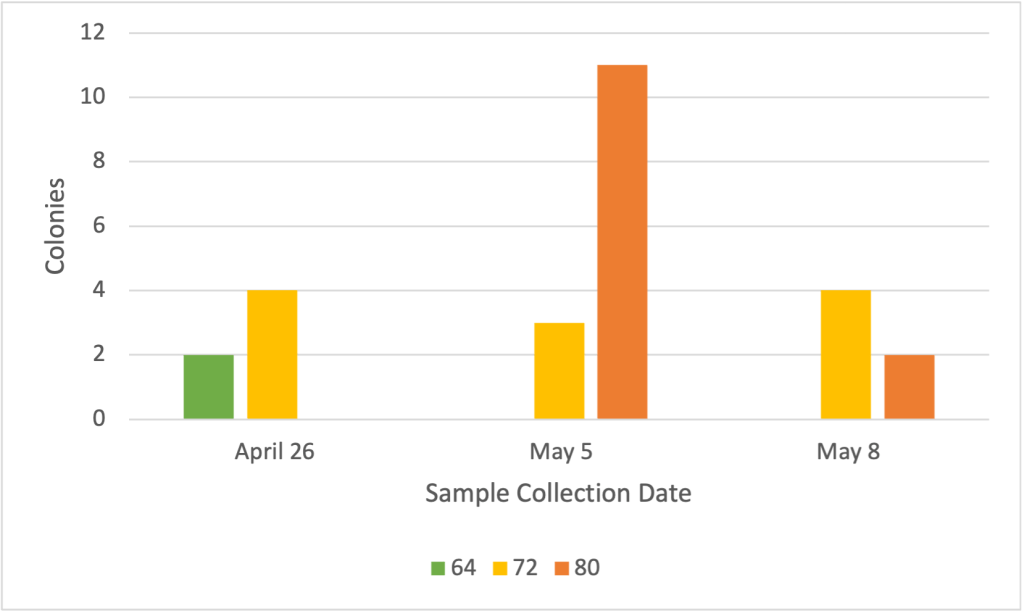
Figure 3. Cell colony counts on TSA with a dilution of 1:10 from three sets of samples taken over 16 days 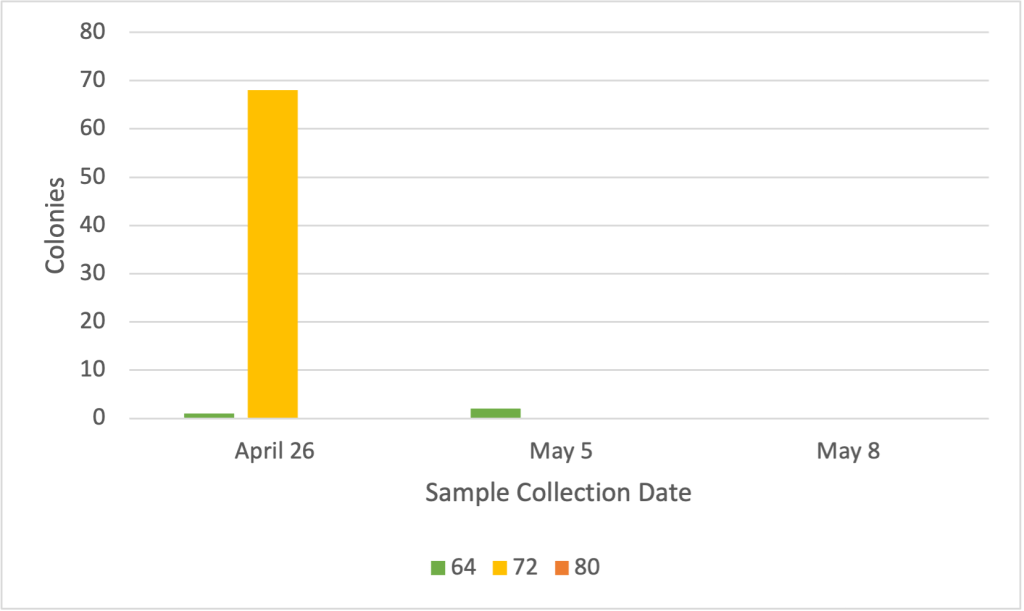
Figure 4. Cell colony counts on TSA with a dilution of 1:100 from three sets of samples taken over 16 days 
Figure 5. Cell colony counts on TSA with a dilution of 1:1000 from three sets of samples taken over 16 days One reason that there might have been more growth from the GTs kombucha samples was that the bottle was shaken and degassed before the dilution, so all of the contents of the bottle were mixed. When taking samples from the SCOBYs that I grew, I did not mix the solution before taking samples. It’s likely that most of the bacteria and yeast were at the bottom of the solution, or in the SCOBY floating on top. and I took samples from just below the SCOBY.
In the previous post I included the graph showing the pH changes of the SCOBYs over time, but I’ll also put it here for reference.
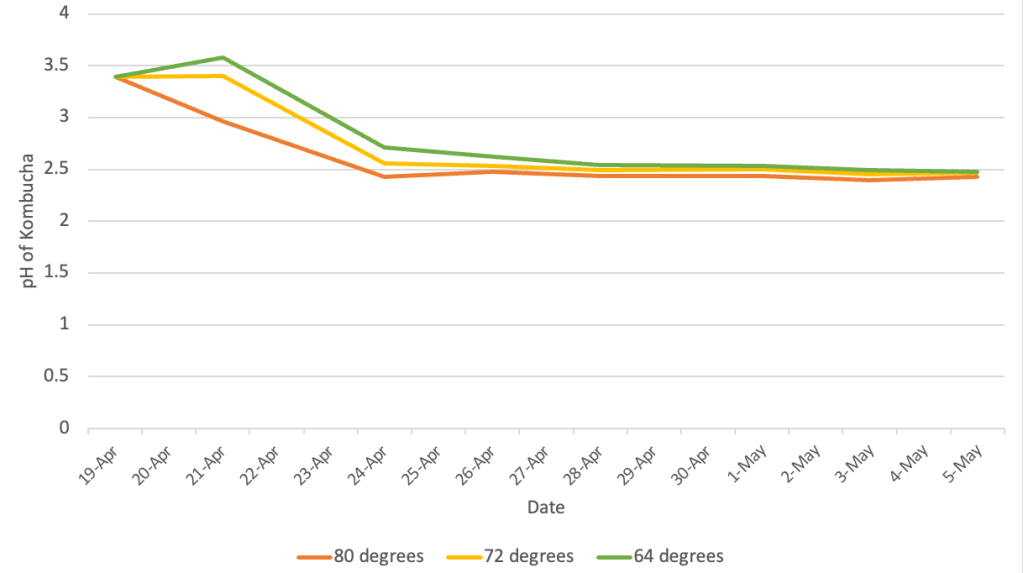
Figure 6. pH of Kombucha in different temperatures over 16 days Conclusion
I believe that this was a successful preliminary experiment to look at the relationship between temperature and SCOBY growth as well as the microbial characteristics. There was no relationship between temperature and microbial growth, but there was an effect on pH. The pH of the SCOBY at 80 °F dropped much faster than the other two conditions (Figure 6).
I believe that if this experiment were performed again in the future, that the SCOBY solution should be mixed before being sampled, to try to include all of the microbiological aspects present in the solution. It would also be interesting to look at a larger range of temperatures, in addition to taking more samples over the course of the experiment. An experiment could also be done specifically looking at the growth of acetic and lactic acid across different dilutions to see if similar results are produced.
-
Brewing a Bale Breaker Field 41 Pale Ale Clone, Part 2.
At the end of the last post I was talking about kegging if “it all went well,” which “it” did, becoming terminal on schedule and without any major off flavors. In this post I’m going to go over the packaging, conditioning, and sensory analysis process. You can read about the recipe research and brewing here.
This beer was by far the most hopped ale I’ve brewed thus far. All in all in my 5 gallon batch I included 3 oz of Simcoe, 1.5 oz of Cascade, 1.5 oz of Loral, and 0.5 oz of Mosaic, for a total of 6.5 oz of hops. Although this doesn’t sound like a whole lot, when it came to kegging my batch it proved to be an absolute nightmare.

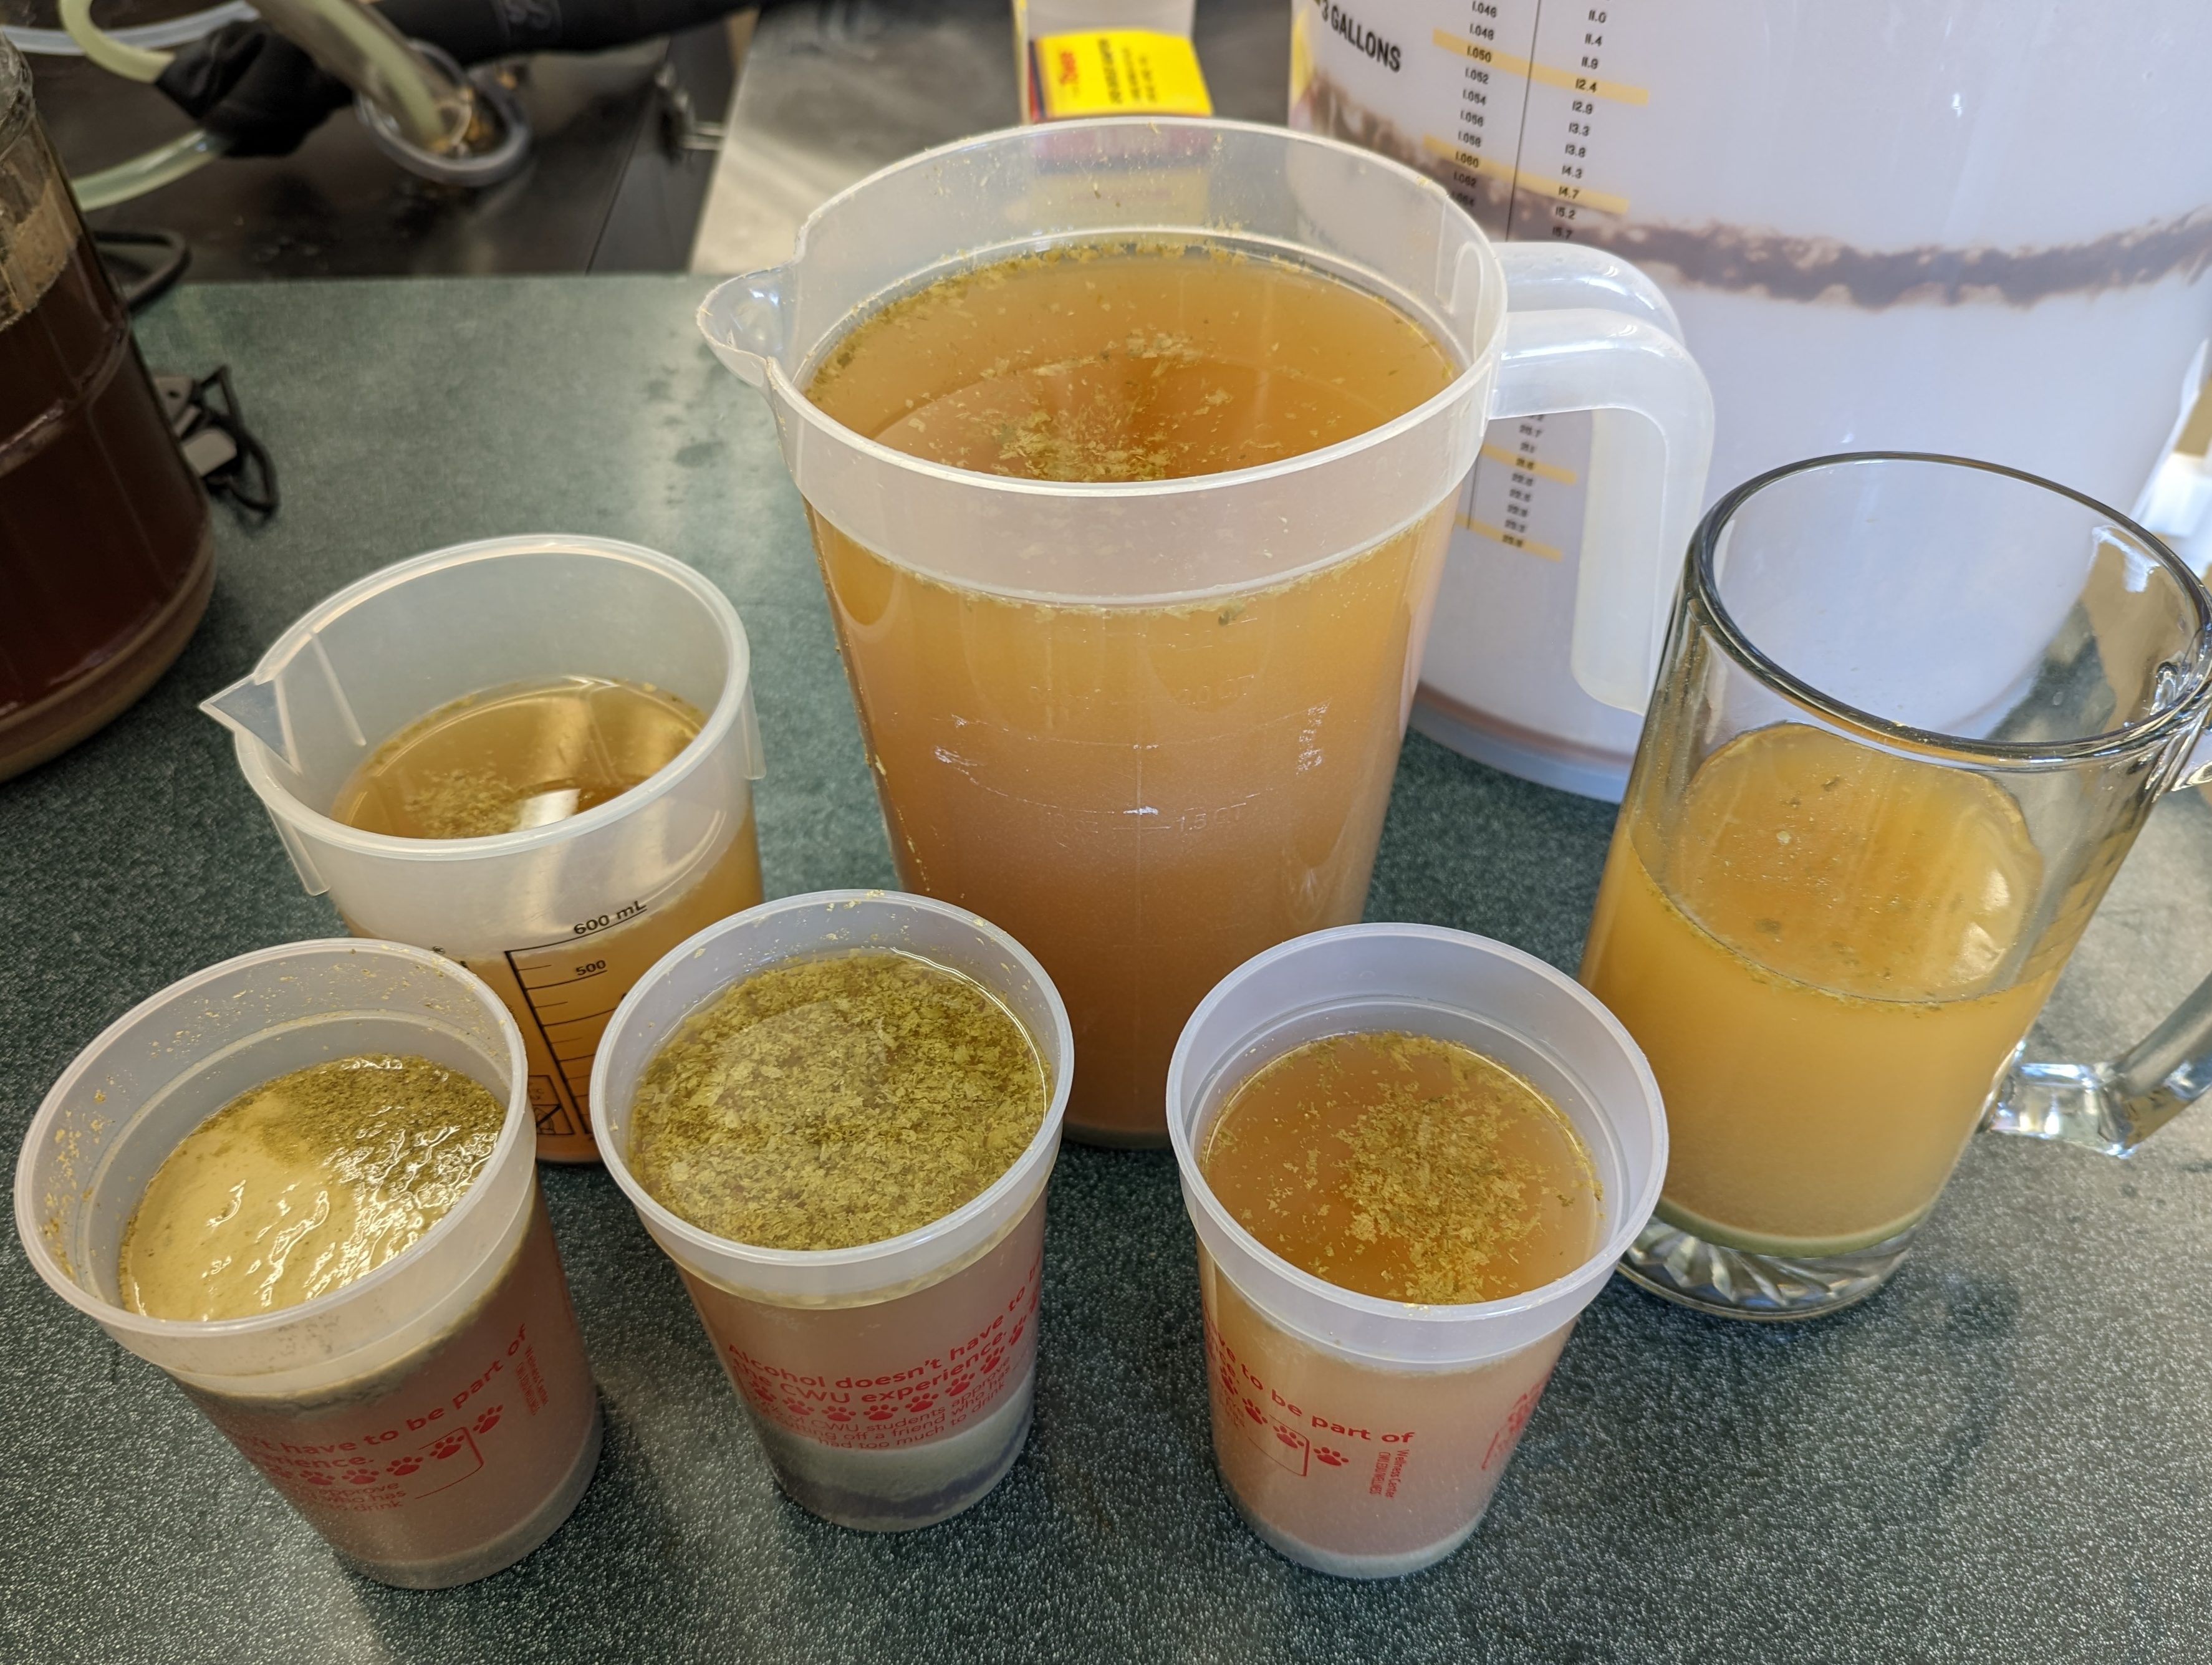
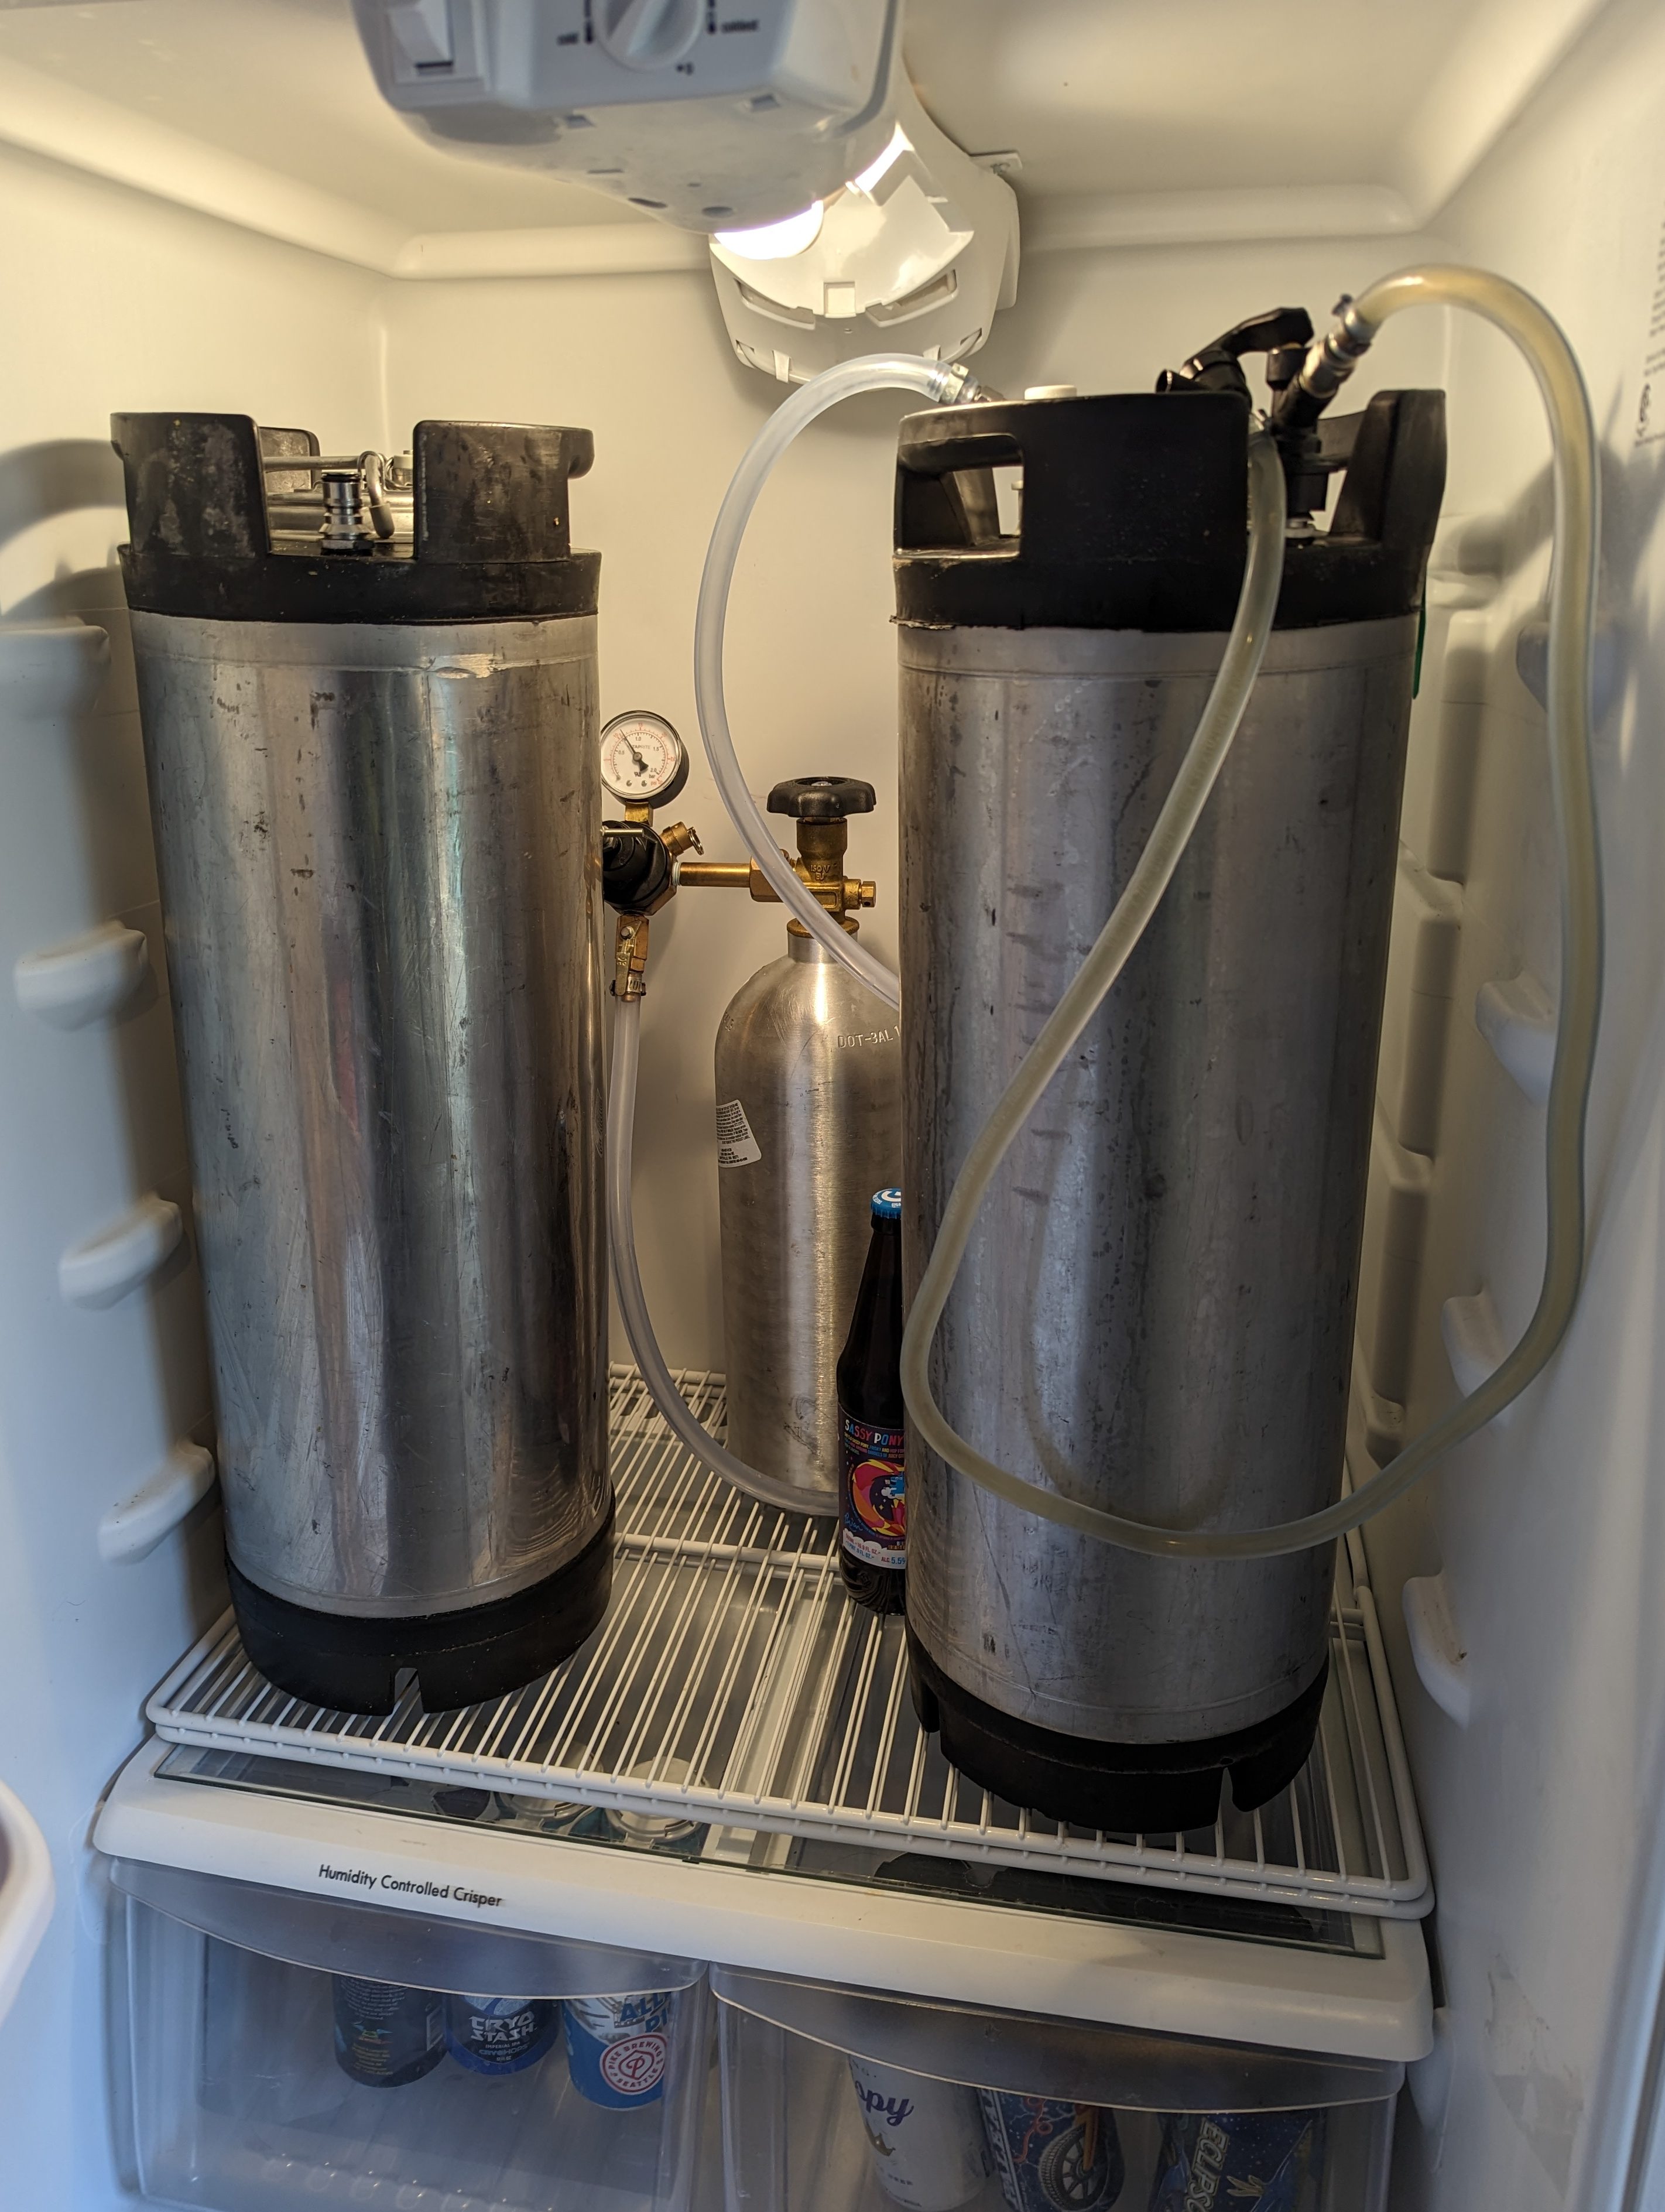
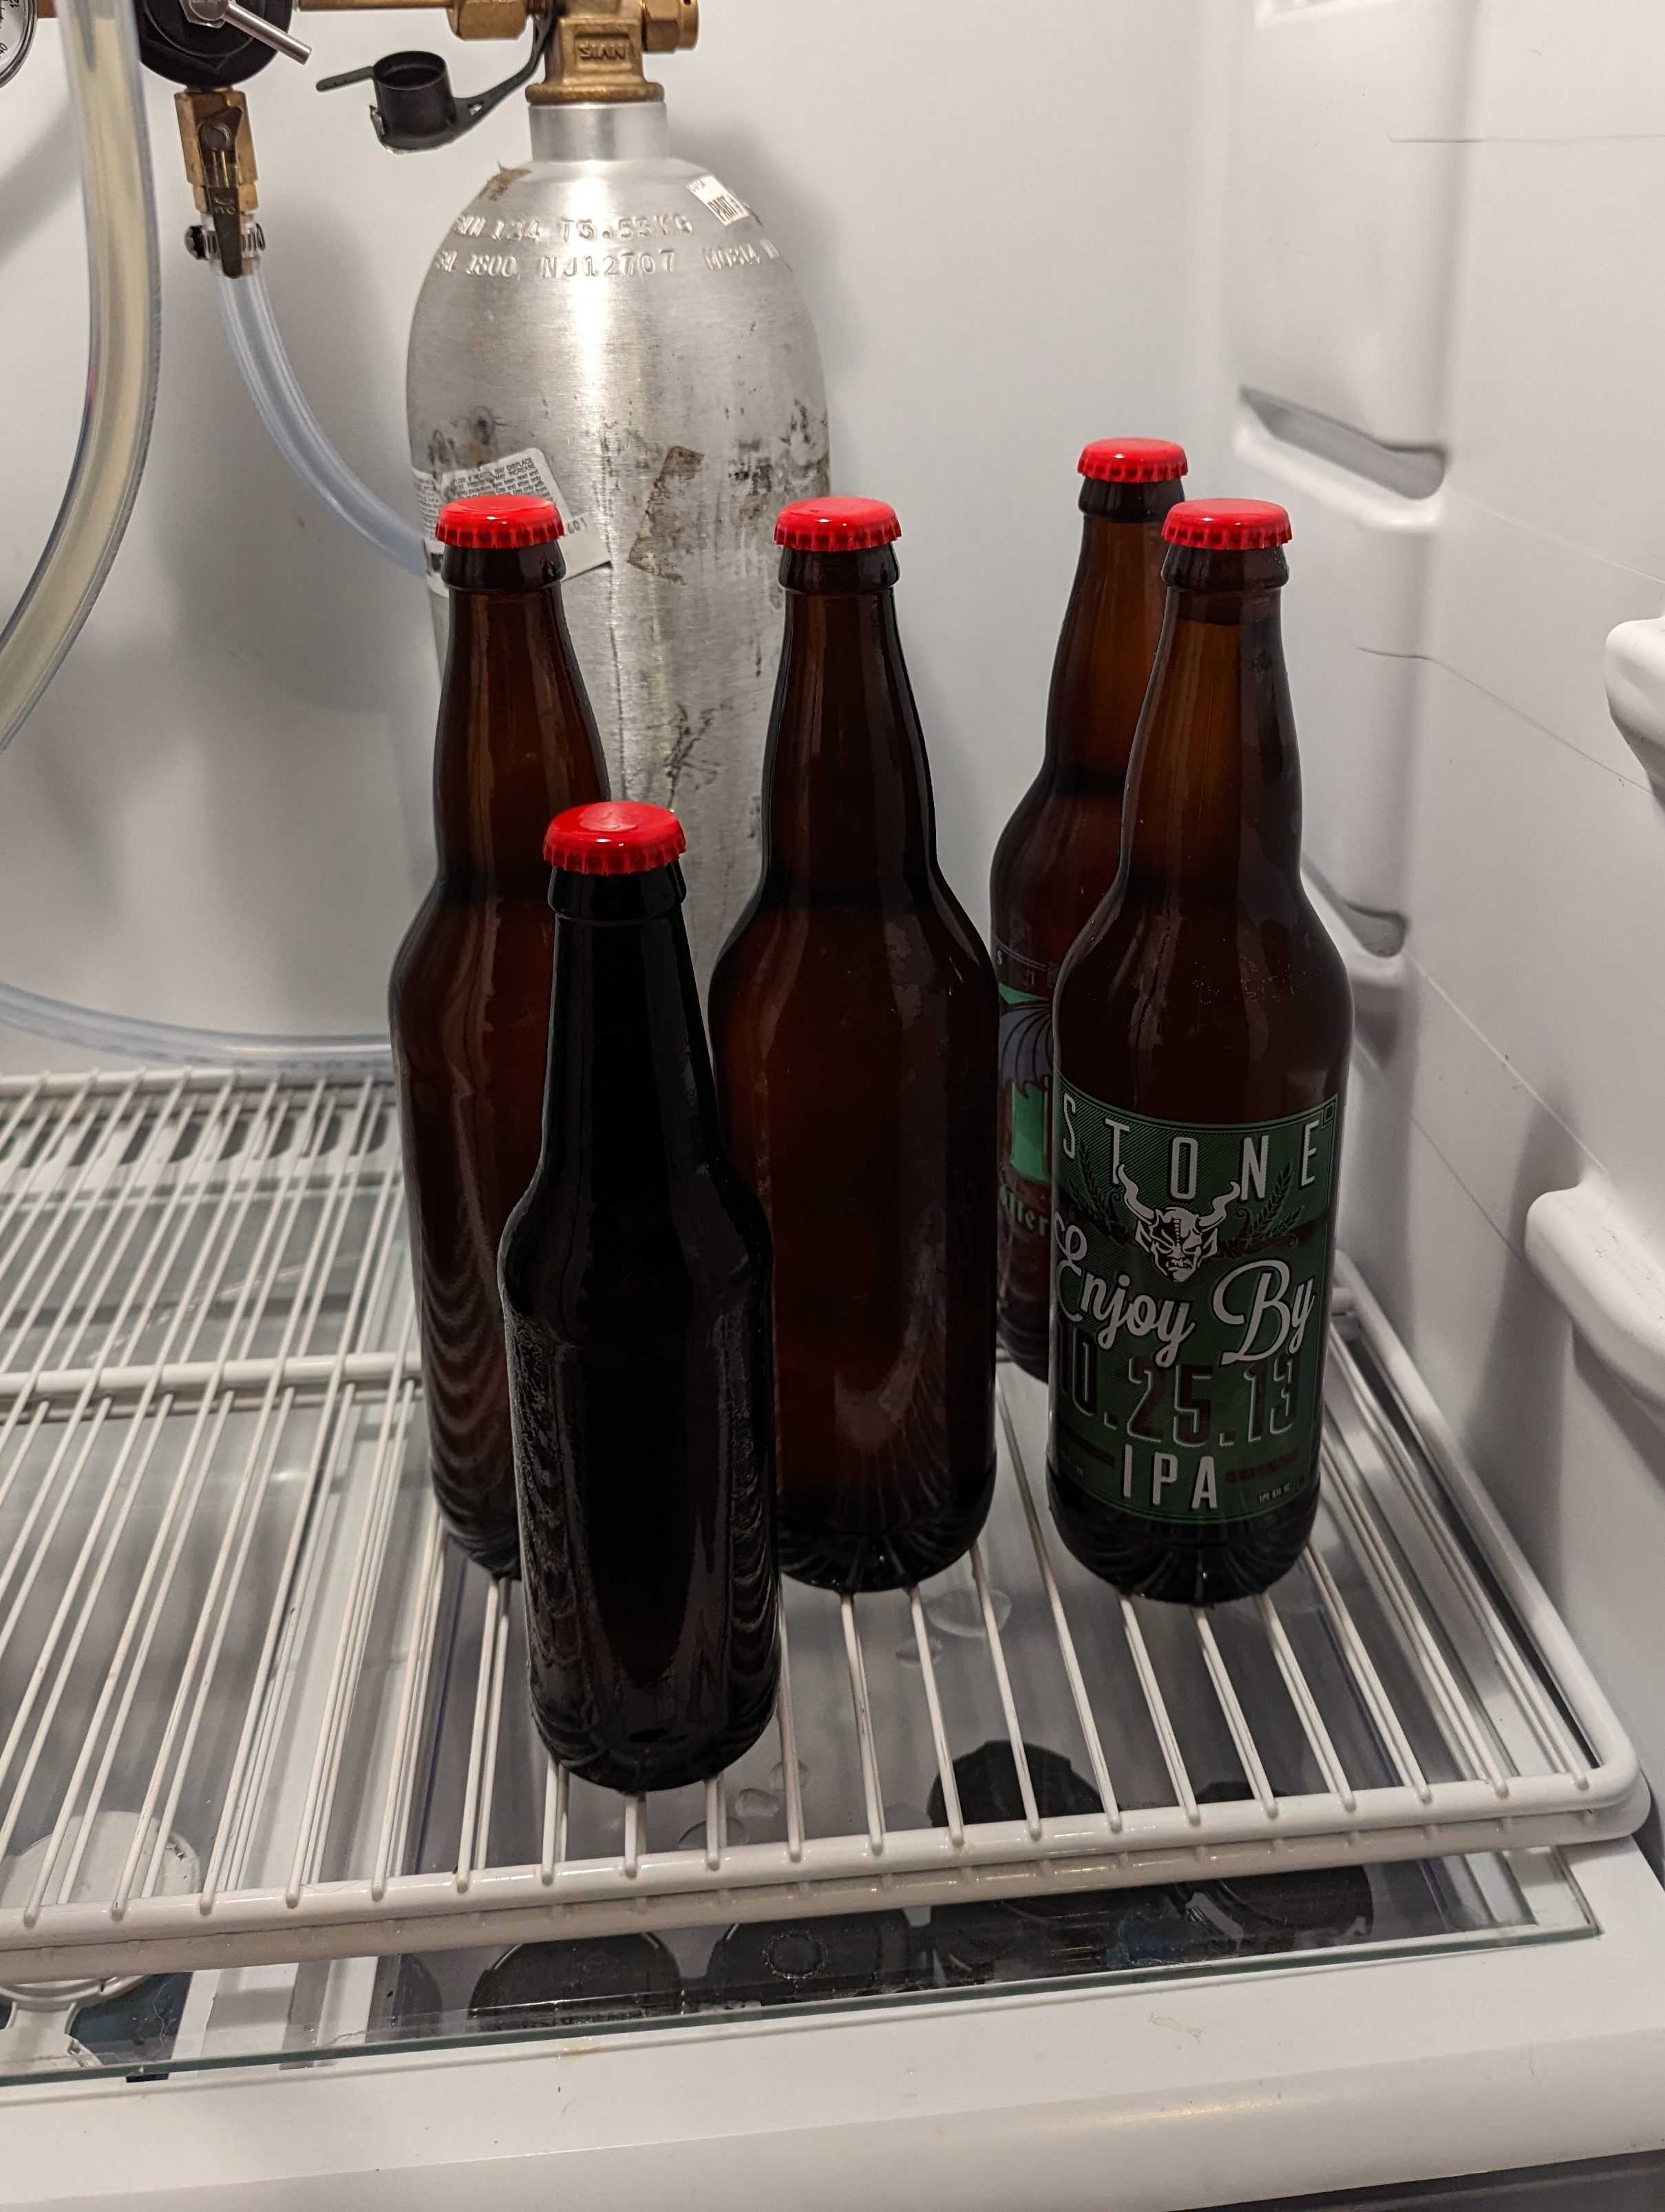
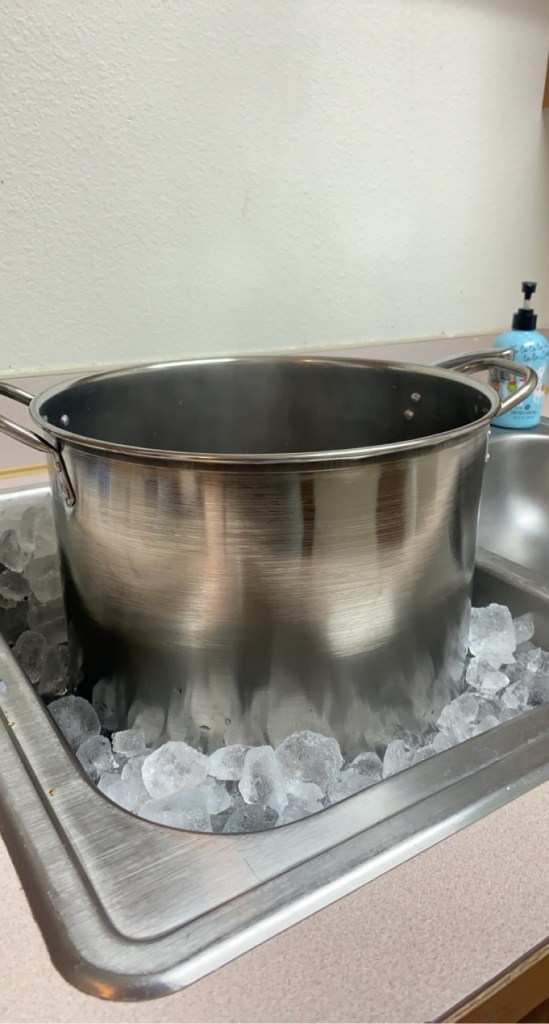
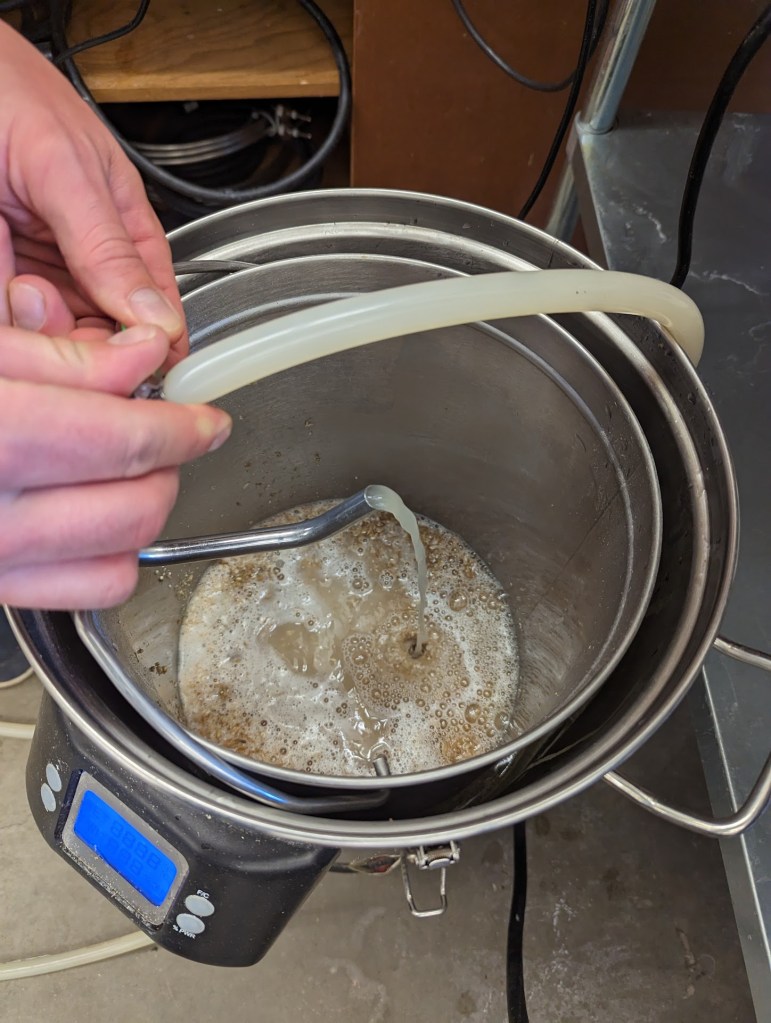
In an effort to reduce exposure to oxygen we set up a closed-loop system where CO2 was pumped into the fermenter as green beer flowed into the corny keg. In principal this sounded good, and it is for shelf life, but it became a frustrating experience when the lines were constantly clogged by hop debris, forcing me to use the CO2 tank to flush the lines so that kegging could continue. Just when I thought things were flowing again it’d become clogged once more, and I estimate I lost about 1.5 gallons of beer when clearing the lines. I definitely want to look into a better way of doing this next time. You can see how much trub is sitting at the bottom of some of these containers.
Eventually my batch was kegged, and it was time to condition. The green beer certainly tasted green considering the amount of suspended hops in the solution, and I was planning on doing tasting in a week’s time. I took the keg home and hooked it up to my CO2 tank in my (aka my landlord’s) spare fridge in the garage. My previous batch on the right was nearly empty, so it was perfect timing to swap my CO2 lines since my regulator only allows for a single connection.
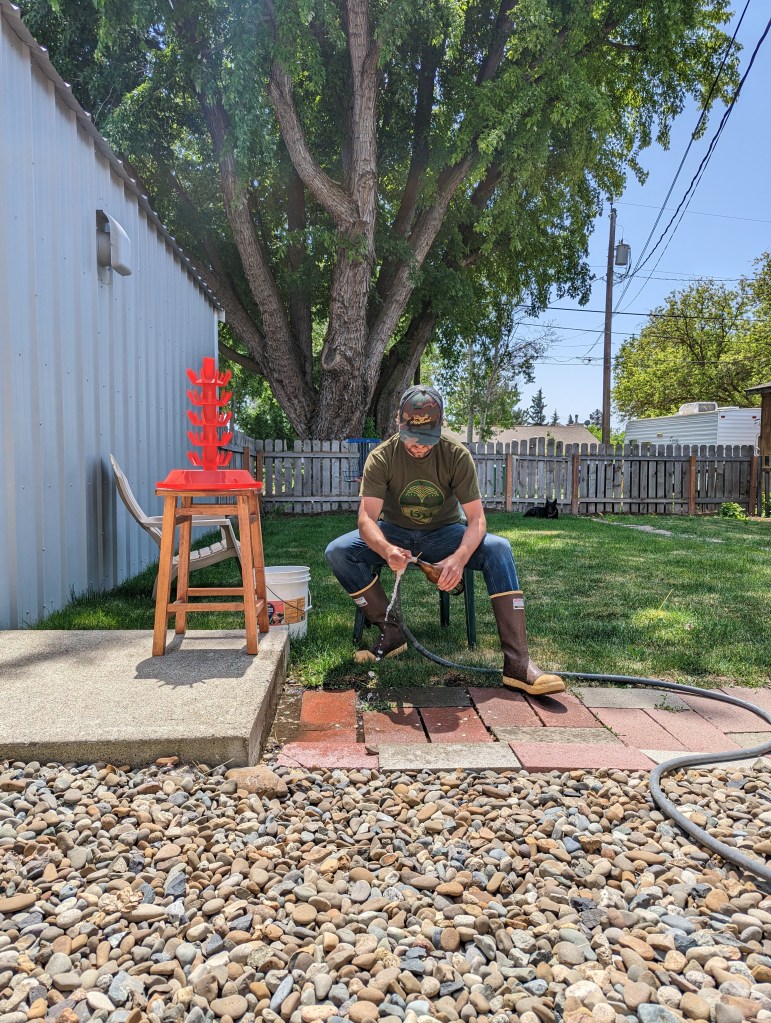
After a little under a week of conditioning time, about 6 days, I started the process of bottling some samples for triangle testing the next day. Any homebrewer is very familiar with the process of cleaning, rinsing, and sanitizing bottles and lines for bottling day, so I set up a comfortable spot in my yard and got to work.
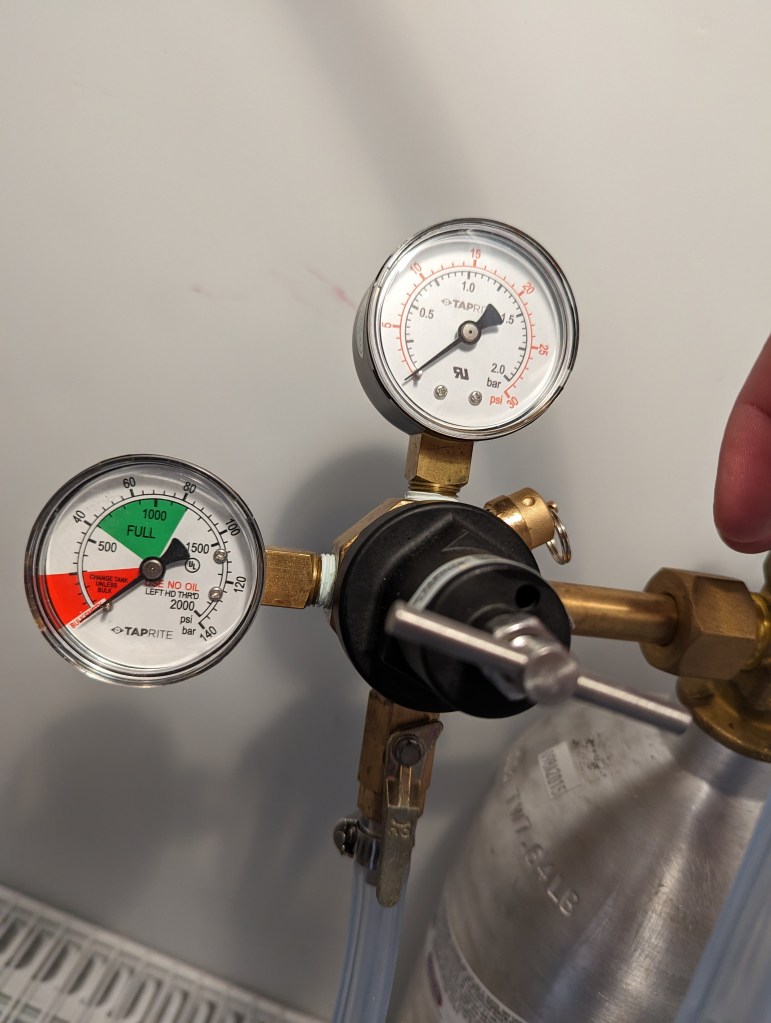
I cleaned my bottles in Powdered Brew Wash, rinsed them out, let them soak in StarSan for about 5 minutes, and then set them on the rack to dry. Ready to bottle, I went to my keg and experienced one of the most frustrating things: an empty CO2 tank. Over the last few days while my batch was conditioning I’d swapped the CO2 line over for carbonation, and I carelessly hadn’t checked on it in about 24 hours, and of course during that time the tank ran dry. This meant although my bottles were ready I couldn’t actually extract any beer from my keg. Luckily a welding supply store was only minutes away, so I dashed over for a tank swap.

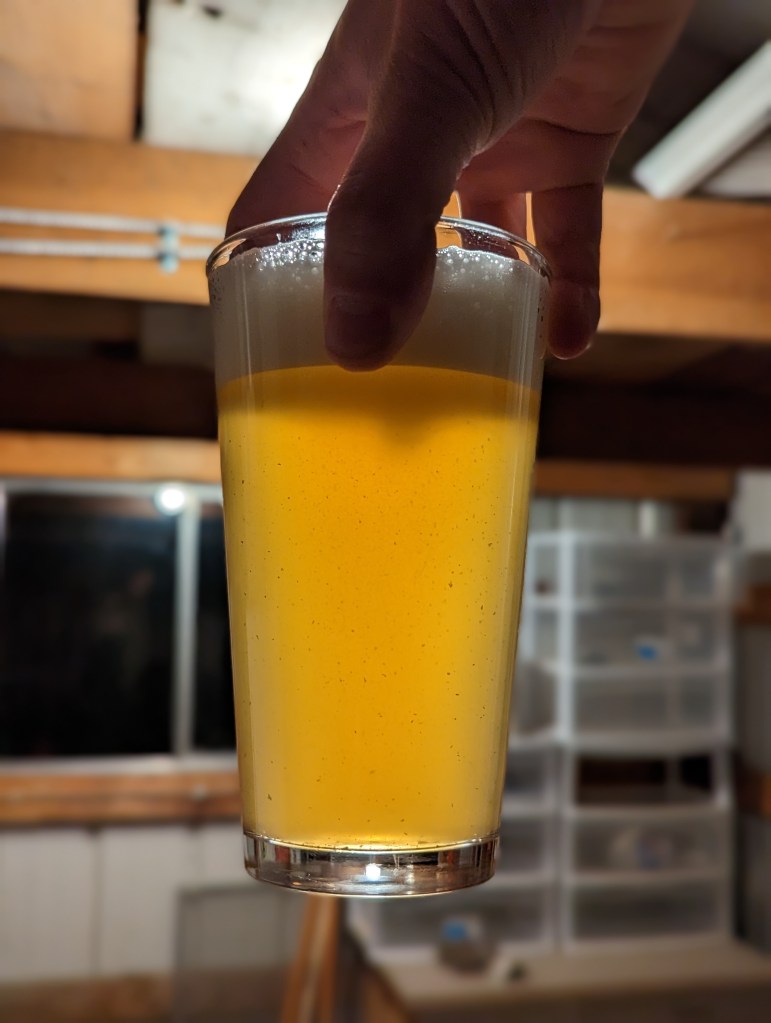
This set me back because I had to wait for carbonation to build, so although my tank was refilled I wasn’t able to start bottling yet. Despite only having 24 hours until triangle testing, I had to wait. I had to head to work, so I decided to check on it that evening when I got home, and if it wasn’t ready I’d just bottle in the morning. Luckily, 7 hours later when I got home, upon tasting, it seemed ready, so I got to bottling. Ideally I think I would’ve given it another week to condition, but I unfortunately didn’t have the time, and you can see the unclarified result in the next photo.

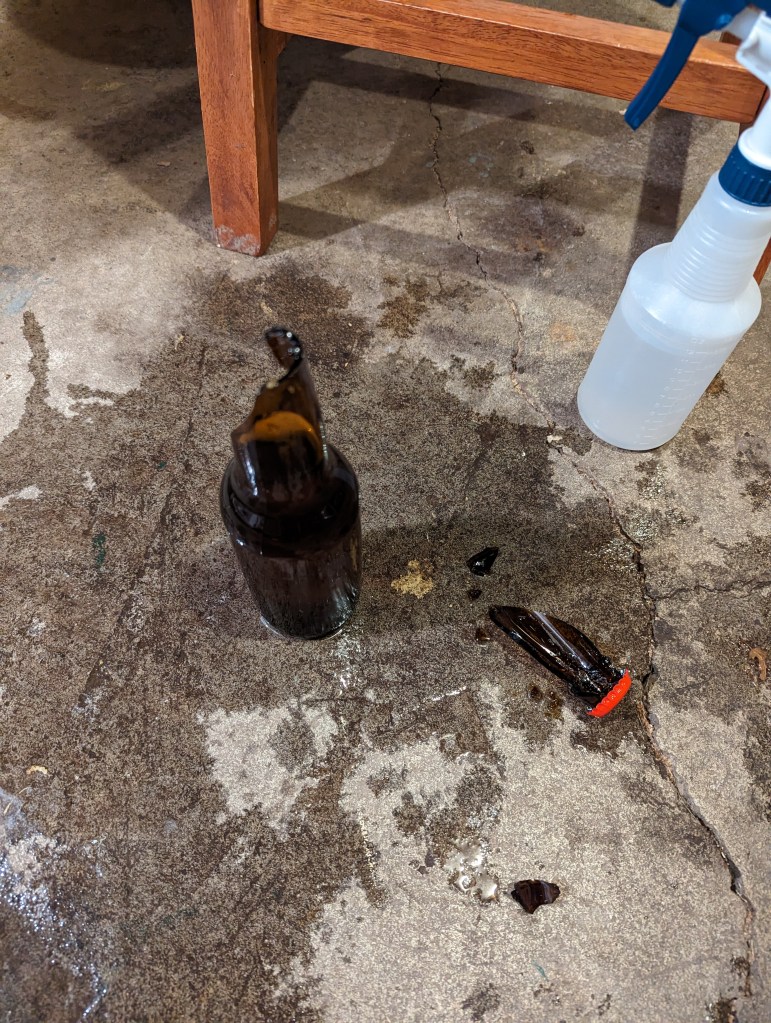
I re-sanitized my bottles, and in the dead of night packaged a few. After hundreds of previous experiences bottling beer I finally broke my first one. That’s how it goes sometimes; you’re on a timeline and you create a mess. Previously I’d only done bottle conditioning, but on this occasion I was bottling carbonated beer directly from the keg, which definitely introduced waste as the beer flowed over as the bottle filled. In order to reduce the amount of oxygen in the bottle I had to allow the foam to spill out, so this is something I’d like to limit next time.
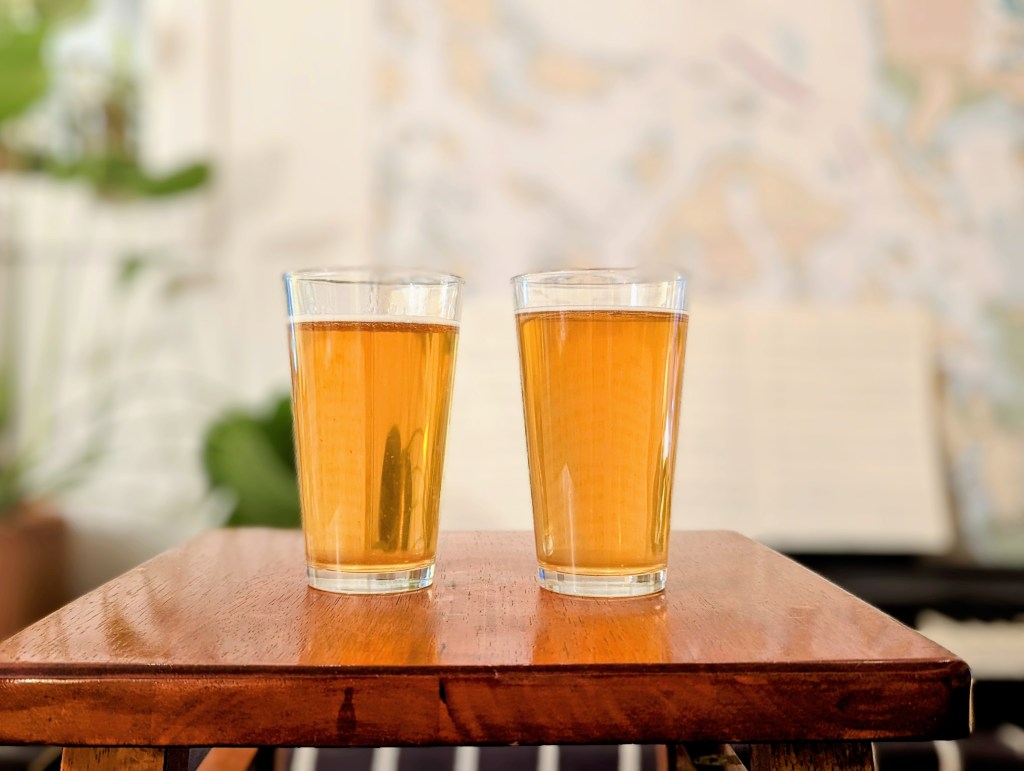
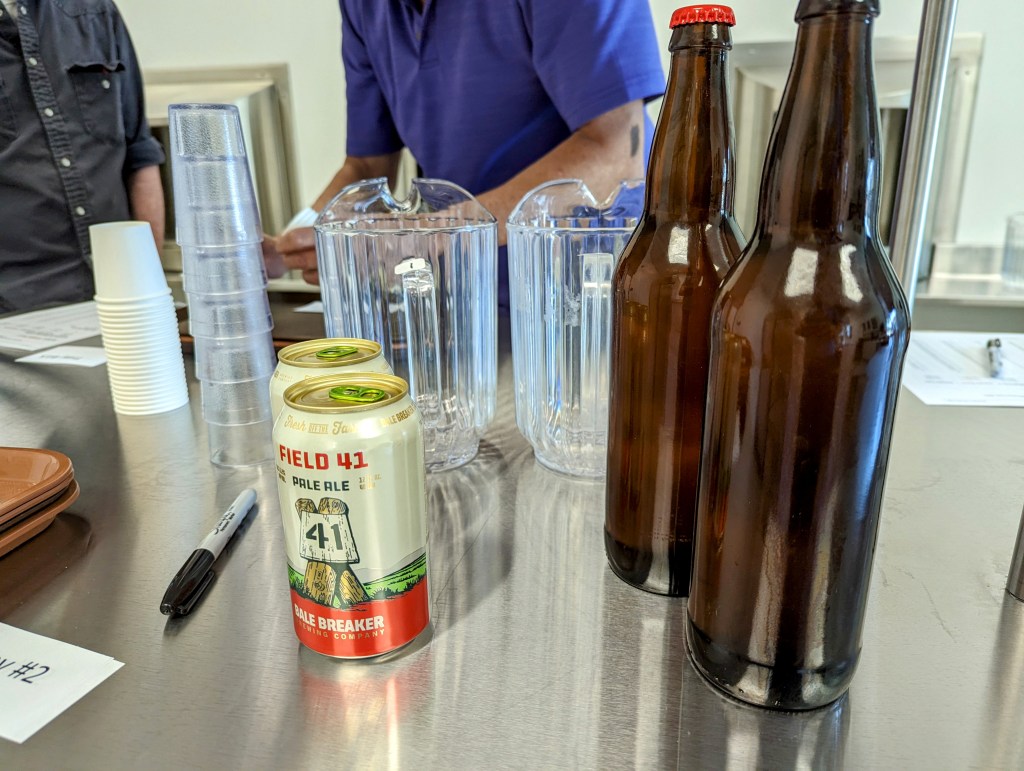
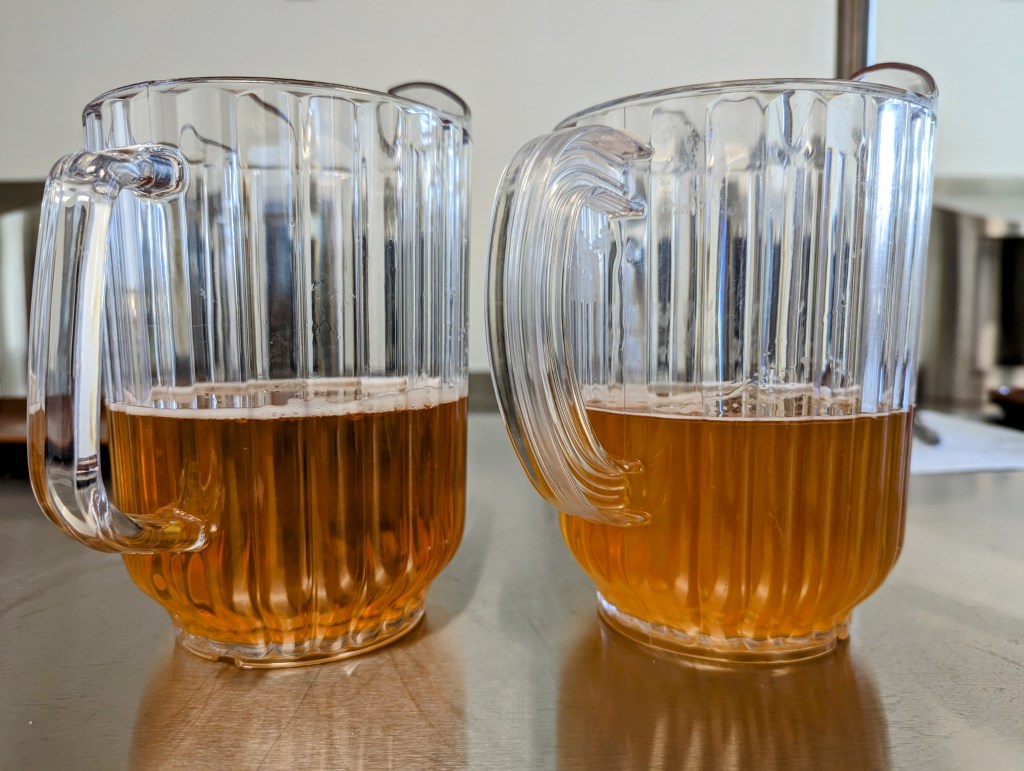
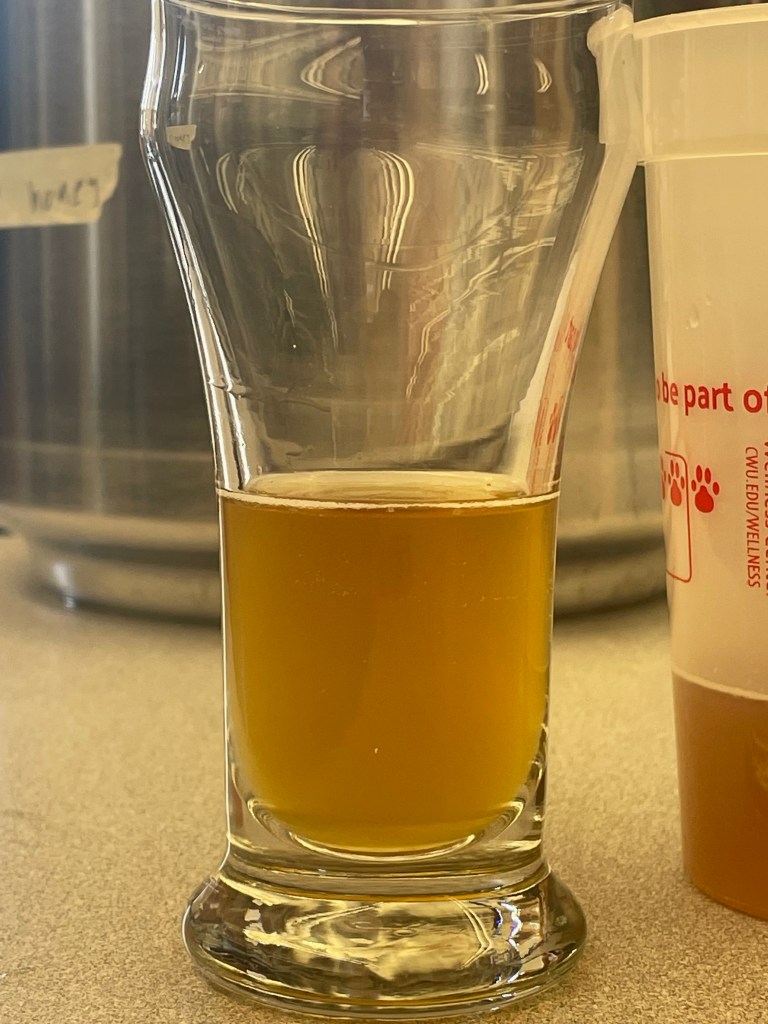
With plenty of beer ready for the triangle test the next day I was set. I slept nervously wondering if the participants would have any problem distinguishing my beer from the original Field 41. The next afternoon I entered the lab and helped set up the test. I poured the original Bale Breaker into the pitcher on the left, and my batch into the pitcher on the right, and immediately I could tell that the color of mine was a little more pale and didn’t quite have the depth of amber that was found in Bale Breaker’s version.
Fortunately, this triangle test was a taste test and not a clarity test, and the clever folks behind the mechanism of this trial had thought about how our visual perception can throw off taste. Within the tiny testing cubicle you’re bathed in red light, limiting the ability to tell what anything looks like from a color perspective. It’s a little bit ominous, but effective.
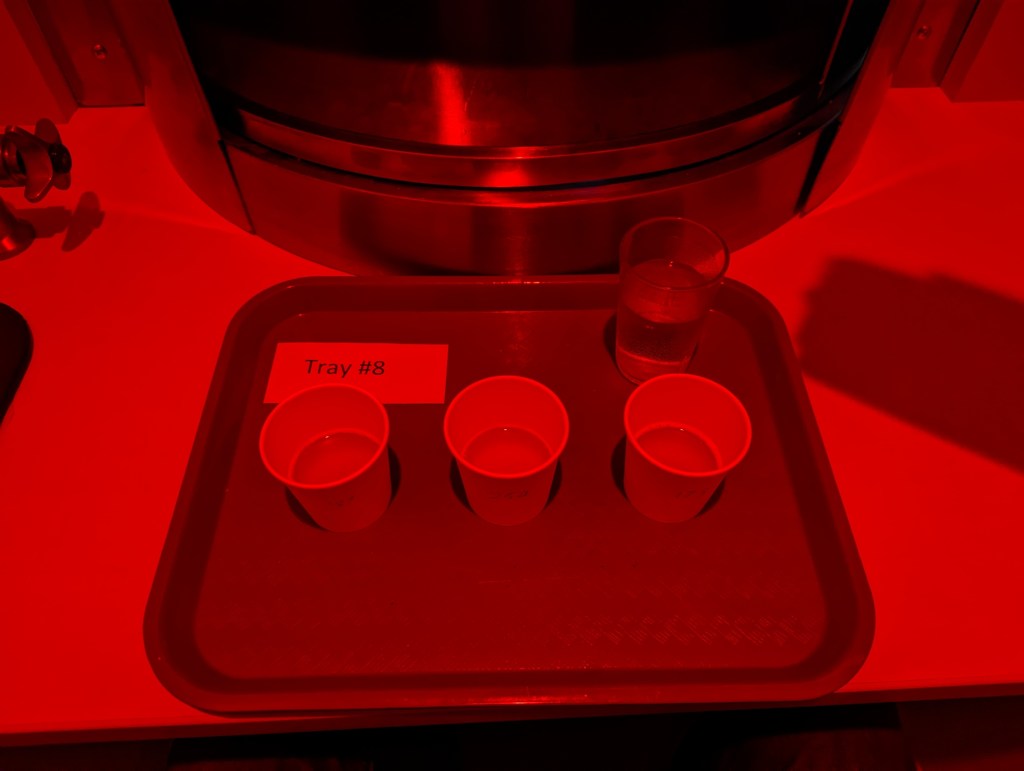
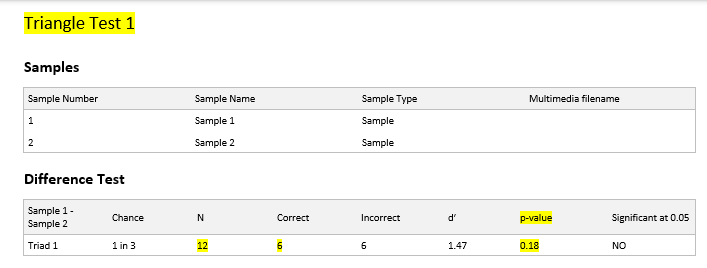
The goal of a triangle test is to pick the “odd man out.” Two of the samples will be the same, and one is different. You taste each one, swishing your mouth with water between each gulp, and then tap your answer out on the nearby iPad, which records all the results. There were 12 participants in this test, including myself, and the test was administered by Dr. David Gee in the CWU Health Science building.
When I sat down for the test I was positive I’d be able to easily pick mine out, but after tasting all three I was pleasantly shocked to discover that I had to go back a few times, and I still wasn’t sure. I’d tasted a little more of a “grassy” flavor and less “fruitiness” in my batch, but it was still difficult to distinguish mine from the Bale Breaker original, and in fact I picked incorrectly, which I’m not sure if that makes me proud of my brewing ability, or ashamed of my sensory analysis ability. I swear I was trying as hard as I could to not skew the results, and I even knew what to look for. I think a panel of experienced analysists would probably result in much different results.
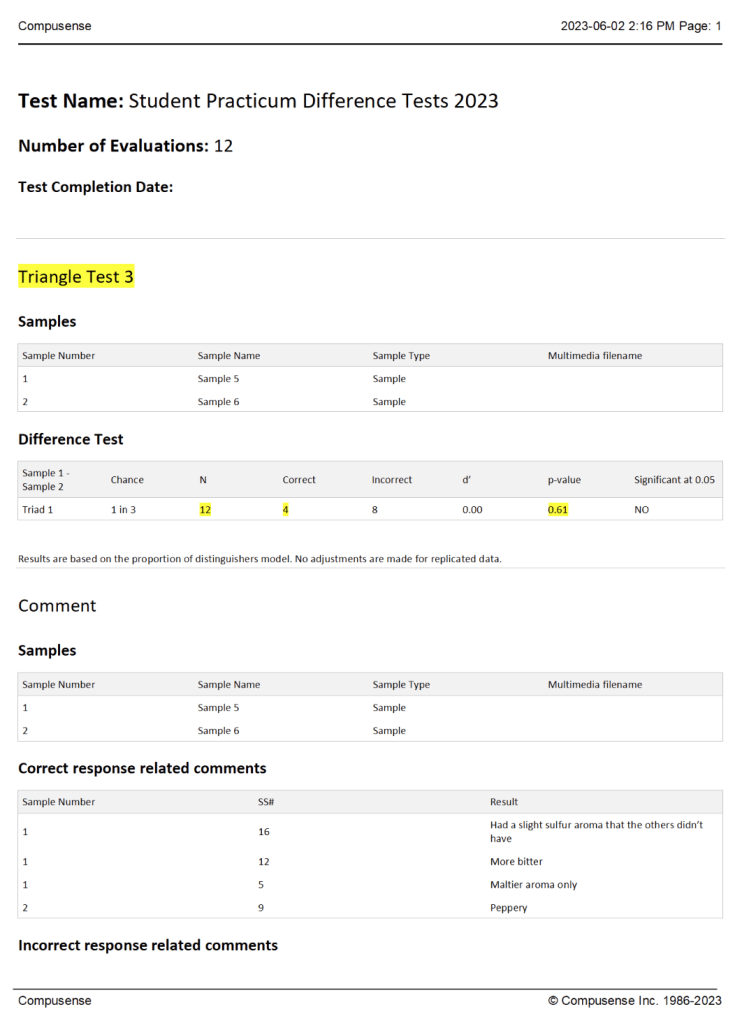
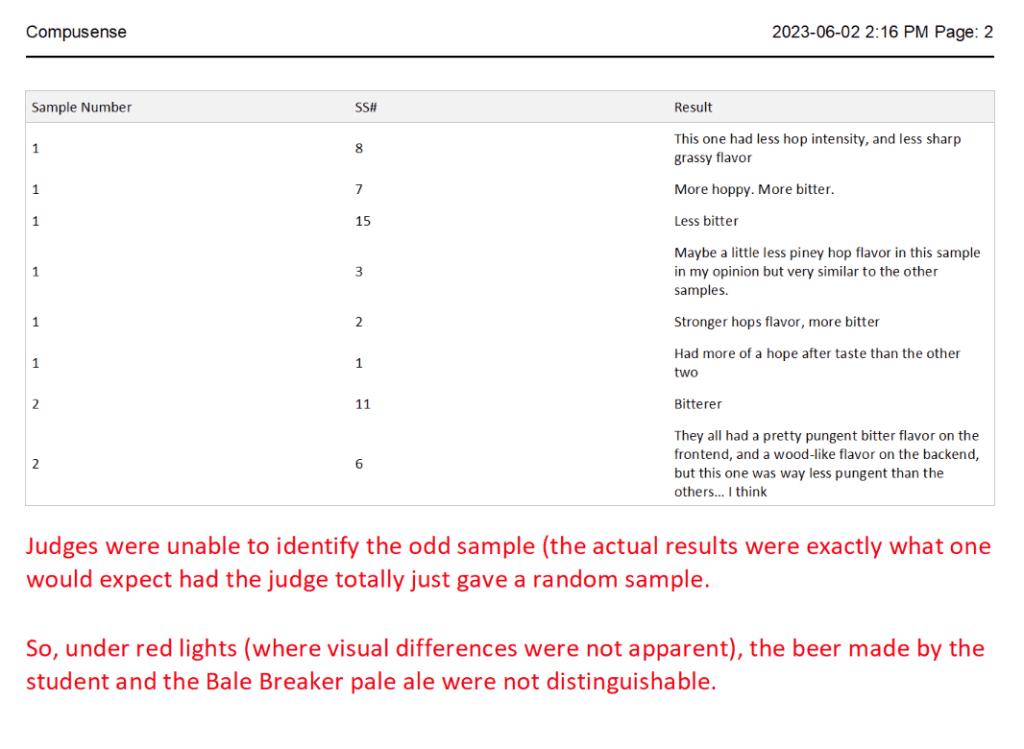
My own experience was corroborated by the rest of the participants. If you tried to pick the “odd man out” by complete random there would be a 1 in 3 chance of getting it right, and that’s exactly the results I got in this test. 4 of 12 participants were able to identify the difference between my batch and the original Field 41. To be clear, the “odd man out” wasn’t always the same beer. Below you can see more details about the test. Sample number 1 (or 5) was Bale Breaker’s Field 41, and sample number 2 (or 6) was mine.
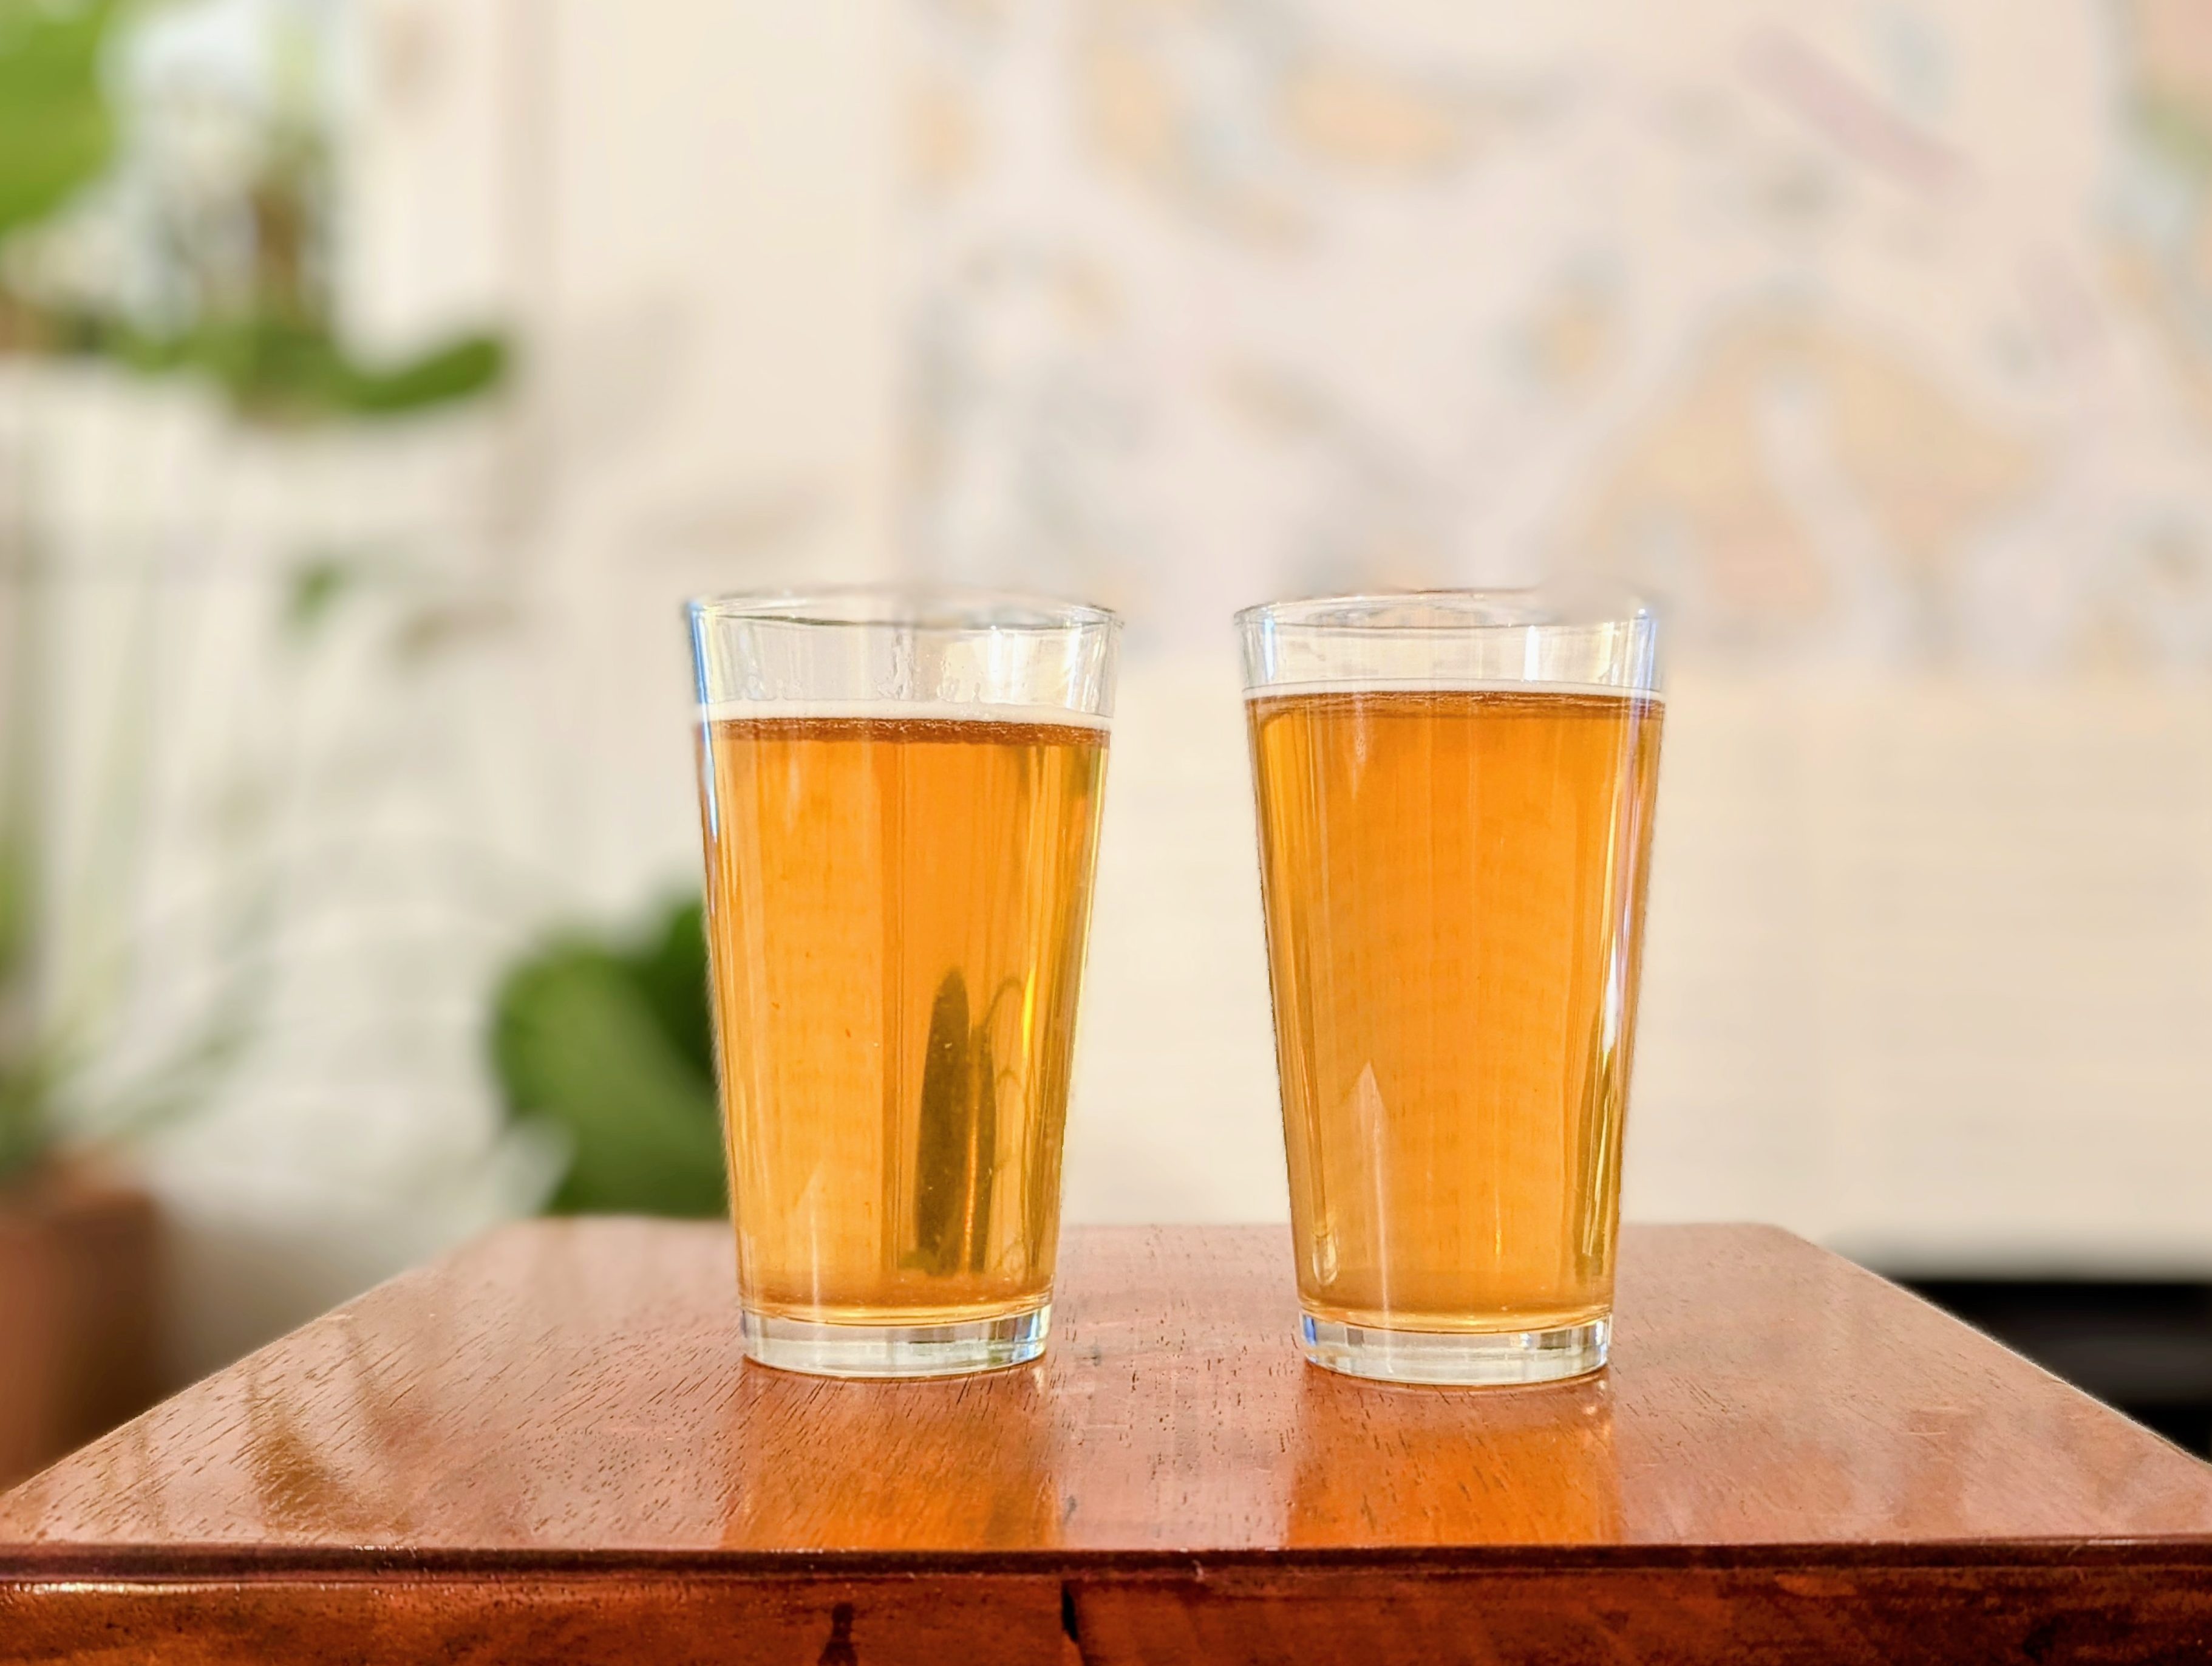
Below, on the left is Bale Breaker’s Field 41, and on the right is my version after sitting in a bottle for a few days. There isn’t definitely a noticeable difference in flavor, but in spirit they are very similar beers. Dr. Gee told me about how light scatter from suspended particles impacts color, and since my beer clarified so much over a few days of resting it actually brought the two much closer together in appearance.
This practicum project was extremely rewarding, and I’m proud of the result. I think I accomplished my goal of creating a serviceable Field 41 clone, and I’m excited to share it with my family in a few weeks when I go to visit. I think it’ll be fun to do a tasting test with them and see if my Dad, a Field 41 tasting veteran of 10 years, can distinguish between the two.
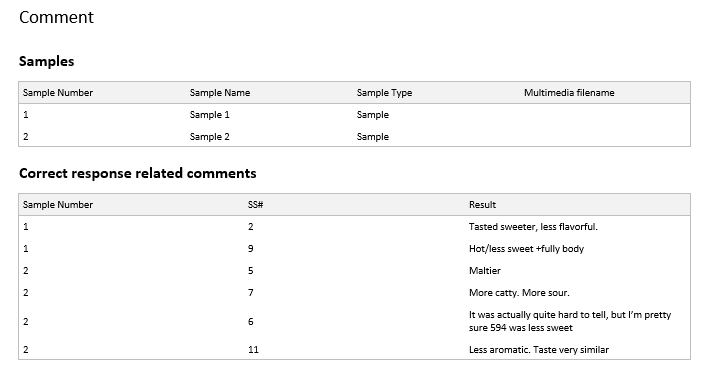
In the future I have a few goals I’d like to accomplish. There are some noticeable flavor differences I’d like to iron out, and based on some of the triangle test comments I think there is plenty of improvement to be made in my recipe. In addition, there was a ton of waste in the kegging and packaging steps, and I’d like to iron those kinks out.
I’d like to thank Brian Logan, the Production and Quality Manager at Bale Breaker for taking time out of his busy day to share their recipe with me, and answer any questions I had. I feel so lucky to receive guidance directly from the source. I’d like to thank Brian LaBore, our Fermentation Technician at CWU, for spending hours with me during brew day, and hours after during dry hopping and kegging, guiding me and putting up with my incessant questions. Thank you to Cole Provence and Dr. David Gee for inviting me to do triangle testing, and thank you Dr. Eric Graham for creating an educational space where learning craft brewing is such a pleasure.
-Miles Koons
-
Sensory: Nature vs. Nurture
Hi there! My name is Kaylan Meyer I am a senior at Central Washinton University. I am currently working on two degrees in Craft Brewing and A Wine Industry Management Specialization, and a minor in business. This quarter I chose to do my Craft Brewing Practicum on sensory, specifically how much we are able to train our sense of smell and taste when it comes to beer sensory. I want to see how much I can hypothetically improve my tasting skills, and truly see whether tasting skills are just a natural gift that some can do better than others, or whether you can train yourself to be the best.
I was really inspired to do this as I have proven myself to be a natural when it comes to wine tasting and being able to smell and taste things about the wine in an in-depth way, and I have really come to have a passion for this process. But, on the other side of things, I am not as good at beer tasting as I would like to be and am looking for a way to do so. What better way than a project where I get to see if continuously training my senses with Hop aroma kits improves my senses in a span of four weeks.
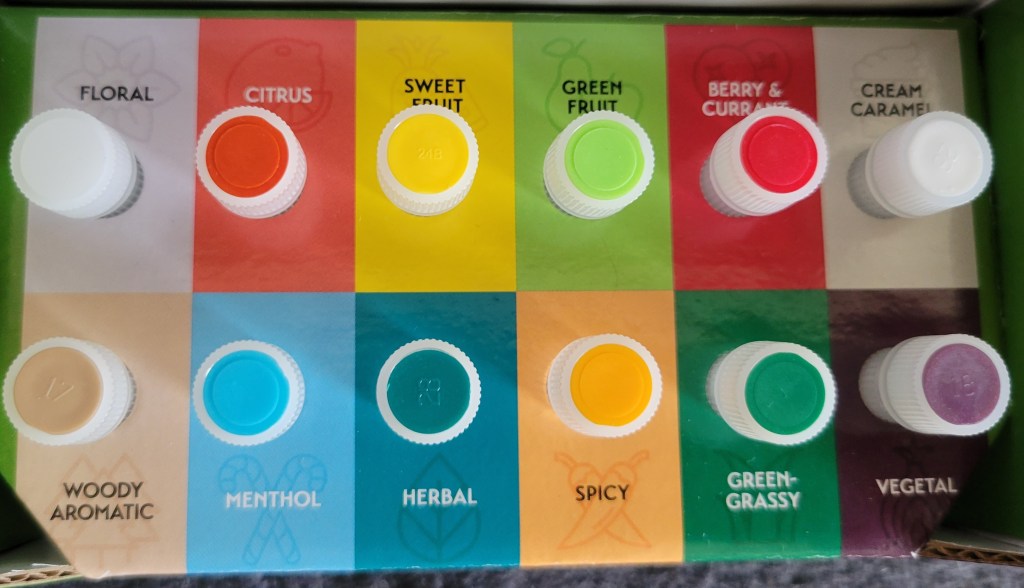
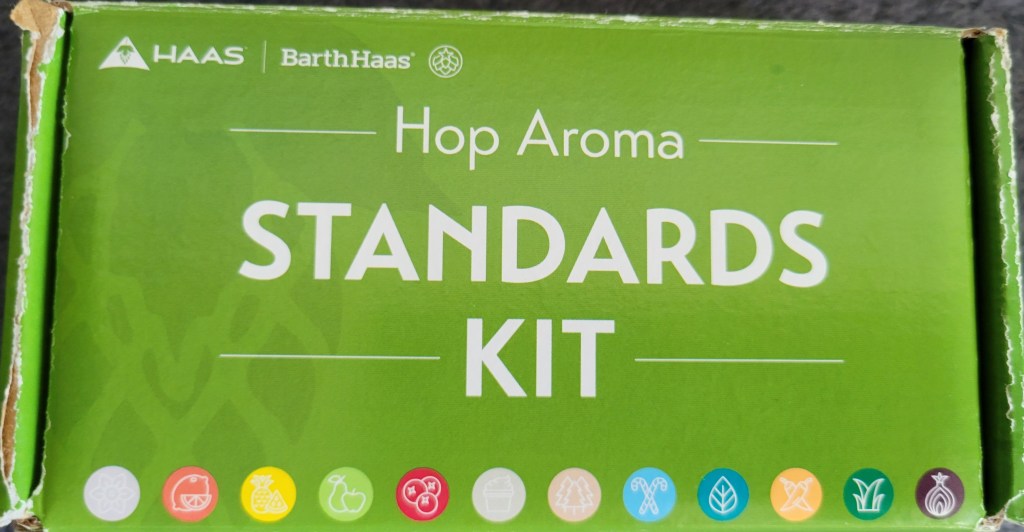
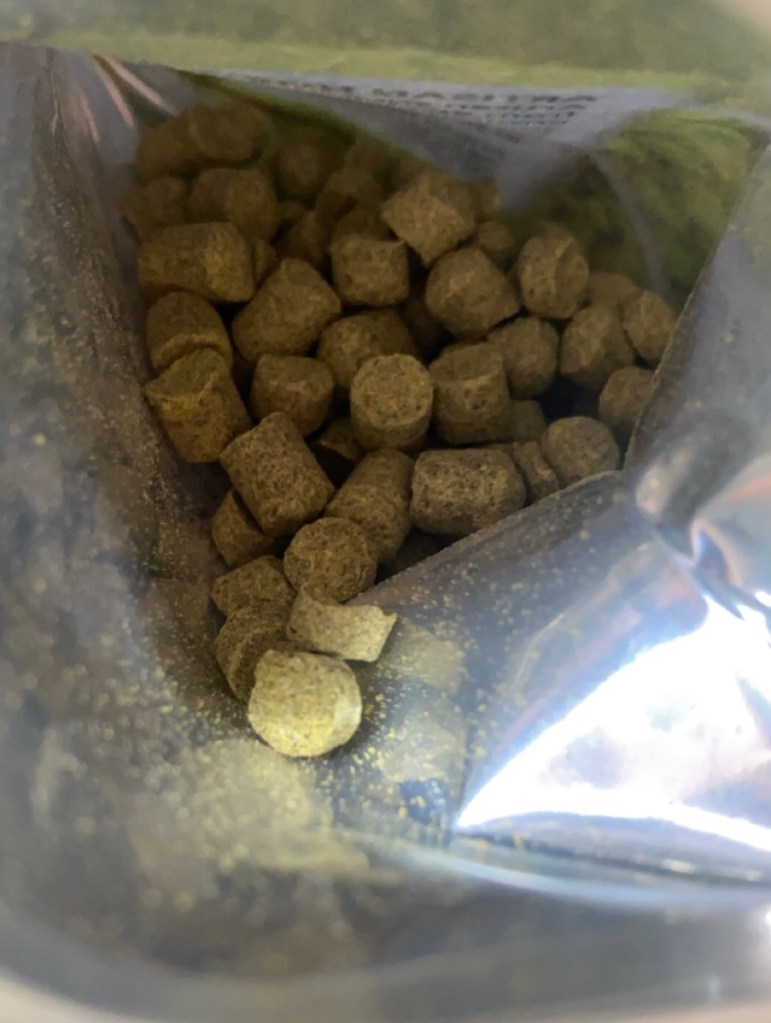
To get started I took to the internet to obtain a hop aroma kit from Haas in Yakima. This is what I used to train my senses throughout this project smelling through their twelve scents all created to mimic various hops and flavors within beer.
After obtaining the main ingredient for my research I needed a baseline to start with so to compare my results to. I chose to do a tasting of four different beers, filling out a tasting sheet for each one to see where my tasting skills currently are.
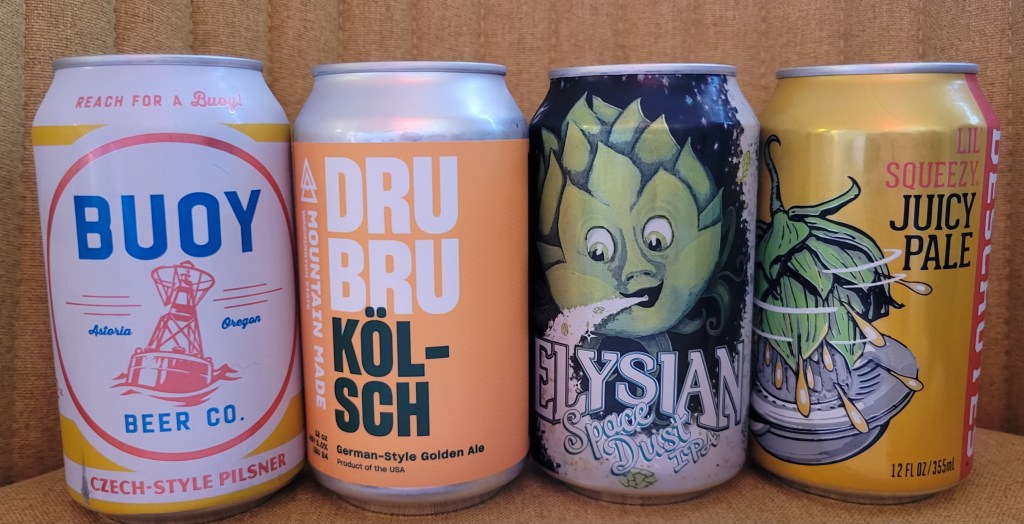
Beers from left to right:
1. Bouy Czech-style pilsner.
2. Dru Bru Kolsch
3. Elysian Space Dust IPA
4. Deschutes Lil squeezy juicy pale
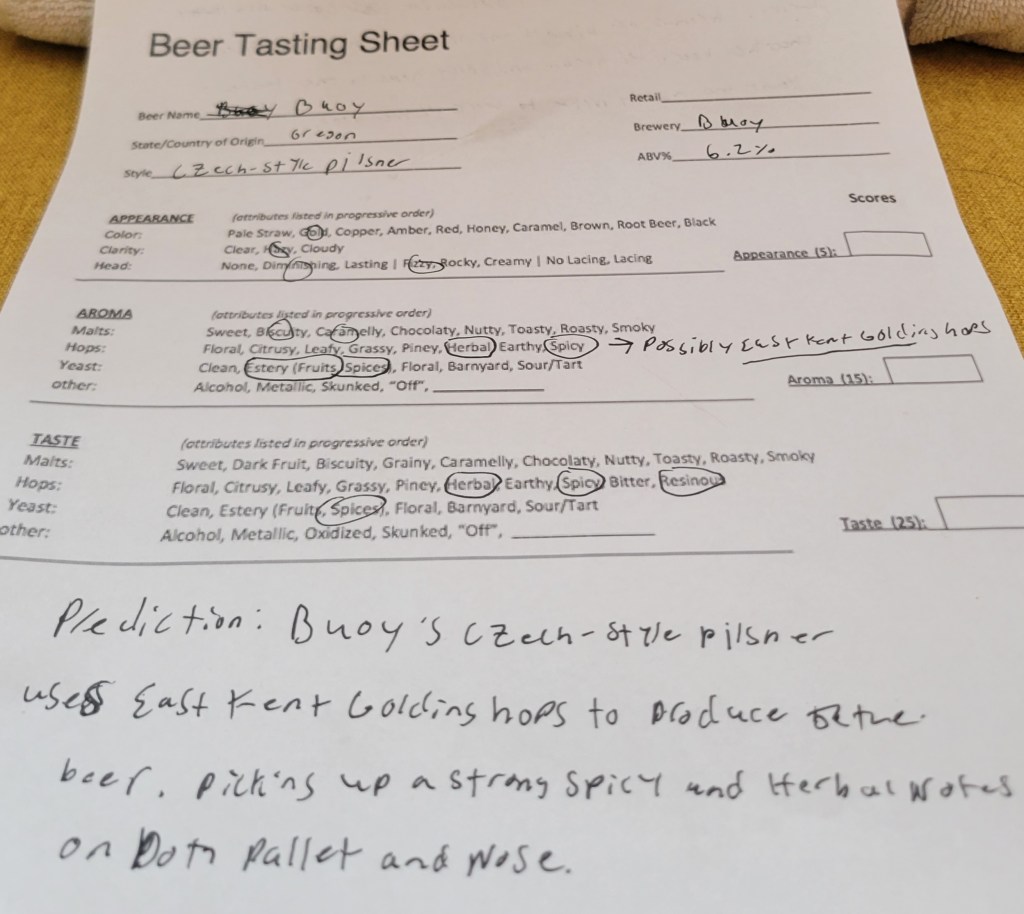
Tasting notes for Bouy’s Czech-style pilsner before using hop sensory:
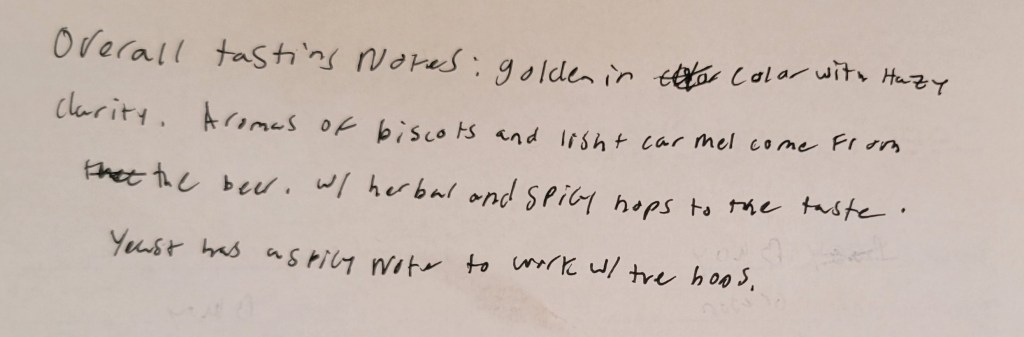
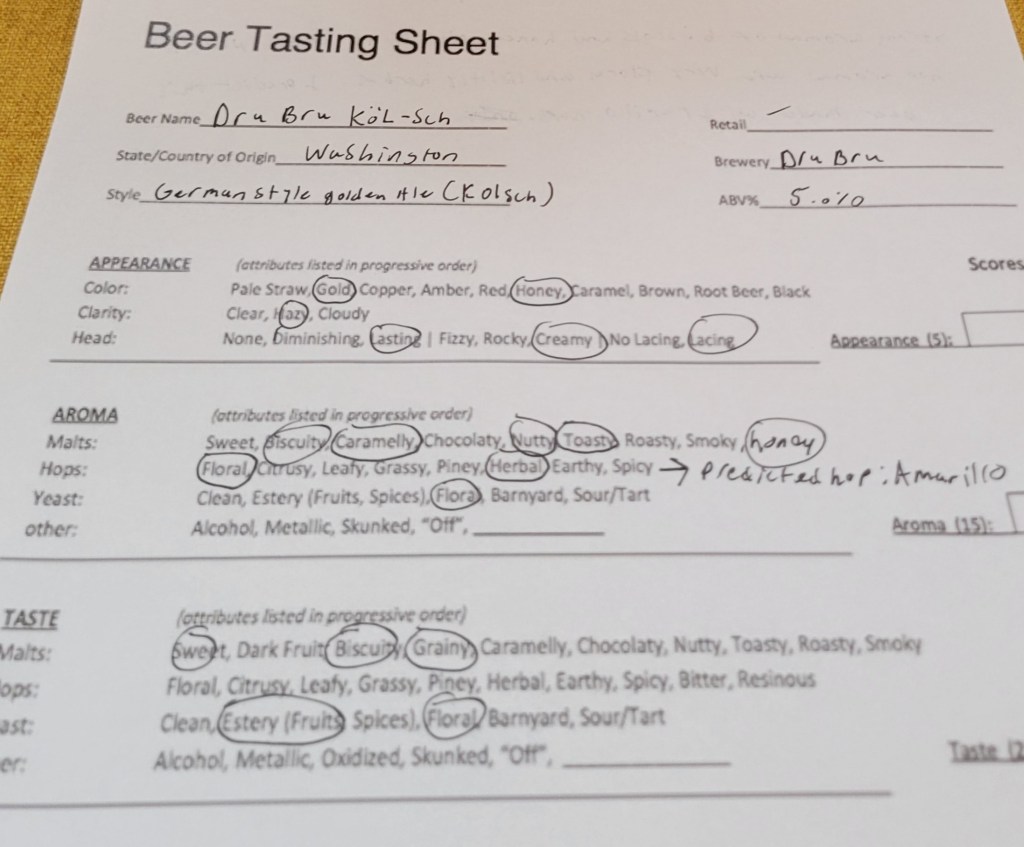
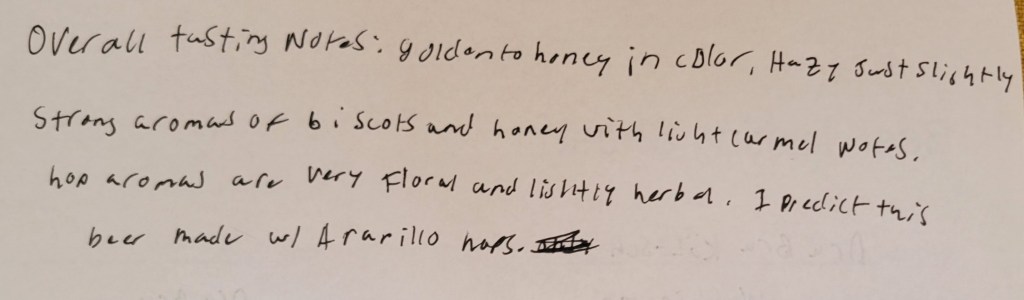
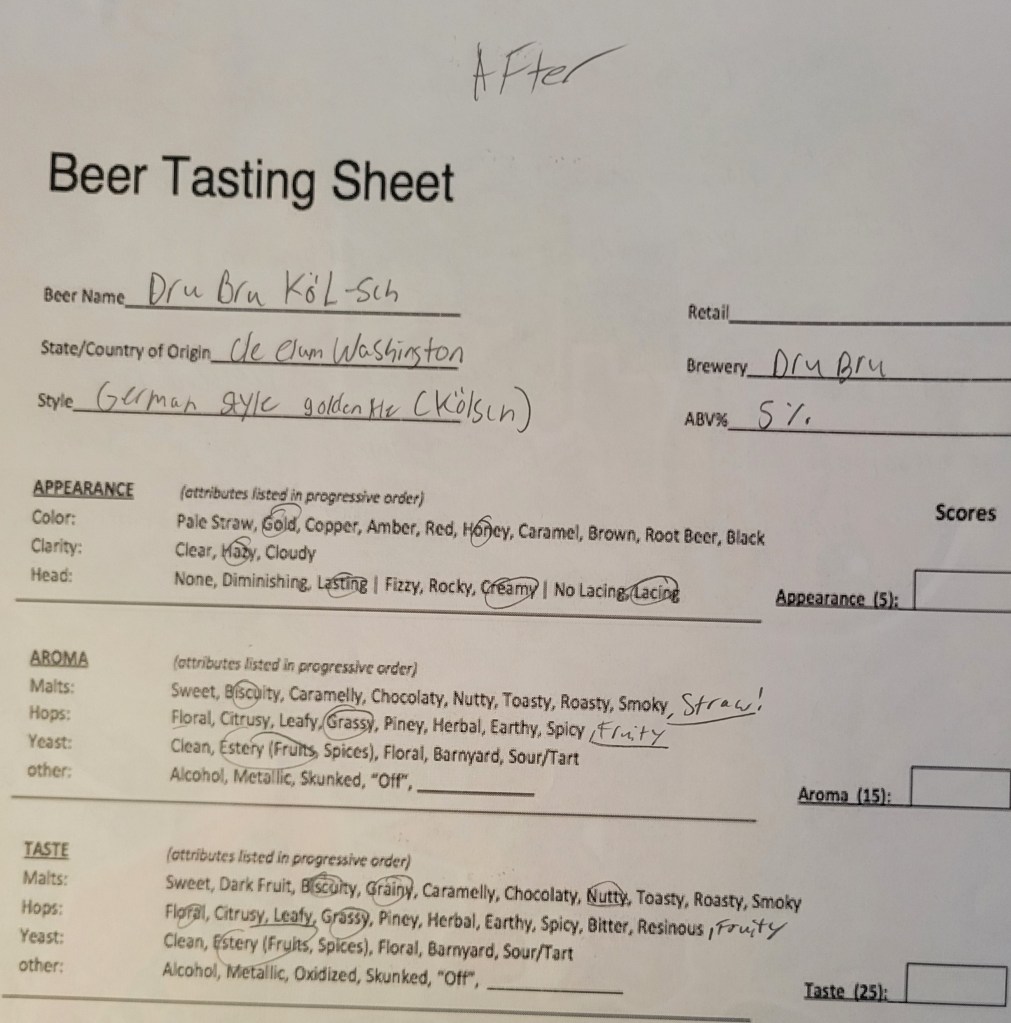
Tasting notes for Dru Bru’s Kolsch before using hop sensory:
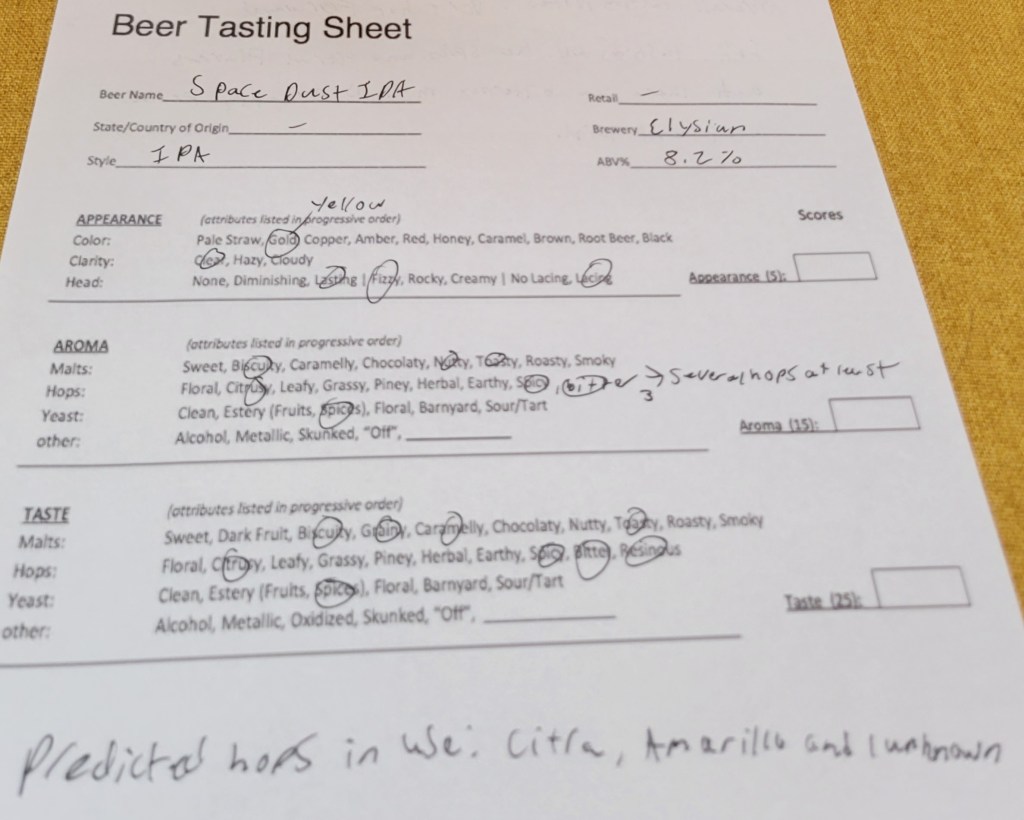
Tasting notes for Elysian Space Dust IPA before using hop sensory:
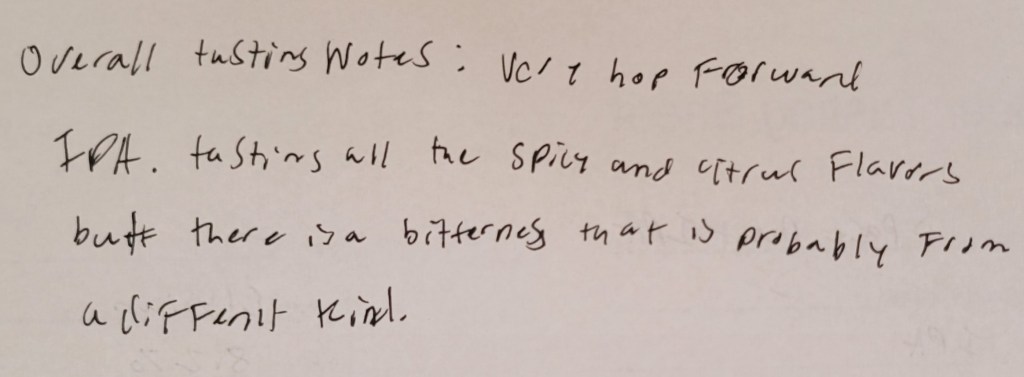
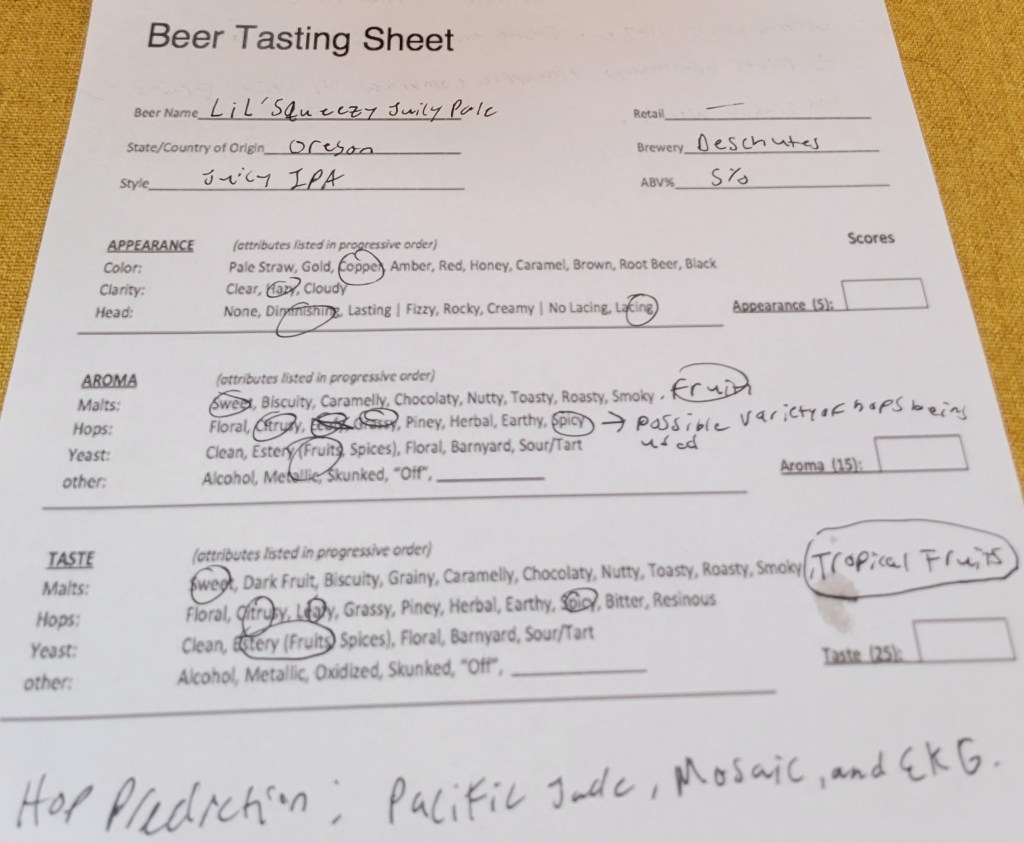
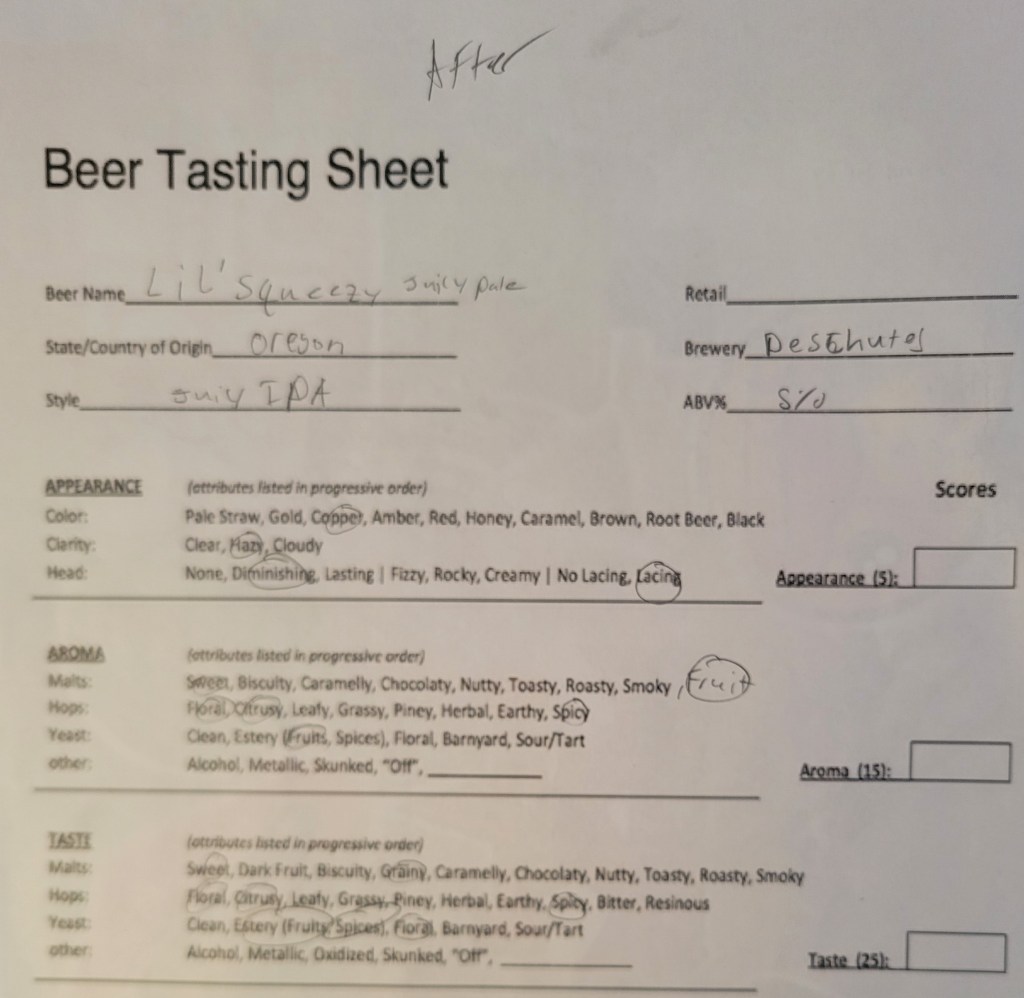
Tasting notes for Deschutes Lil’ Squeezy Juicy Pale before using hop sensory:
Ever since my tastings I have been taking about five to ten minutes a day smelling through the Haaz sensory tasting kit in hopes to train my mind and sense of smell to recognize those types of smells easier in beer.
Final Taste Tests After Using Hop Kit’s:
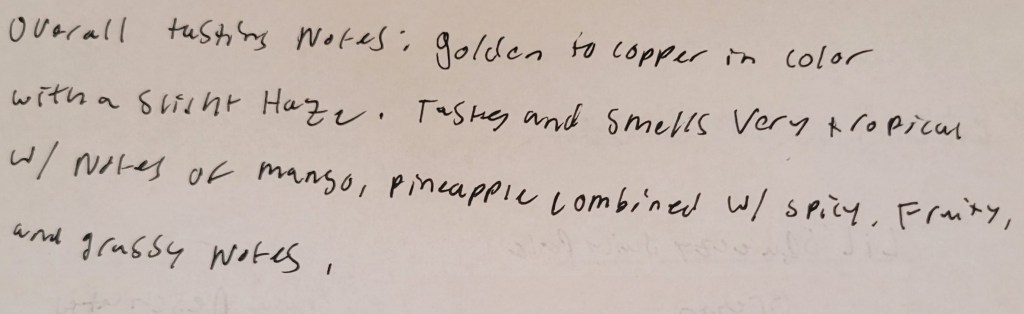
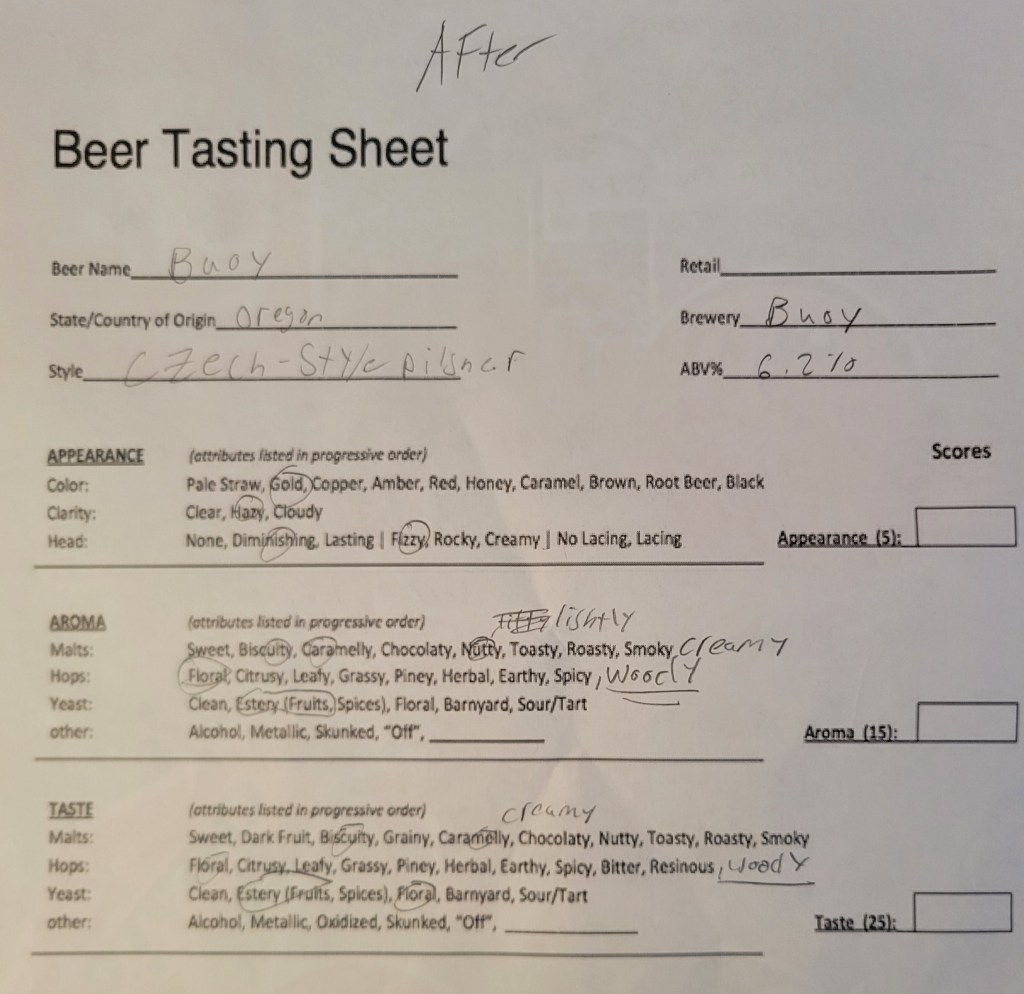
Tasting notes for Bouy’s Czech-style pilsner after using hop sensory:

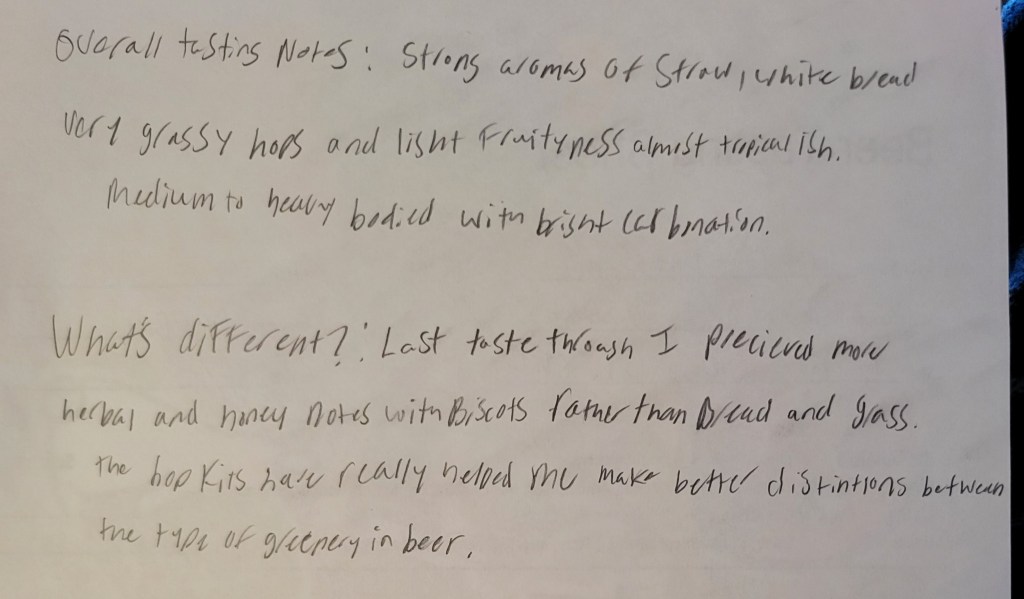
Tasting notes for Dru Bru’s Kolsch after using hop sensory:
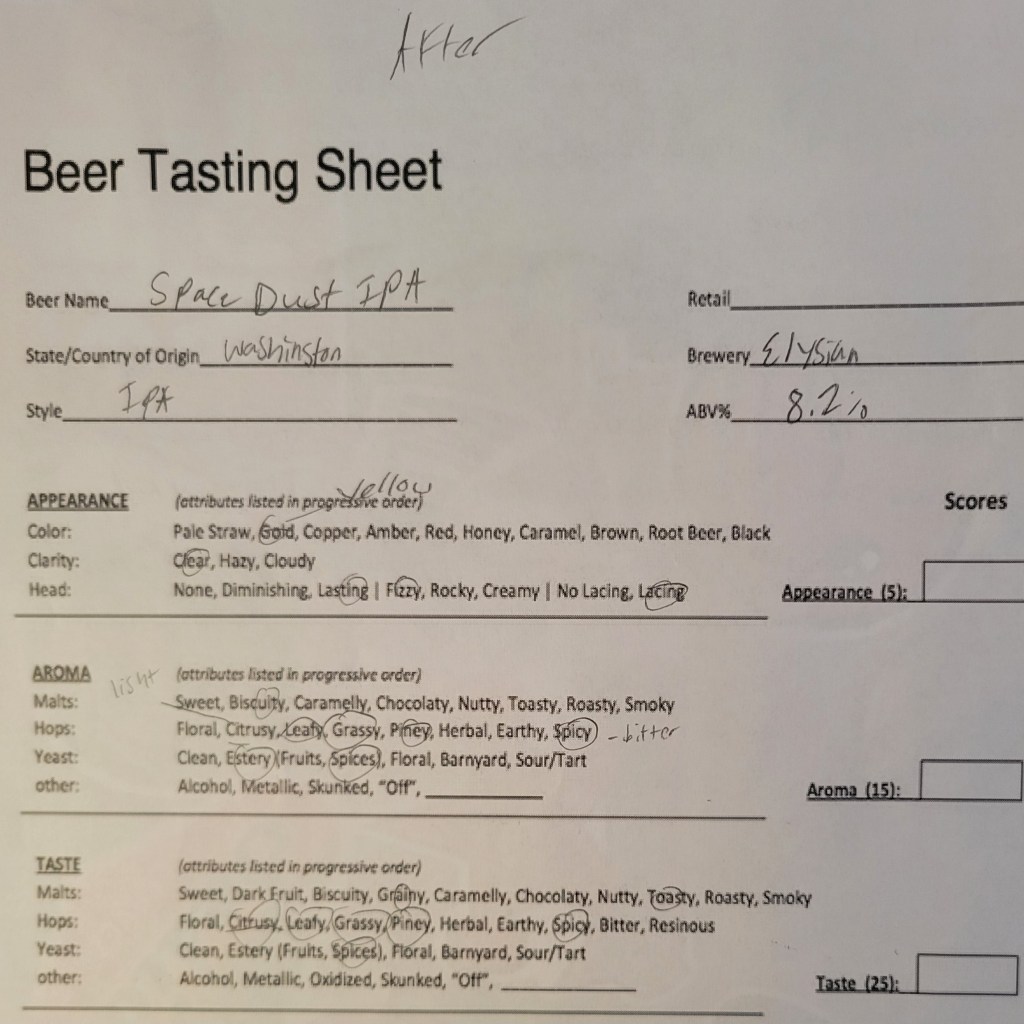
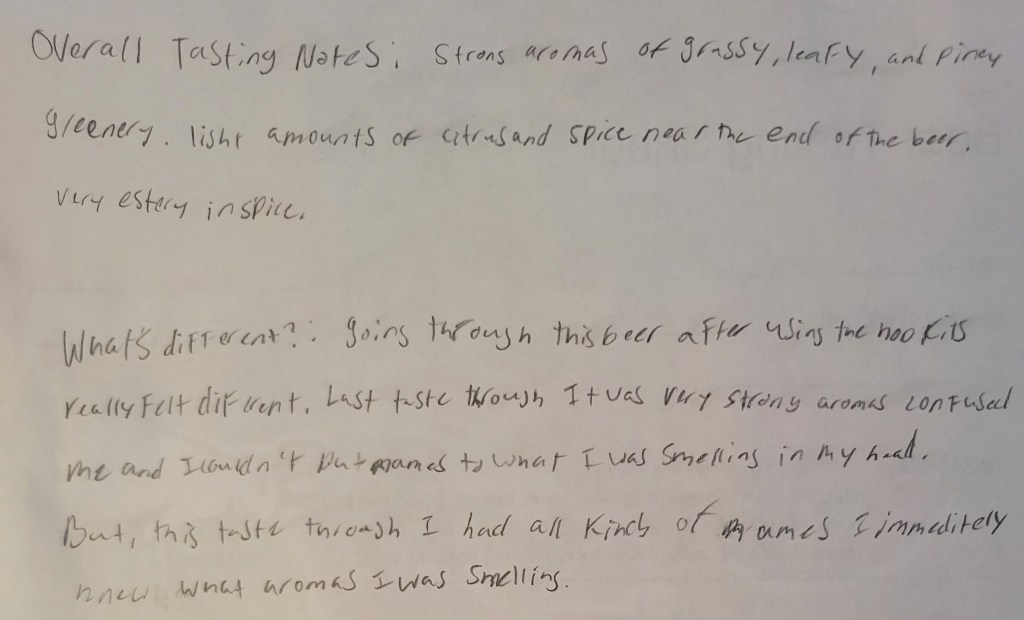
Tasting notes for Elysian Space Dust IPA after using hop sensory:
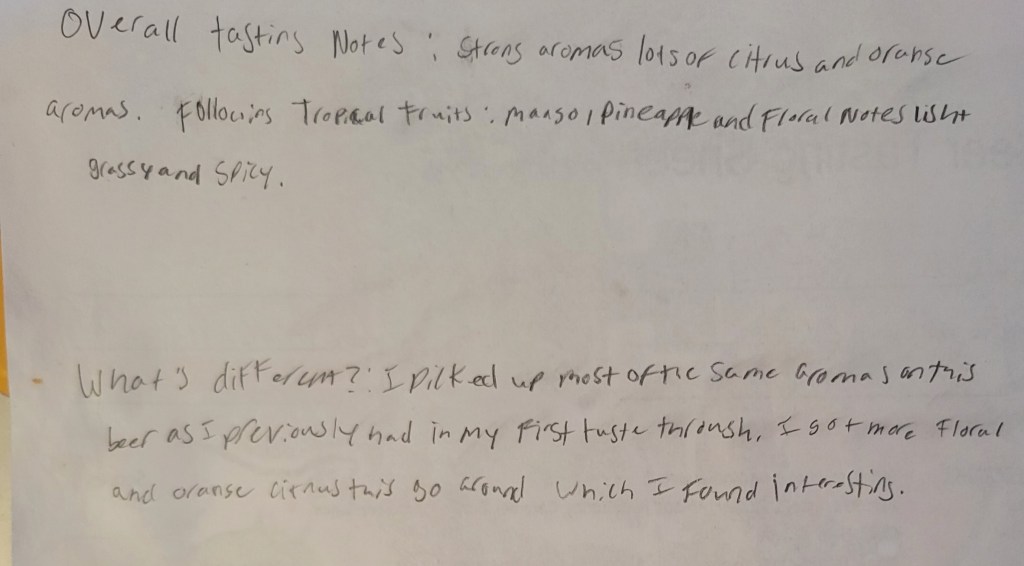
Tasting notes for Deschutes Lil’ Squeezy Juicy Pale before using hop sensory:
Overall conclusion:
I would say the hop sensory kits worked when it comes to being able to associate smells within a beer to the smells within the kit. Being able to make those type of aroma associations within my mind happened much faster and easier than I had been able before the use of the hop kits. I went into this rather doubtful of whether hop kits would help me improve my tasting abilities, but am more than happy to say I am pleasantly surprised with the amount detail I was able to identify on my tastings just because I could name more of the things I was perceiving.
-
Brew Kits Part 2.

So what I have done for this practicum was perfect the recipe that will potentially go into a kit that will be sold to help support the brew club. I also was able to calculate how much each kit will cost based on research online and going to Ace Hardware in Yakima to evaluate where we would want to buy our supplies from. Below is a list of items going into the basic kit along with how much each of these items will cost.
Funnel: $0.50
Corn sugar: $3.75 ea. 5 oz pack
Grain: $0 donated
Growler: $0
5 gal bucket: $10 ea.
Bubbler: $2.50 ea.
Grain bag: $0.50 ea.
Amarillo hops: $15 for 3 oz
Hydrometer: $5 ea. 15 for 3 pack
Cost per kit: $37.25
With the research done above (granted this is a rough estimate depending on what we as a club are able to get discounted through some of our sponsors like Ace Hardware), the cost per kit will be approximately $37.25. I was actually surprised with how much per kit we would be spending, but it makes sense for someone who would be starting from scratch for brewing and doesn’t have any of the supplies.


Another thing I have done was I put together what an order sheet will look like when we are ready to sell these kits. My idea was to make a pre-order form so that when we do order from our suppliers, we don’t accidentally order too much or too little. It will also just make it easier for us to collect payments that way. The Information that will go on the order sheet is the name of the student at the top and then below is a small table that will ask for the purchaser’s name, phone number, email, and kind of kit (although for now, it will just be the standard kit), and a signature part for when they receive their kit. Below is the setup I put together:
Student Name:____________
Name Date Email Phone Number Kit type (standard) Signature upon received The price for each kit that we decide to sell will obviously vary based on the ingredients, supplies, and overall costs of what each kit will cost to make. For our standard kit, there will be all the supplies listed above, an instruction sheet on how to create the perfect brew, and a little flyer that talks about our program and how their purchase benefited our club and program. As I went over the cost per kit with some of my fellow officers, we decided a good price to make a profit for the club to sell the kit would be $65 for one standard-sized 2-gallon sized kit. Although I won’t be working on this project more for school credit I will still be working on it as I will be president of the Brew Club and working on funding for this next school year. Something I hope to accomplish with this project is to advertise our program and club and make our existence known because there are countless times when I talk about the major to someone who has no idea what the brew club is and or that this was even a major. Secondly, I would love to be able to use this money to be able to go on trips like for the MBAA conference so that students who want to go to the conference each year can go, make connections, and not worry about having to pay for anything other than food. Below are some photos I took during this two-quarter-long project, and thanks for reading!
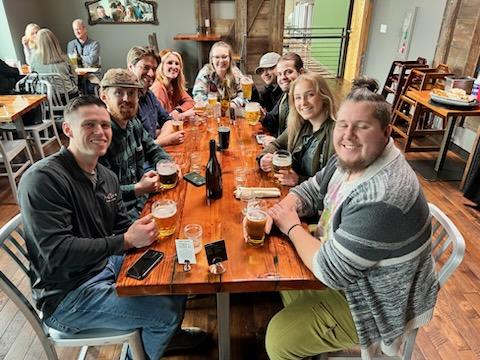
2023 Brew Club at the MBAA conference.
-
Ale Yeast Fermentation Trials.

This spring quarter I decided to do a project on different brewing yeasts and their sensorial differences in the final beer. In the past couple years of school, I have tasted a wide range of beer styles that were fermented with different yeast strains, which gave me a good idea of what characteristics some yeast strains may show in beers. A general understanding of these differences between, let’s say, an English yeast strain and a German wheat beer yeast strain was not satisfactory enough for me though, so I decided to brew a large batch of a beer using a simple malt and hop recipe, and then divide it into five separate fermenters to pitch different ale yeasts in to.
Back in the first week of April, I proposed this idea for my Spring Practicum. This included my recipe of pale malt, 20 IBU of Cashmere hops at 60 minutes in the boil, and five different dry ale yeasts: S-04 English Ale yeast, US-05 American Ale yeast, WB-06 German Wheat Beer yeast, BE-134 Belgian Saison yeast, and K-97 German Ale yeast. I brewed this beer according to my recipe, bottle conditioned, measured attenuation (how much of the sugar was fermented out) of each yeast strain, and wrote down aroma, appearance, flavor, and mouthfeel of each finished beer that started out the same but finished completely different (sensorially), depending on which yeast was used.
Using just over 9.5 pounds of pale malt and a pinch of acidulated malt for mash pH, my post boil original gravity was 1.047, giving me great efficiency on my Brewzilla all in one brewing system. The S-04 English Ale yeast fermented this 1.047 SG wort down to 1.009 SG, resulting in a 5.0% ABV beer. The US-05 American Ale yeast fermented this 1.047 SG wort down to 1.007 SG, resulting in a 5.3% ABV beer. The WB-06 German Wheat Beer yeast fermented this 1.047 SG wort down to 1.005 SG, resulting in a 5.5% ABV beer. The BE-134 Belgian Saison yeast fermented this 1.047 SG wort down to 1.003 SG, resulting in a 5.8% ABV beer. The K-97 German Ale yeast fermented this 1.047 SG wort down to 1.008 SG, resulting in a 5.1% ABV beer.
Each final beer was unique in regard to aroma, flavor, and mouthfeel. The final appearance was fairly similar across each beer though.
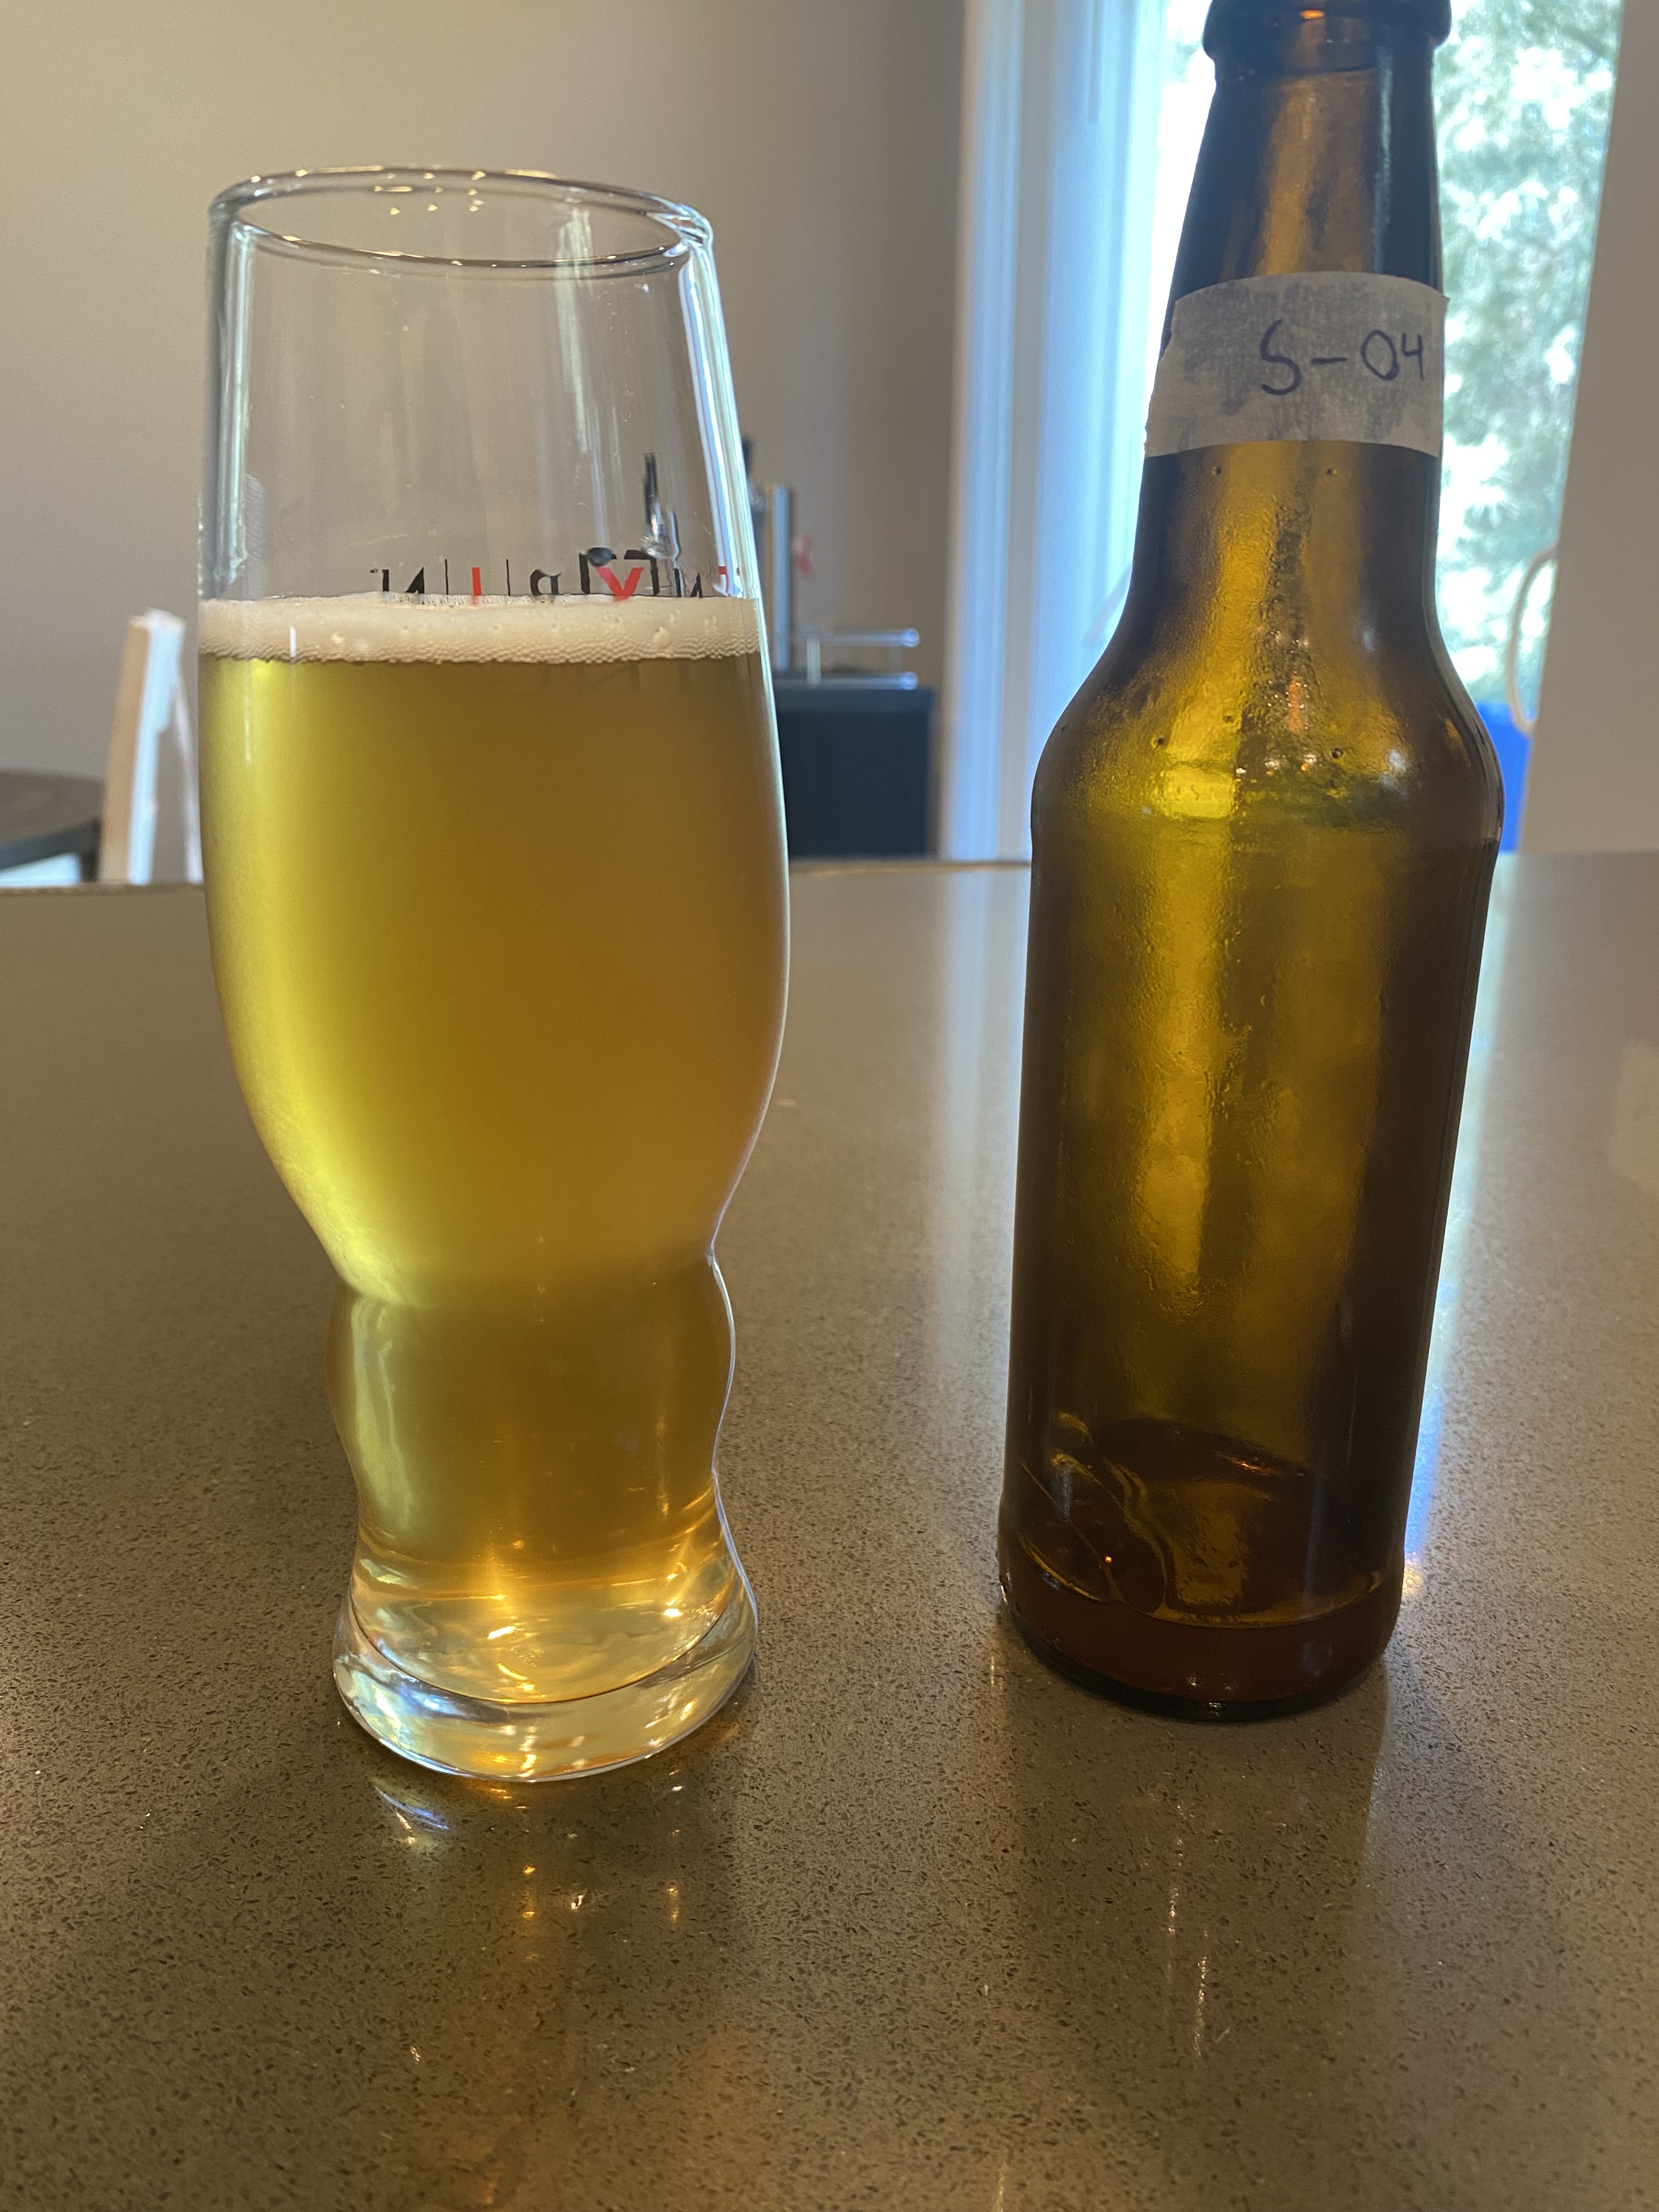
The S-04 English Ale yeast beer had moderate malt aroma with notes of grain, bread, honey, and hay. It had a very low to low hop aroma with floral notes. Low to moderate fruity esters with notes of cherry. No alcohol aroma. Its appearance was yellow, with a slight chill haze, a white rocky head with low but persistent head retention. The flavor had moderate malty sweet grainy characteristics with notes of cracker as well. The bitterness was low with no hop flavor and moderately low esters. The finish was smooth and malty with no alcohol warmth, but dry. The mouthfeel had medium body and carbonation.
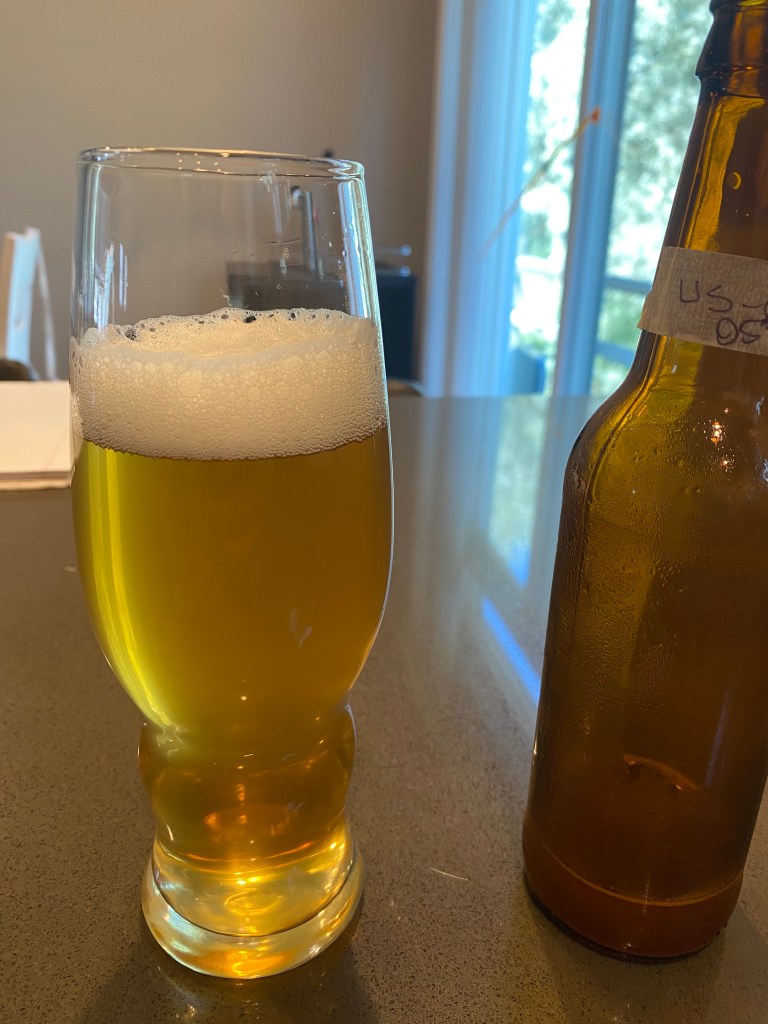
The US-05 American ale yeast had moderately high malty aromas of bread crust, very light caramel, and Hawaiian Sweet Rolls. There were low to medium bubblegum esters, and no hop aroma. The beer had a yellow color, with some chill haze that cleared when it warmed up, and a white medium rocky head with fair retention. It’s flavor had moderately high sweet maltiness with notes similar to the aroma, and moderately low bitterness with low herbal hop character. The fermentation character was clean with very low esters. The finish was malty and slightly dry but smooth. The mouthfeel had moderately low body, medium carbonation, no alcohol warmth.
The WB-06 German Wheat beer yeast had moderate sweet banana esters and spicy fermentation character in the aroma with low malty sweet grain notes, and now hop aroma or alcohol aromas. The beer had a yellow color with good clarity, but just a slight chill haze that cleared as it warmed up. The head was white with medium tight bubbles in the center and rocky towards the edge of the glass, and medium head retention. The beer had a medium sweet grainy and bready malt flavor with moderately high esters and moderately low spice. Low to no hop flavor, and smooth malty finish with moderate fermentation character, with low bitterness. The mouthfeel had medium to low body, medium carbonation, and a dry finish with no alcohol warmth.

The BE-134 Belgian Saison yeast had a high spicy and fruity estery fermentation aroma with medium floral notes. The malt aroma was medium low with sweet grainy notes and low to no hop aroma. It had a yellow color, clear appearance with a slight chill haze and some light particulates floating that quickly settled to the bottom of the glass. The head was white and medium rocky with low retention. The flavor was moderately high fruity esters and phenolic spice, balanced with low to medium grainy malt sweetness. Medium low bitterness and a very dry malty finish, with pleasing lingering fermentation character. The mouthfeel had light body, medium carbonation, and light alcohol warmth.

The K-97 German Ale yeast had medium grainy, crackery, bready malt aroma with very a clean fermentation, no esters or phenols. It had a low herbal hop aroma, and no alcohol aroma. It was yellow and clear with a slight haze, and had a medium white rocky head with low retention. The flavor was moderately malty with notes of crackers and bready. Very clean fermentation character, the most similar to a lager. The bitterness was medium low and had low to no hop flavor. The finish was very smooth, crisp, and malty. The mouthfeel was light body, medium carbonation, and no alcohol warmth.
I had a lot of fun with this practicum experiment and learned a lot more about different yeast strains and their effects on pale malt wort. I felt that this practicum was a success, other than the fact that I forgot to take pictures of the German ale beer. I met every goal from my practicum proposal. The biggest take away I got from this experiment was how clean the German ale yeast strain was. I have been using US-05/Chico ale yeast due to its usual clean characteristics, but I honestly thought that the K-97 German ale yeast had the cleanest fermentation character, and I want to experiment with that strain even more in both hoppy and malty beer styles.
In the future, I would like to experiment with different lager yeast strains. This practicum I chose to only use ale strains that had similar fermentation temperature range recommendations because I only had one fermentation chamber. Next time I will gather five different lager yeast strains and perform an experiment similar to this one, the only difference being the strains of yeast and the lower fermentation temperature, and longer cold conditioning time.
-
Braggots, Done Two Ways.
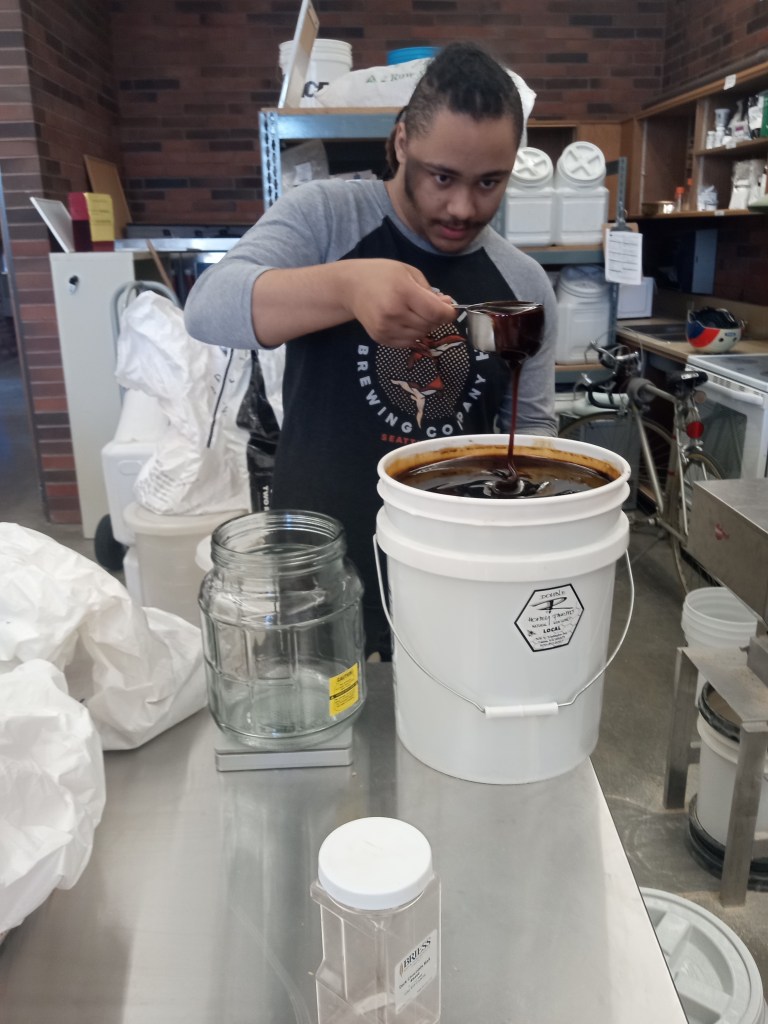
Hi, I’m DJ and I’m a craft brewing major here at CWU. However, I am more interested in mead than I am beer (but more interested in beer than I am wine), so I decided to have my practicum centered around braggots, a beer-mead hybrid, and I looked specifically into the process of how they are made. Most (if not all) braggot recipes call for you to add your honey after you’ve boiled your standard beer wort, mostly because you lose out on many of the great natural properties of honey when you heat it up to a boil. I wanted to see just how significant of an effect it actually has on the final product.

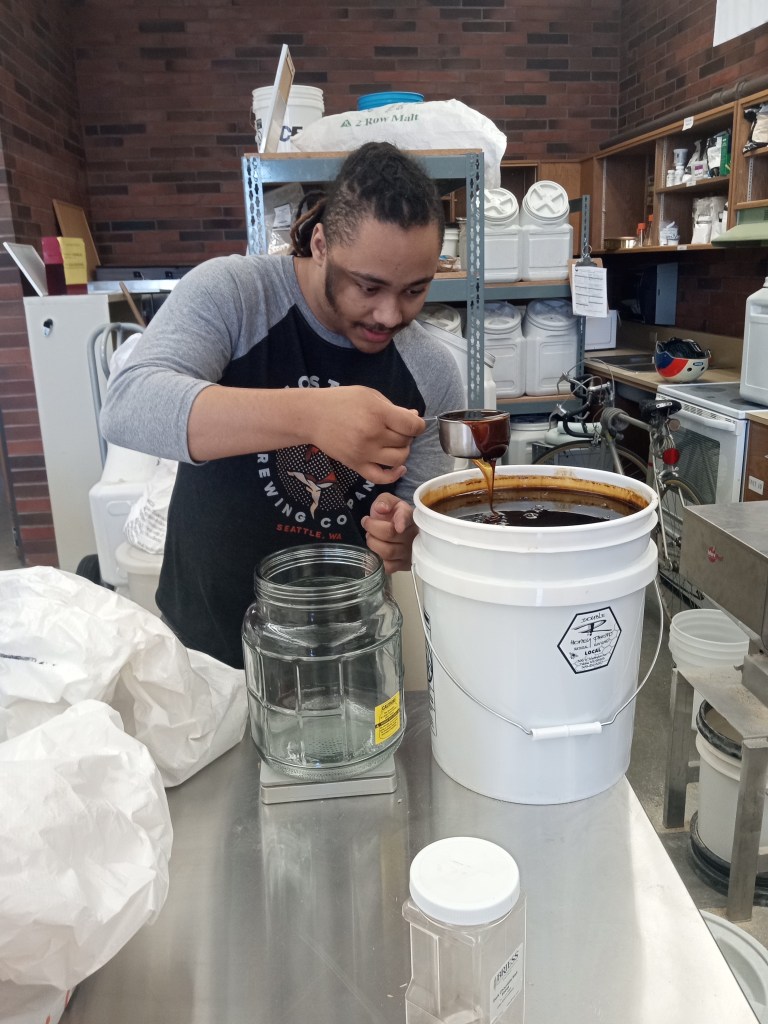
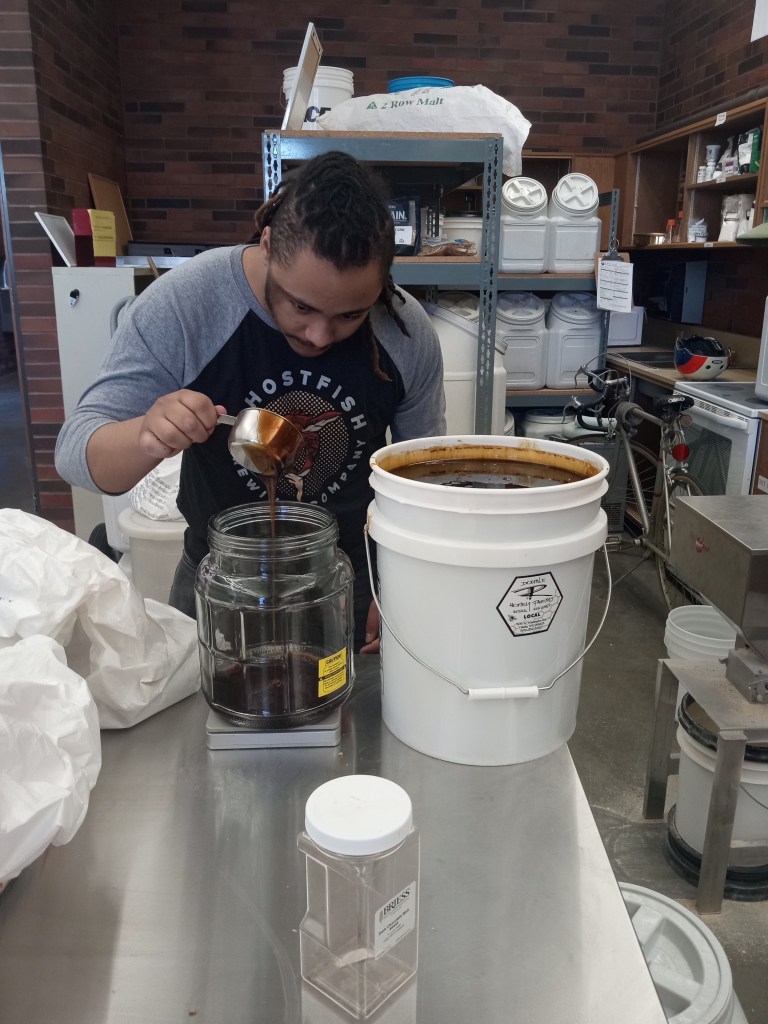
To start, the main issues I found in the beginning of my project was determining how much supplies I need and what quantities I needed, the central supply being honey. Through Dr. Graham I was able to order a bucket of local wildflower honey from a friend of his in Yakima. The honey itself had quite a powerful flavor, which I was initially worried about but I figured that the full process of the brew would dim down the flavor.

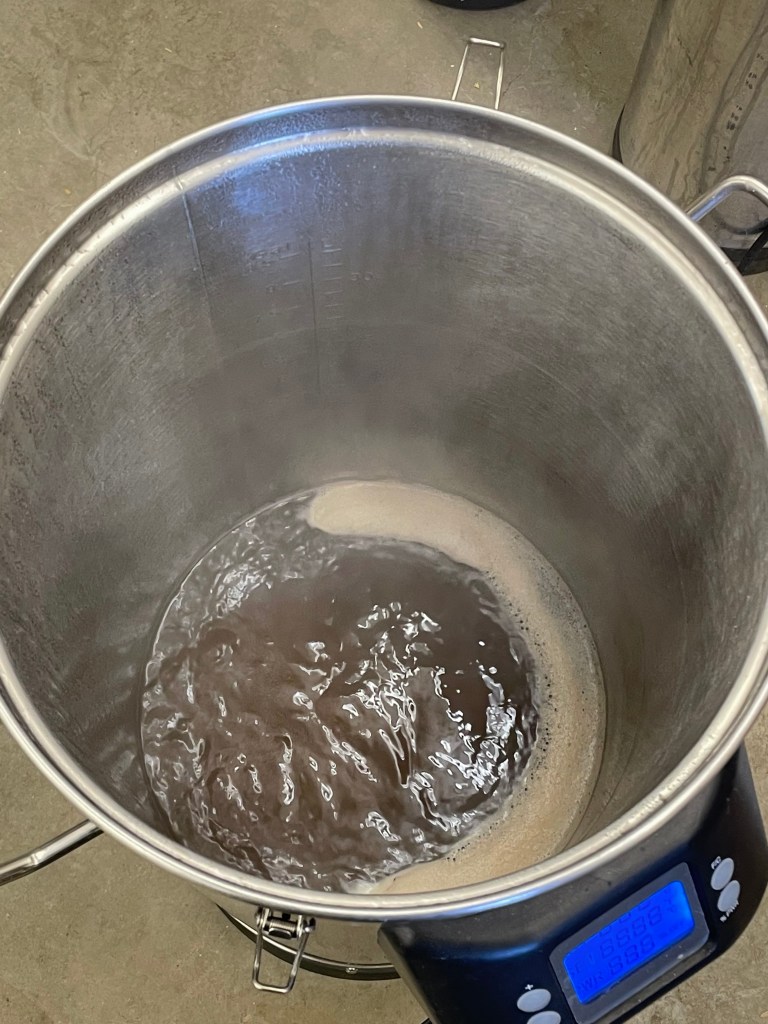
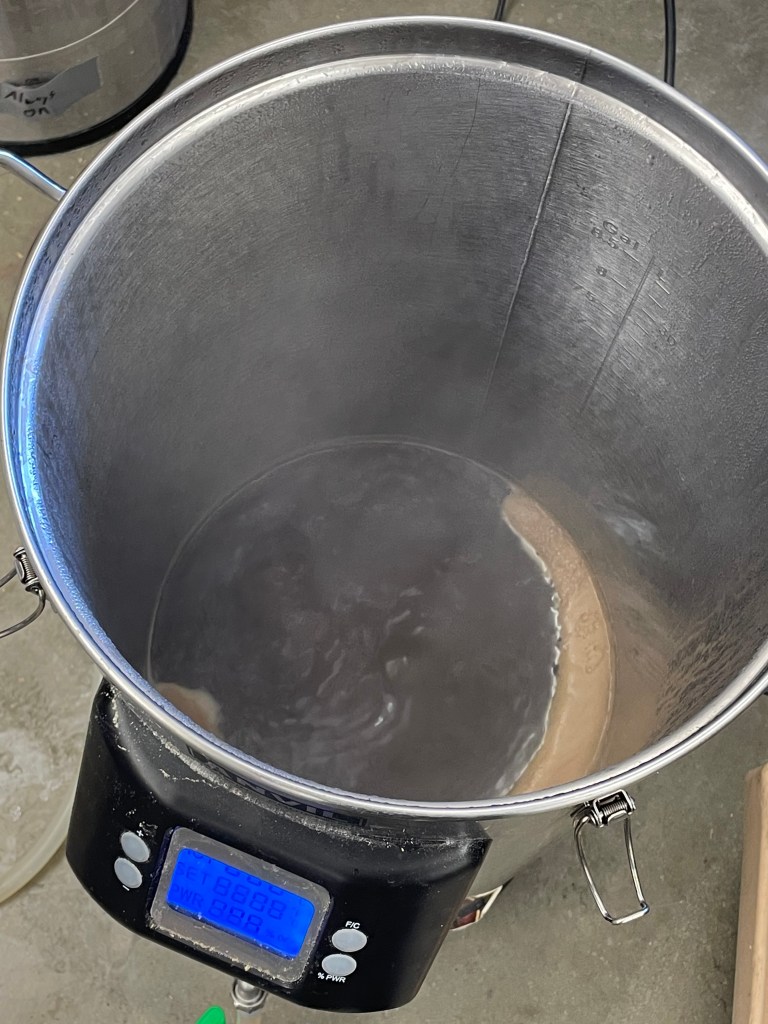
To start, we wanted to make a large excess of the initial wort. Not only for me, but for another project as well. Having an excess of the wort allows us to have a uniform wort to split for the two styles; one to add our honey to for the boil and one to add after the boil.
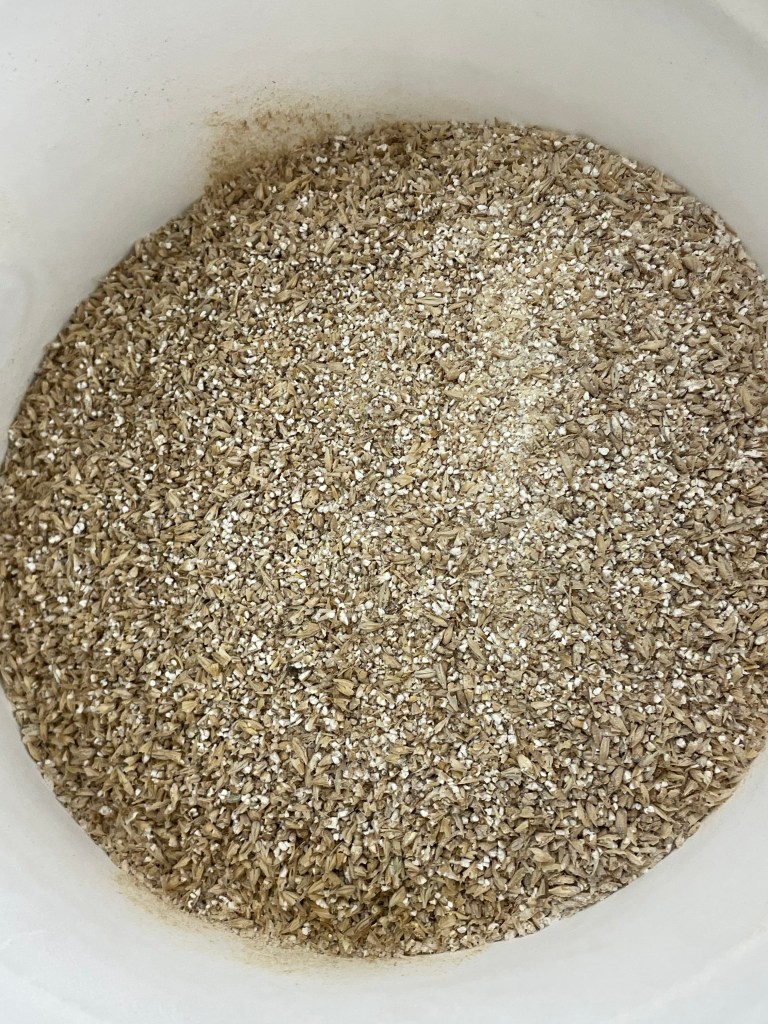
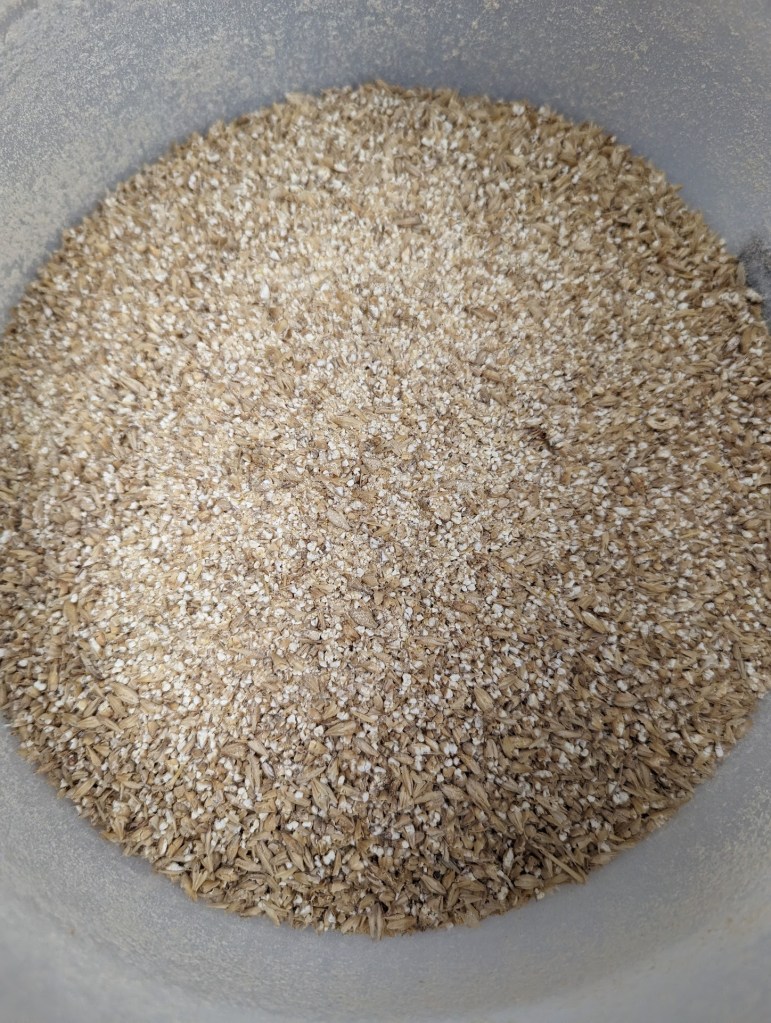
First, we milled some 2 row pale malt (about 8 lbs).


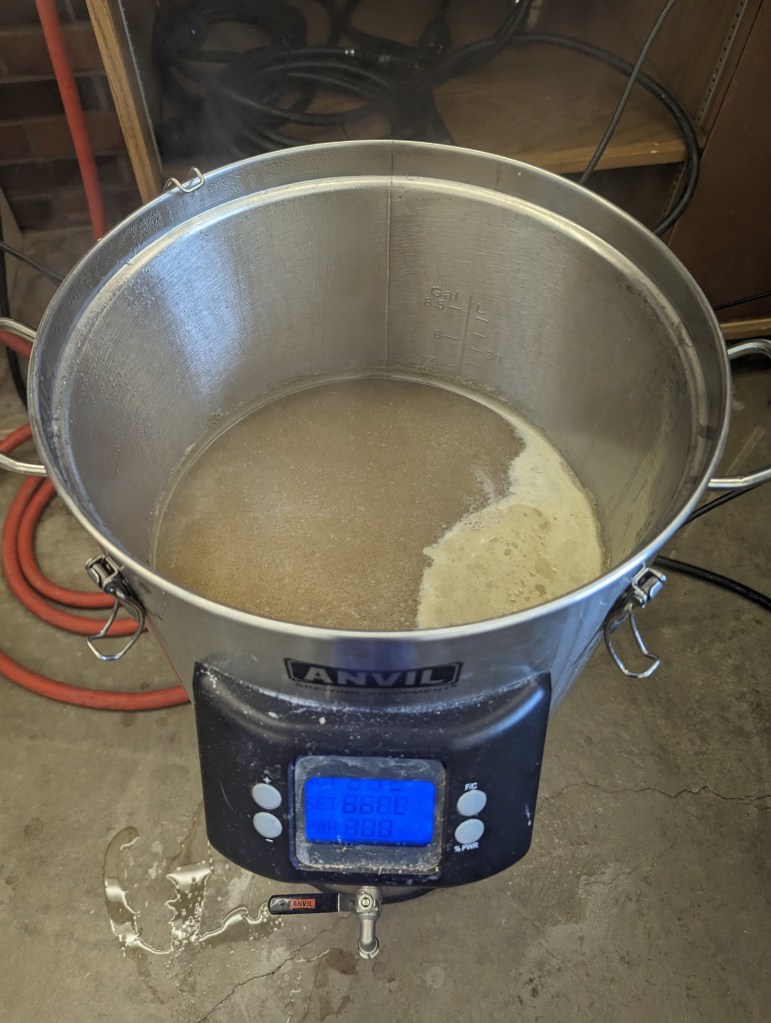
Our goal for the mash was 152° f and a pH of about 5.3. The strike water we used had a pH of 8.32 and a temperature of 155° f. We started the mash at 9am and let it rest at 9:09 with a temp of about 152° f (our target), but with a pH of about 6.05, which was higher than we wanted but honestly 5.3 was just an estimate, plus we figured that we could lower the pH later in the process. The Gravity of the mash at this point was 1.016
We started the vorlauf at around 9:40, and just with that hour and ten minute long process, the pH lowered to 5.91. We did have some issues with the pump, sometimes the water pressure would be very low and the recirculated wort would only dribble out and other times it would come out fast enough that it would hit the other side of the kettle. The gravity at this point was 1.043
For sparging, we did lower the pH of the 165° f sparge water, but the pH was only 7.12. But after that, we moved on to the boil which is where the experiment began.
This consisted of splitting our current wort in half and adding honey to one of them. we used 2 pounds of honey in total, 1 pound for each gallon. Our initial calculations indicated that 1 pound of honey would raise the gravity of 1 gallon of wort by about 35 significant gravity points, but in practice, it was only raised the pre-boil wort by about 18, putting our pre-boil gravity at 1.054 for the braggot wort being boiled with honey (which I will now refer to as “honey boil”) and the braggot wort being boiled without honey (“non-honey boil) at 1.036. However, after the the boil, the honey boil was up to 1.068 and the non-honey boil was at 1.070, meaning that the total gravity point change was only off by 0.001 for the non-honey boil and 0.003 off for the honey boil. Another conversation we had was what to do for preventing the braggot from becoming syrupy. The initial thought was to add tannins but we found out far too late that the brew lab was out of tannins. I had done some side research into some older mead recipes, and I found one from the 80s that mentioned using tea for its tannic acid to offset the sweetness. I proposed the idea to use green tea in the boil, which had a pretty neutral flavor that wouldn’t take away from the flavor of the braggot itself. But in the end we decided to use hop pellets, specifically Idaho Gem. We didn’t use very much, only about 6 grams for each wort, but we figured that it would be enough to prevent over-sweetness while not taking center stage for the flavor profile. The final pH for the post boil worts was 5.28 for the honey boil and 5.30 for the non-honey boil.
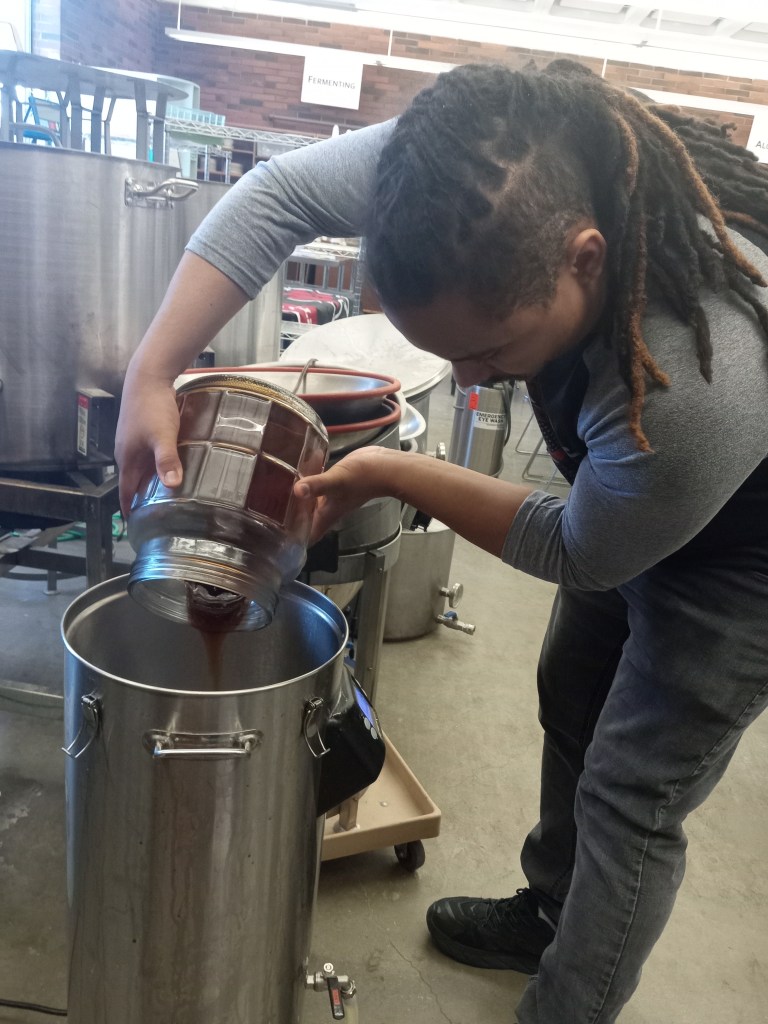
After all that was said and done, we let it cool, moved it to our carboys to ferment, put a packet of American ale yeast in, and corked them with airlocks to let them ferment for 10 days. (We even had some of both worts left, so Brian had the idea to put them together with some English ale yeast just to see how it turns out!)
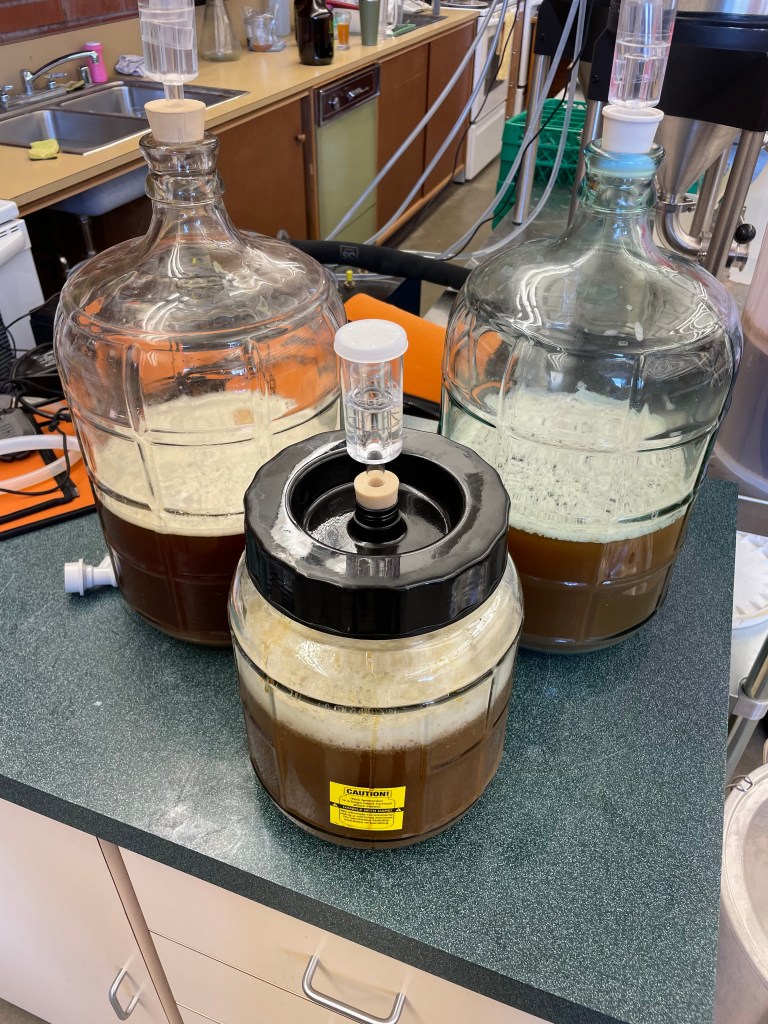
10 days later, we checked up on them to see just how done the fermentation was. We took a reading of the gravities, and the honey boil was down to 1.007 and the non-honey boil was down to 1.006. We racked them from the carboys to a small keg, and just to be certain that the fermentation was truly complete, we thought to monitor the pressure and check back in a couple days to not only check the pressure to see if it had increased, but to also check the gravity to see if it was lower. After a few days, we noticed that it had indeed been still fermenting in the keg, but only a little bit. Both gravities had lowered to 1.005 giving us an ABV of 8.27% for the honey boil and 8.53% for the non-honey boil.
We weren’t done yet. After confirming that fermentation had stopped, we had to carbonate and chill the braggots. which would prepare them for the final test, a triangle test conducted with the Sensory Analysis for Brewing class to test if (with an admittedly small panel of judges) there was any significant difference between boiling your honey and not boiling your honey.
The Final Notes Writeup
A quick summary: My project was to determine the significance of a rule when using honey in brewing: never boil your honey. I’m more interested in making mead than beer, but I still wanted to try something new and relevant to what I am learning in the craft brewing department.
The initial proposal I had was clear, concise, and for the most part organized. But I learned more than what I sought out to. I learned how complex the logistical aspect of brewing can be, I learned about how important it is to stay on top of what you need and how much you need, I learned just how important it is to communicate with the people you’re working with, and I learned just how fun and rewarding the brewing can be if you have a wide resource of people willing to help you. Everything felt pretty last second (including this final report!) and if I was more on top of what I needed, then maybe it would have been less stressful. Somethings you can’t control, like how long it will take someone to pick up your supplies or how long it will take to deliver. But what I could have done differently is ask much earlier about the current honey supply, and (after finding out that we had no honey) order it much earlier to compensate. I should have been more on top of my recipe too, I’m sure I caused unnecessary anxiety with the people I was working with by not showing them that I mastered all the information about braggots, braggot recipes, and the process of actually making them.
That aside, the last part of this project was working with the Sensory Analysis for Brewing class to use statistics to determine if there is a significant flavor difference in the final product. Ultimately, with 12 judges, we had a 50/50 split of correct and incorrect answers. With a p-value (statistical measurement used to validate a hypothesis against observed data) of 0.18, we can determine that there is actually no significant difference in the final product between adding honey during a boil and adding it afterwards. This null hypothesis would likely mean that any observed difference is due to sampling or experimental error. This data is of course to be taken with a grain of salt, because we likely had no where near the amount of judges we should have had, and this was done in such a small scale. In the future, should I do this again, it would be great to try this in a 5 gallon batch while also incorporating a wider pool of judges (potentially from multiple classes).

Judges were not able to distinguish these two beers from each other. However, with this small number of judges, I would recommend recruiting another 5-10 judges to clearly establish whether differences exist or not. With just 12 judges, just two more judges correctly identifying the odd sample would have established a difference existed.
Professor David GeeI initially believed what all of the braggot recipes I saw were saying. But now I know that in the future I can be more lenient with when I put my honey in. I think that I will still opt to not boil my honey, but I definitely feel better about using older honey that may have started to crystallize because it can be boiled to achieve better clarity without losing much flavor in the final product.
I enjoyed this project! This fall I have an idea for another project that will be more focused on mead, and using different types of sugar with the honey.
-
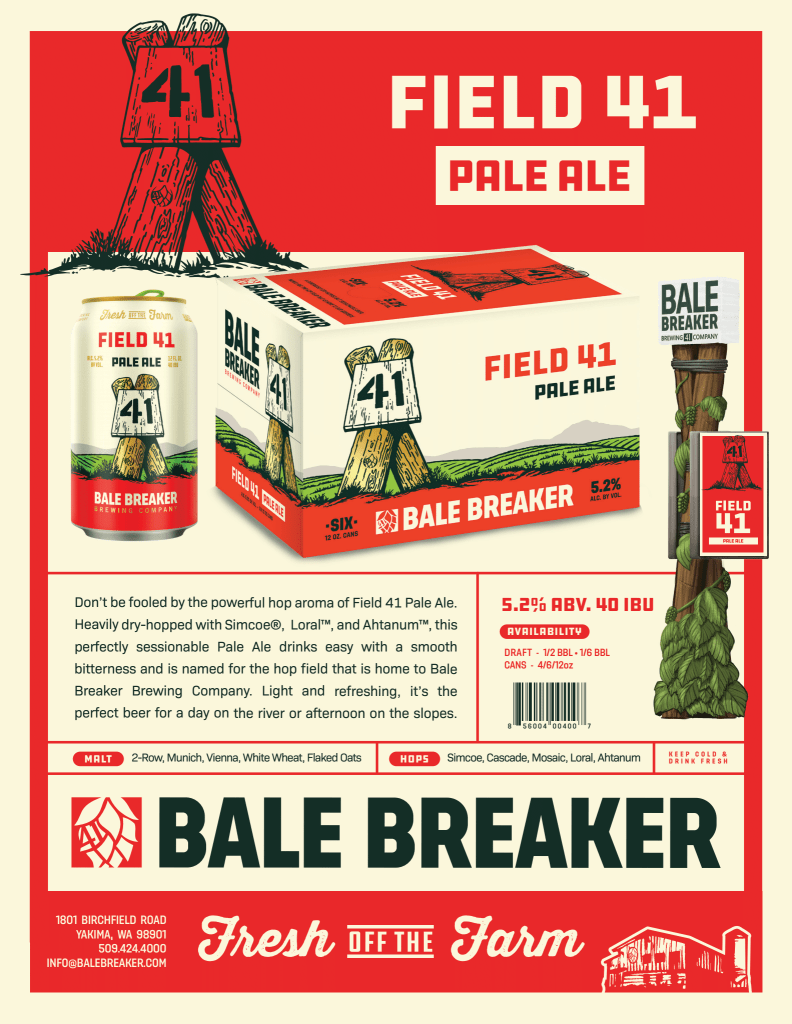
Brewing a Bale Breaker Field 41 Pale Ale Clone, Part 1.
Growing up in Bellingham, WA meant that I’ve been surrounded by craft beer my entire life. I can remember my parents and their friends drinking at Boundary Bay, or bringing a six-pack of Full Sail over for a BBQ, but it wasn’t until years and years later that it fully clicked in my head that craft beer in Washington was something really special.
My dad came to visit me for the weekend when I lived in Seattle, and he claimed that he’d brought his favorite beer as a gift. He pulls the cans out of his cooler to transfer it into my fridge only to find out that I, completely independently and without talking it over ahead of time, had already stocked my fridge with the very same beer.
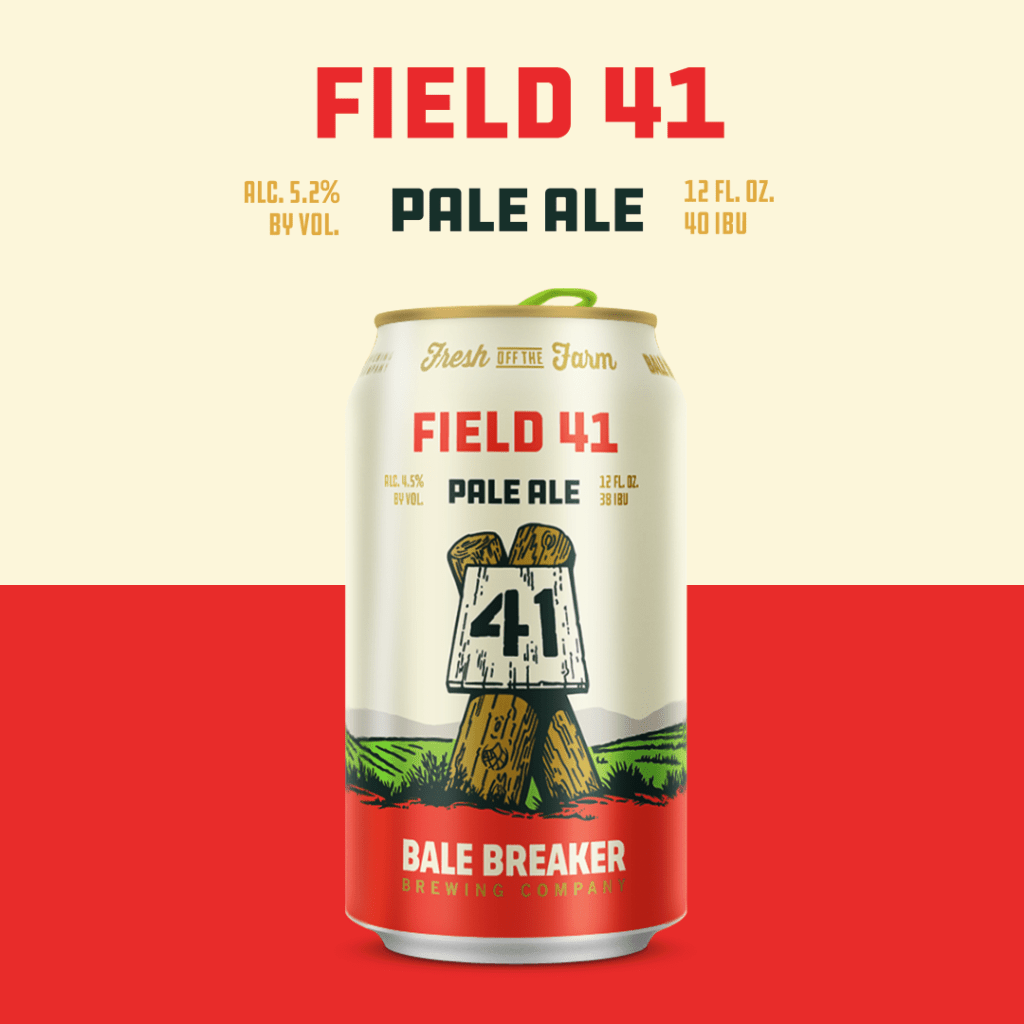
This was Bale Breaker’s Field 41 Pale Ale, and that night my Dad and I cracked open more than a few while expressing our love for the the crisp, hoppy flavor, and the homegrown approach Bale Breaker took in brewing beer from hops they themselves grew. I’d never really thought about the craft brewing process until that moment, and how proud I was to live in a region that had the capability to produce something so wonderful and unique, and do it almost entirely locally.
Now, almost a decade later, I’m following my dream of becoming a brewer, so I thought it would be a great opportunity for my practicum project to get more brewing experience by trying to brew my own version of Field 41. I’d learn while also developing a closer relationship with a beer that has a lot of sentimental value to me and my family.
Developing a recipe
I was originally planning on using sensory analysis to reverse engineer the recipe for Field 41, a task that would’ve been time consuming and far too extensive for the scope of a single, 10 week school quarter, so instead I decided to reach out to the source, Brian Logan, the Production and Quality Manager at Bale Breaker Brewing Company. One of the massive benefits of being a student in the brewing program at CWU is being able to have access to members of the craft brewing community, and pick their brains and dive into their expertise.
I’d done some digging and was able to find the bones of the Field 41 recipe, but just like when baking a cake, knowing the ingredients is only a small part of the battle. I still wasn’t sure about quantities, mashing profile, the use of protein rests, or quantities of hops and when they’re added, fermentation temperature, gravity targets, or dry hopping, just to name a few. This is where Brian Logan donated his valuable time and allowed me to see the recipe they use at Bale Breaker, a resource that I’m still thankful to have. Myself from 10 years ago is so jealous right now.
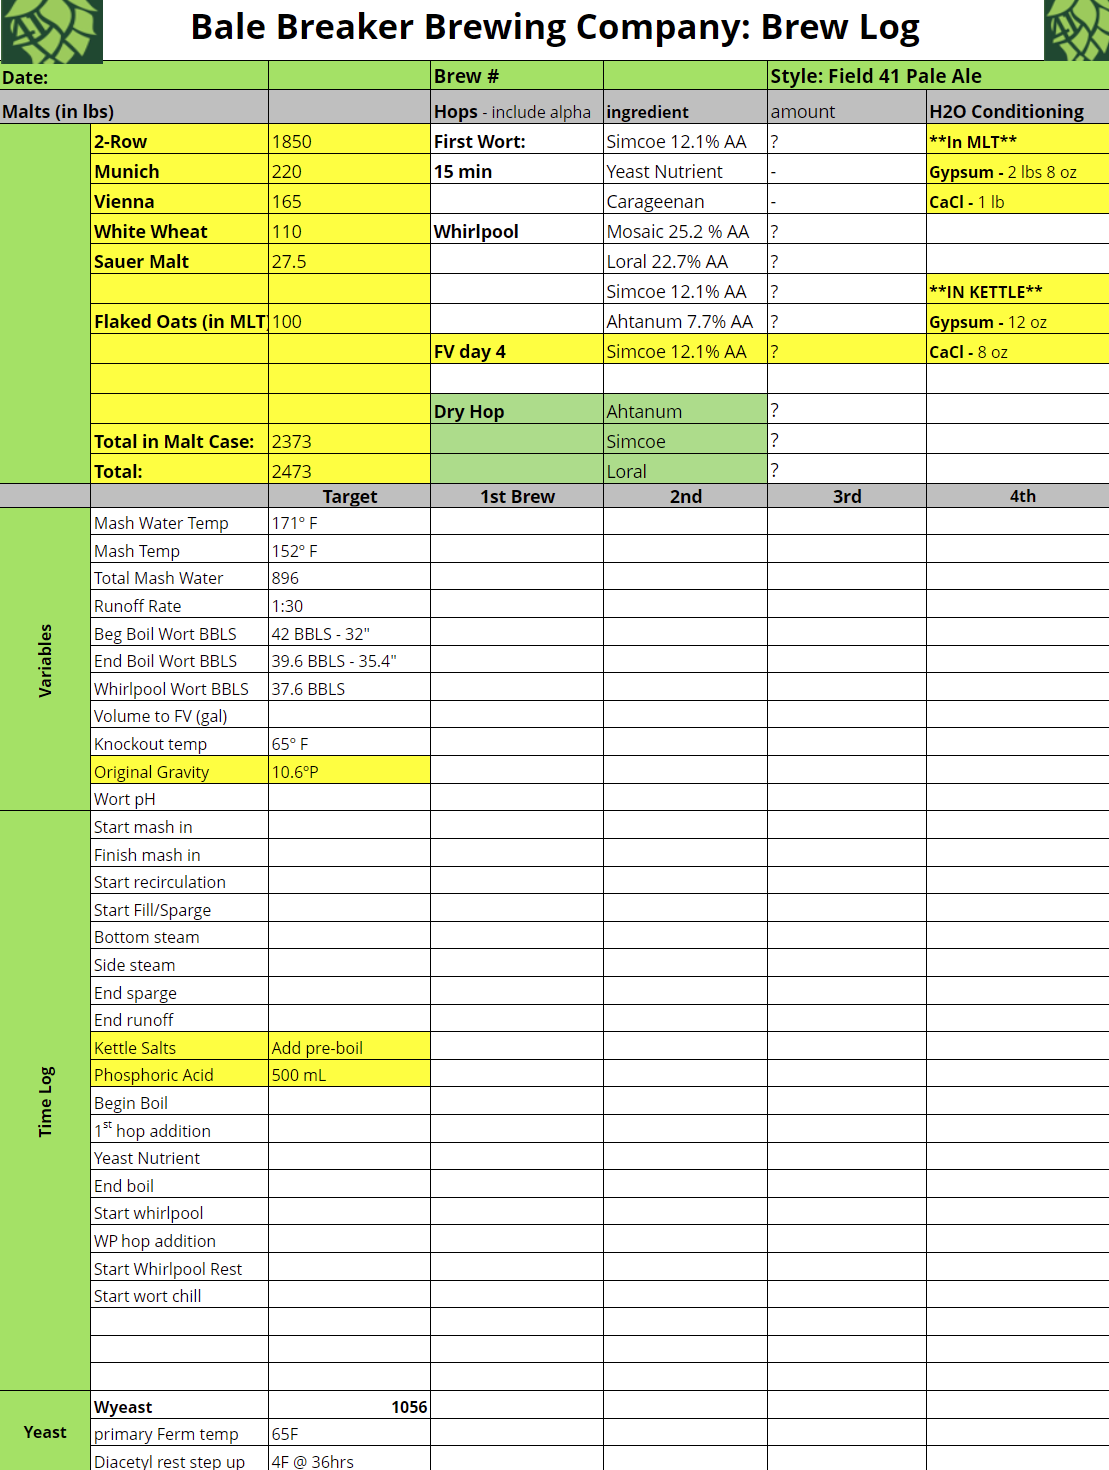
Translating a 42 barrel (1,302 gallon) recipe down to my 5 gallon homebrew setup might sound as simple as doing a little division, which is what I did, and I really don’t have any other option for my first brew attempt, but even if I nail every single detail on a smaller scale I should be prepared for the result to not match the big brother Field 41 version in flavor. Brewing chemistry differs when the volume changes by this much, in addition to the equipment I’m using being completely different as well.
One thing you might notice about this recipe is that the “amount” column for all the hop additions are left as question marks. While discussing the idea I had for my practicum with CWU Craft Brewing faculty member Cole Provence over a few pints he convinced me to leave a little mystery in the recipe so that I’d still have to use some sensory analysis skills to try to figure out the missing pieces. Brainstorming is best done over beer, but decisions should be made the next morning, and the next morning I still like the idea, so I asked Brian to remove this information from the spreadsheet, adding a little bit of an extra challenge. At the least I still had which hops would be used in the appropriate step of the brewing process.

One thing I like to do whenever I’m brewing is to keep track of what I’m doing with as detailed notes as possible. I put together a recipe in BrewFather, an app that’s worked really well for me, just so I wouldn’t have to use my terrible memory to recall what I’d done. It also lets me keep track of any changes I make along the way, purposeful or not, for example I wasn’t able to get ahold of Ahtanum hops, so I swapped them for Cascade, which was a varietal used in Field 41 in the past.
Brew Day
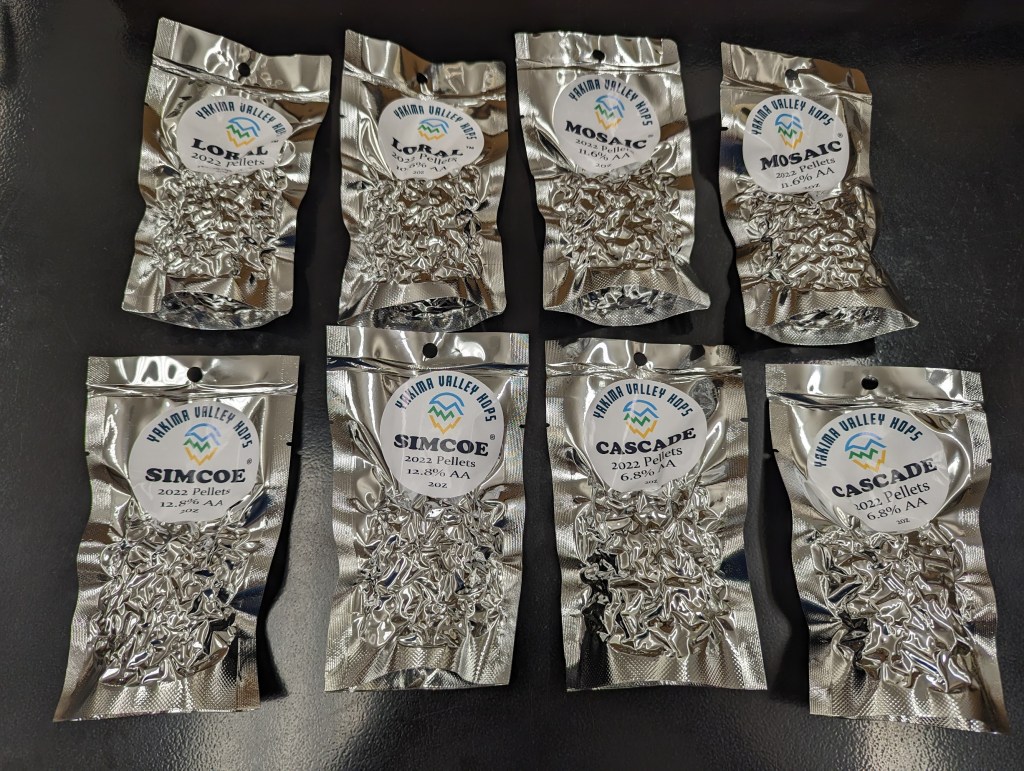
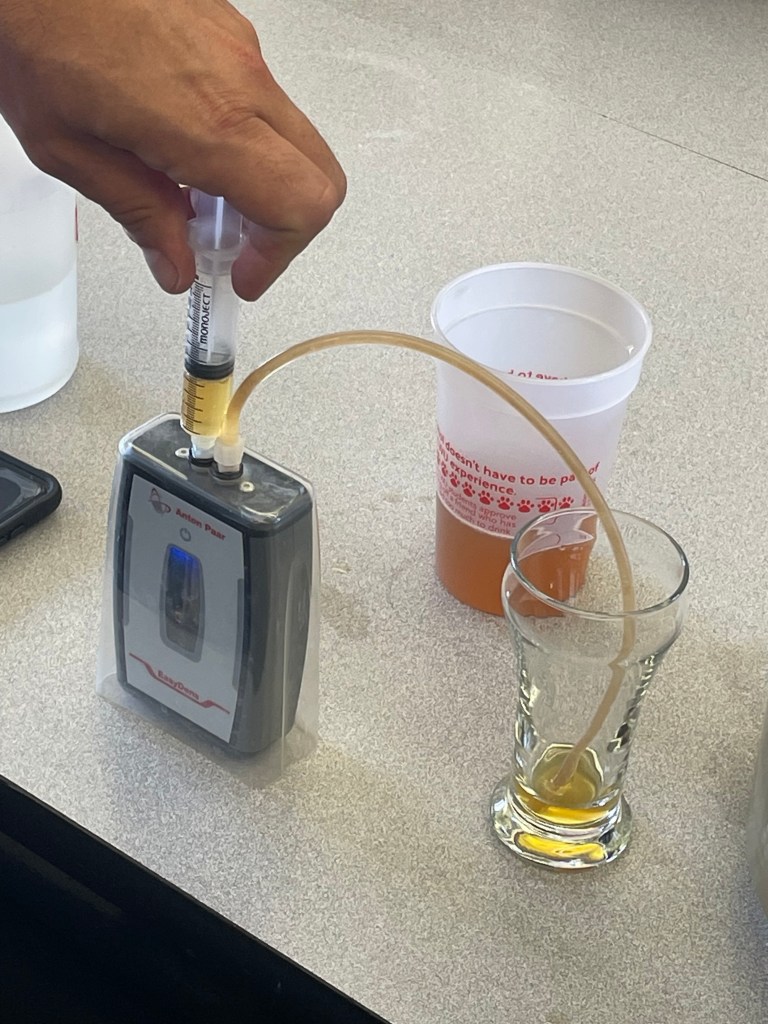
After making a trip to Yakima Valley Hops I was ready to start the brew. The CWU brew lab was already stocked with the malt I needed, and we had some ale yeast that we’d been propagating for our Microbiology of Brewing lab, San Diego Super. To ensure the proper pitch rate I took a diluted sample and did a cell count under the microscope, enabling the right amount of yeast to consume all the sugars in the wort at the proper rate without getting too stressed out. Brewing yeast is very particular about the environment their in, and I can’t blame them too much. They do great work when they’re happy.
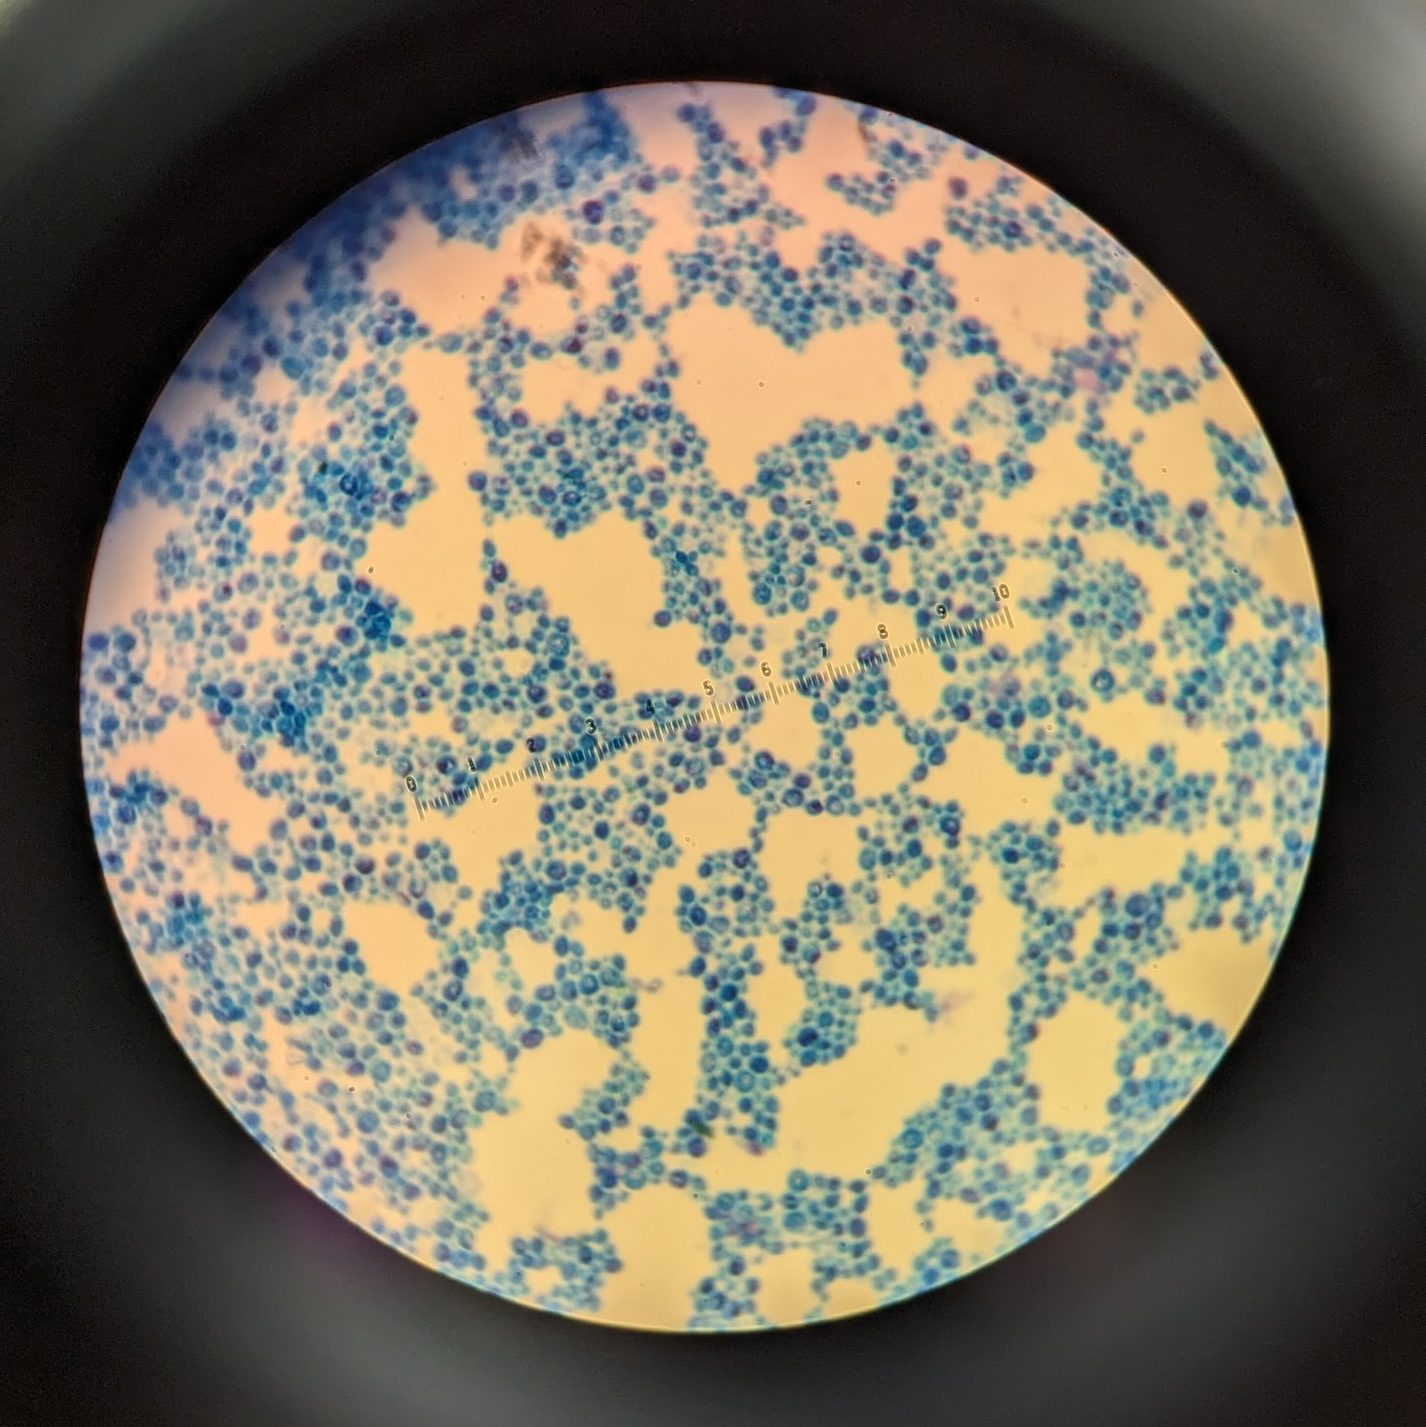
This was a photo I took of San Diego Super from lab, but not from the hemocytometer cell count. Counting yeast cell this way would be a nightmare. The methylene blue stain make viewing cells much easier. Based on the gravity (10.3 plato times 1.0 x 10⁶ cells/mL) multiplied by the the volume of the wort (19873 mL), and divided by the the viability of the yeast cells (8.2 x 10⁸ cells/mL) I could calculate the volume of yeast I needed to pitch when it came time for fermentation, which was about 250 mL on the dot. This was my first time doing a yeast cell count, which I was really excited about because it’s just one more tool in my belt to have control over the brewing process.
The rest of the brew, from mashing to fermentation, was pretty standard for an ale. One interesting thing about this recipe was that non of the hops were added during the boil. There was an addition in the wort pre-boil, and a hopstand addition post-boil, but nothing during actual boiling point. This will probably help prevent isomerization with the alpha acids in the hops, limiting the amount of bitterness and focusing on the aromas instead, which is certainly evident any time you drink a Field 41 brewed by Bale Breaker.

This beer was also my first experience with dry hopping, which meant coming in a few times a week to add extra hops during fermentation. As of writing this the dry hop additions have been added, and the fermentation temperature has been raised a few degrees for a diacetyl rest. The gravity has dropped to a fairly dry 1.3 plato, but I’m planning on kegging on Friday, May 26 if all sticks to plan.
Next steps are to let this batch condition, and then do a taste test, comparing it to a can of Bale Breaker brewed Field 41 Pale Ale. I’m already planning on my next brew day of Tuesday, May 30, but the timeline means that this version won’t be ready to taste until the quarter is over, which I’m personally fine with since I plan on continuing to brew this recipe until I can get the kinks ironed out.
It’s been a really rewarding process working with Brian Logan at Bale Breaker, and the CWU instructors Brian LaBore, Cole Provence, and Eric Graham. Thank you all!
