
-
Impact of Temperature on SCOBY Growth.

Hello, my name is Molly Spurrell and I am a Craft Brewing minor student here at Central Washington University. I was curious about how different temperatures affected the growth and microbiological aspects of a SCOBY for kombucha.
SCOBY is an acronym that stands for “Symbiotic Culture Of Yeast and Bacteria,” and is made up of acetic acid bacteria, lactic acid bacteria, and yeast. The SCOBY is what ferments tea into Kombucha by converting sugar to acetic acid and alcohol.
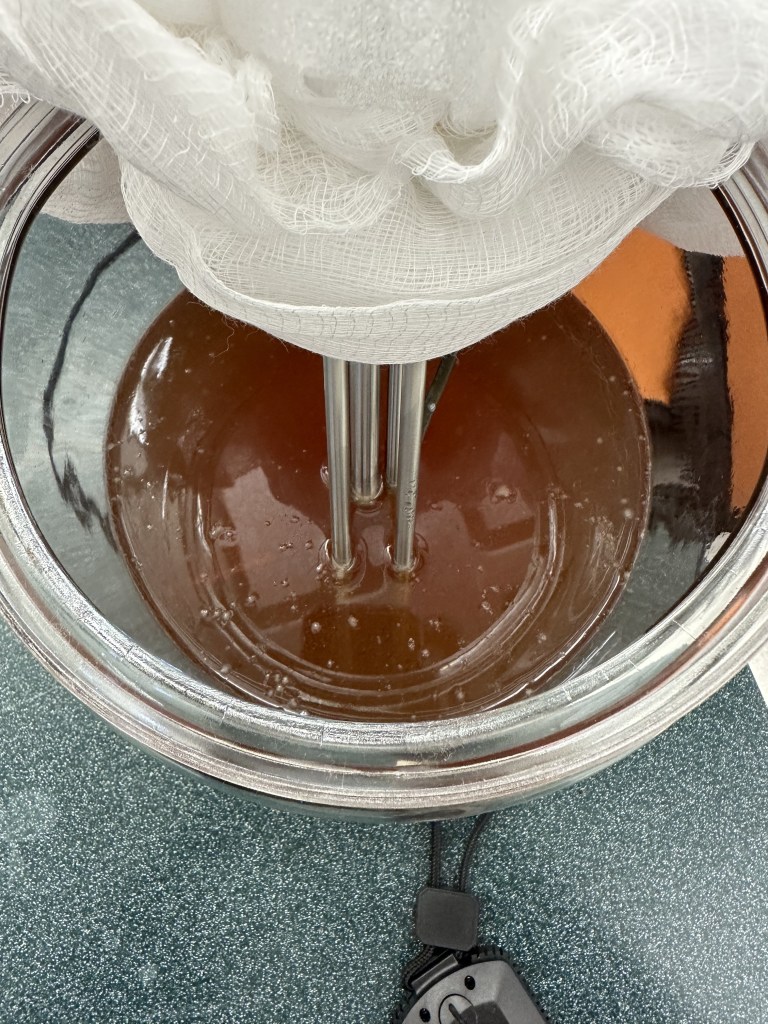
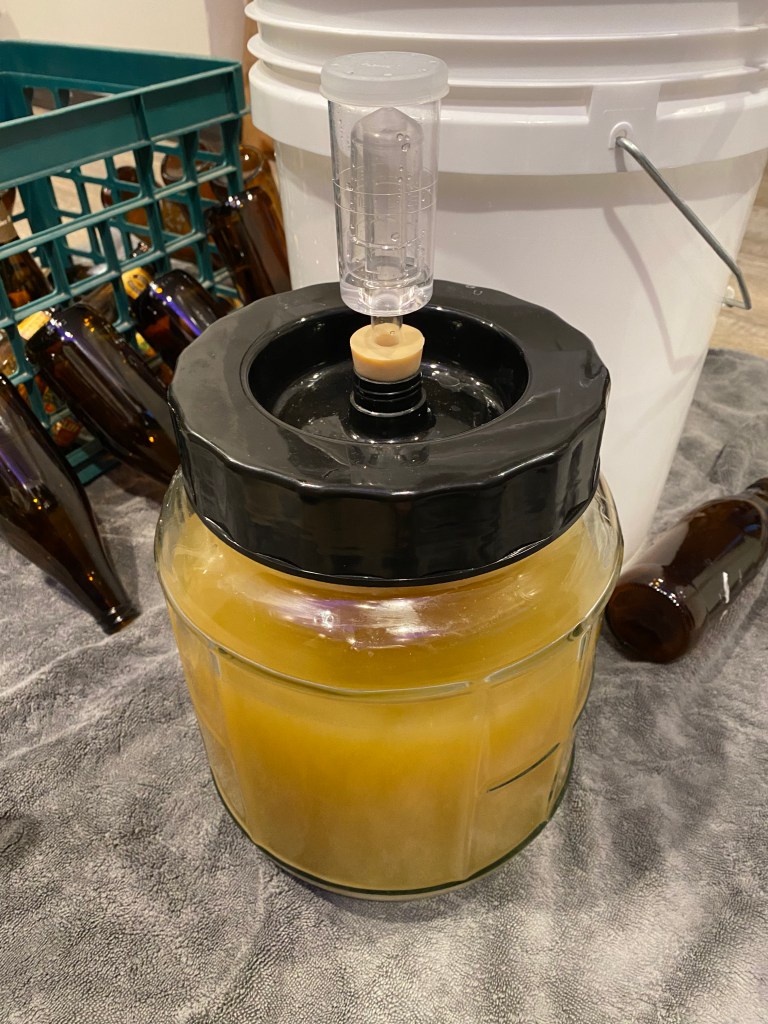
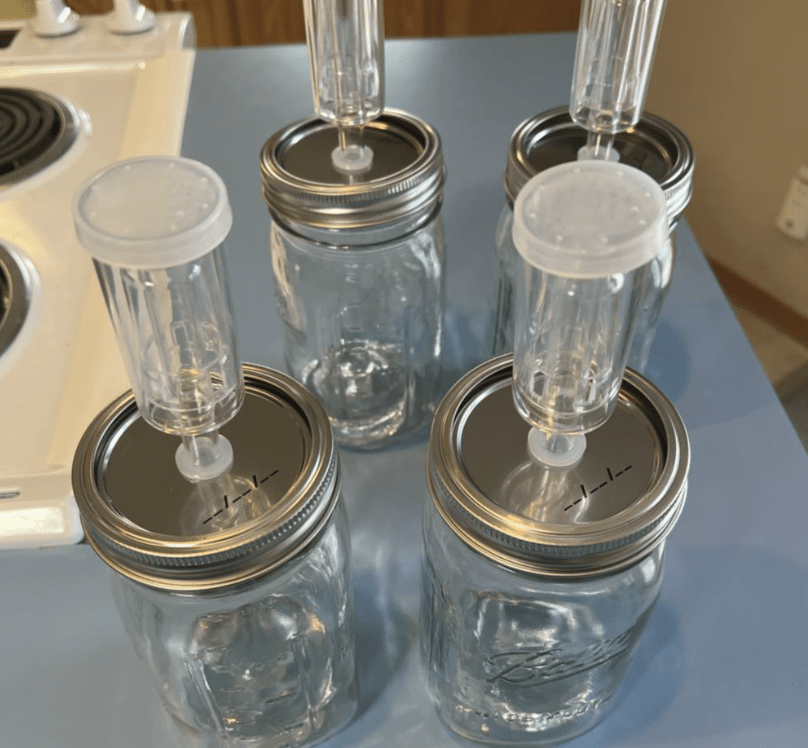
For this project, I grew three SCOBYs at different temperatures, 64°F, 72°F, and 80°F, and took pH measurements three times a week. I took three sets of samples for microbiological testing throughout this process so I could compare them to the original kombucha that was used to grow the SCOBYs. After 2 ½ weeks I took samples of the SCOBYs to dry out for weight measurements.
I started this on Wednesday, April 19th by making the sweet tea/kombucha mixture that would grow the SCOBYs. I boiled 7 cups of water and put 12 tea bags in to steep. This steeped for 15 minutes, then I added 1.5 cups of sugar. In a separate large bucket, I added 14 cups of water, and then the sweet tea mixture. The water in the bucket cooled it down enough to separate it into three gallon sized glass jars, and I put one bottle of GTs Pure kombucha into each. One jar was placed in a heated cooler at 80°F, another was placed at room temperature (72°F) and the other had a glycol chiller in it that kept it at 64°F.
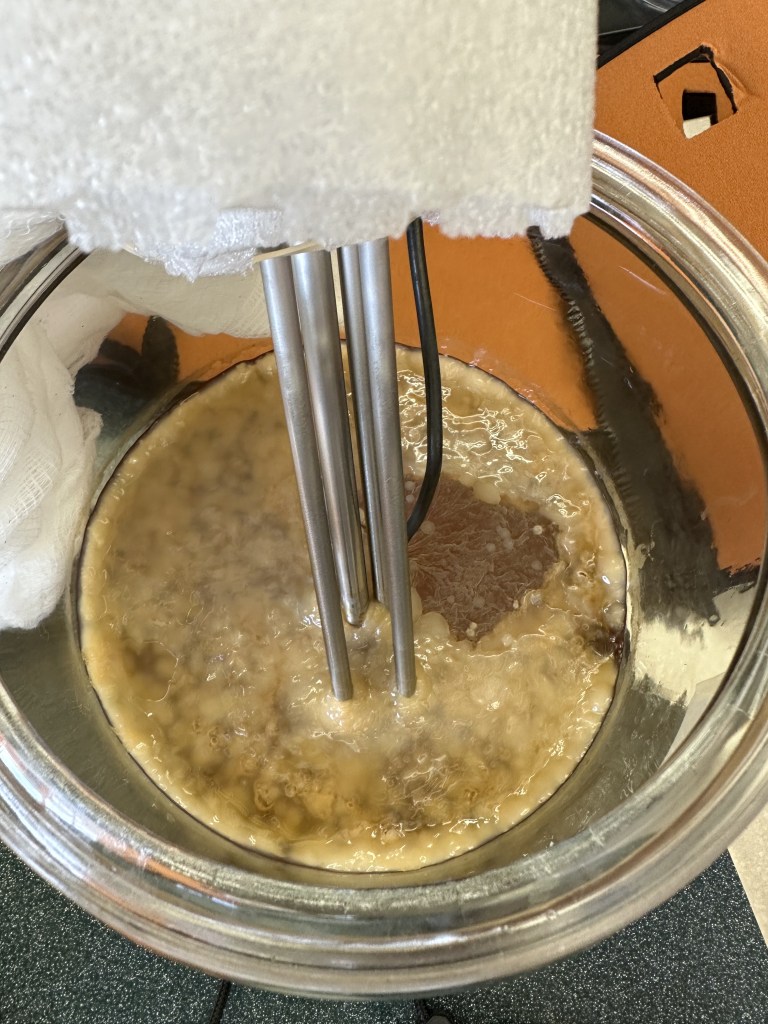
I took pH measurements every Monday, Wednesday, and Friday to see how the conditions compared to each other, shown in figure 1.

Figure 1. pH of kombucha in different temperatures over 16 days On May 5th the SCOBYs were removed from their tea mixture, and samples were taken to dry out and weigh. A final set of samples were also taken on this day, and they were frozen with the rest of the samples for future analysis.
On May 11th the samples (and the original kombucha for comparison) were thawed and plated on three different media, including TSA, MRS, and YGP. Each sample underwent a serial dilution and was plated at the ratios 1:1, 1:10, 1:100, and 1:1000. These samples will be analyzed soon, and I will post the information here.
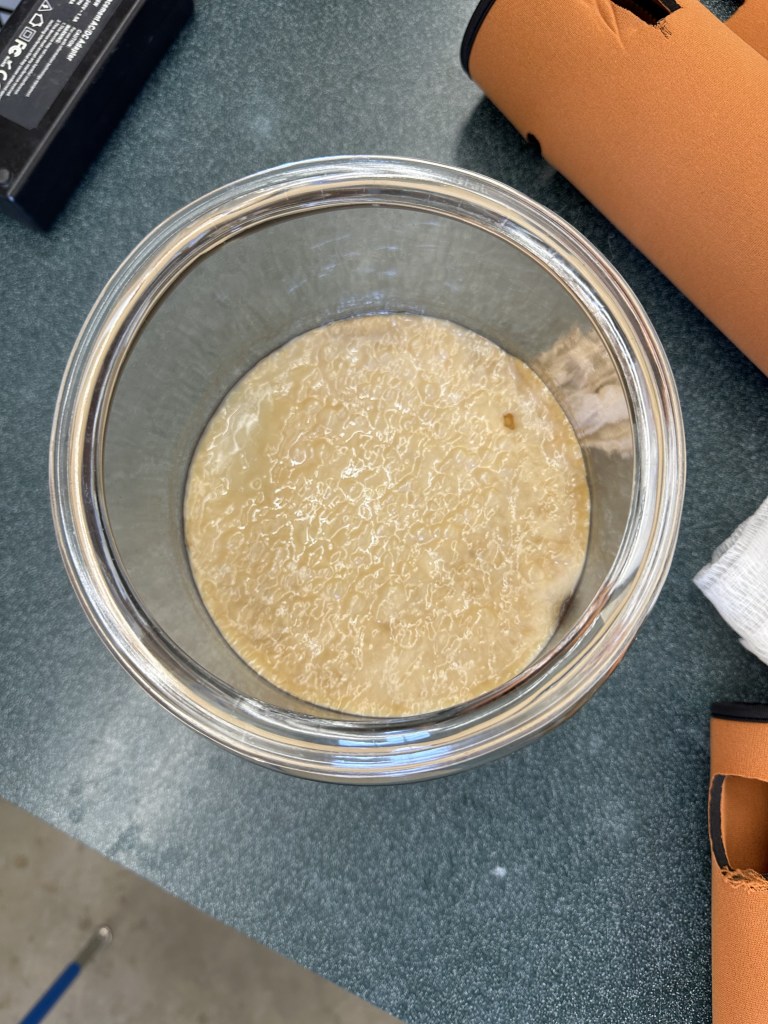
Here are some photos that I took over the course of the experiment to show how SCOBY growth compares at different temperatures.
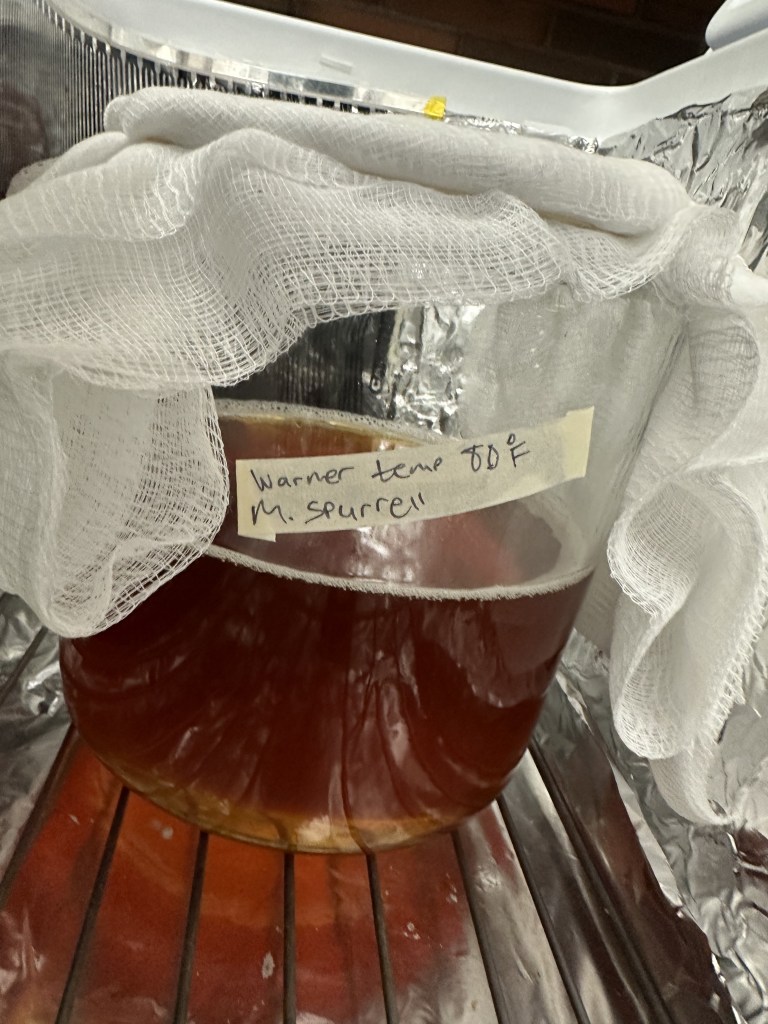
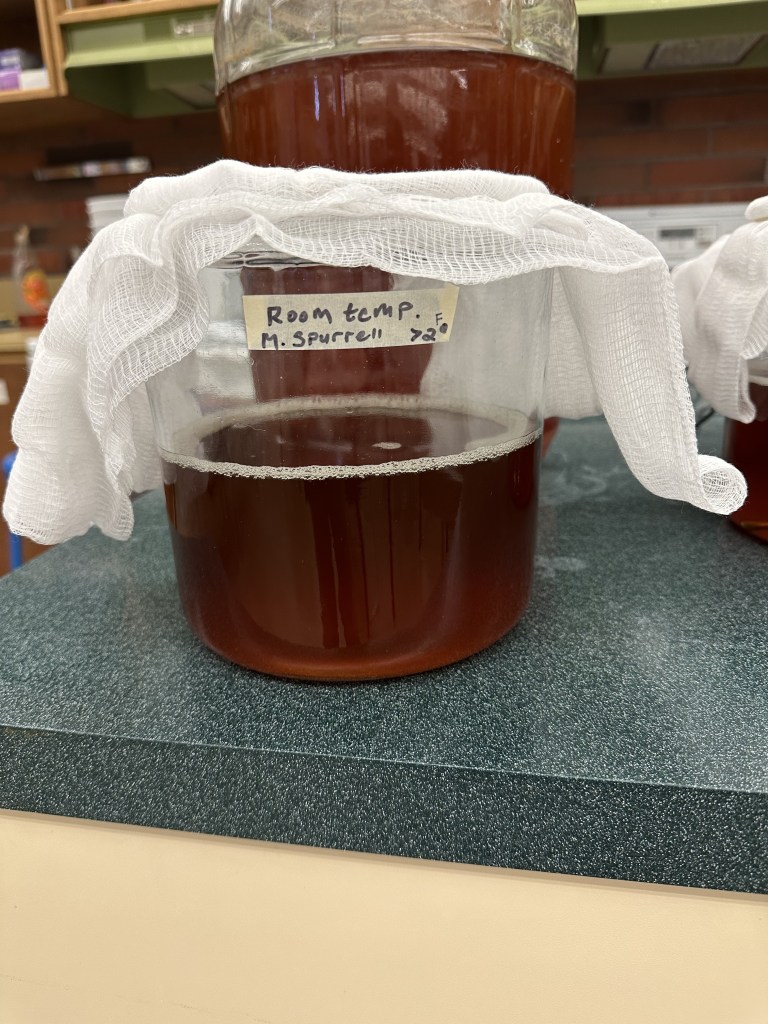
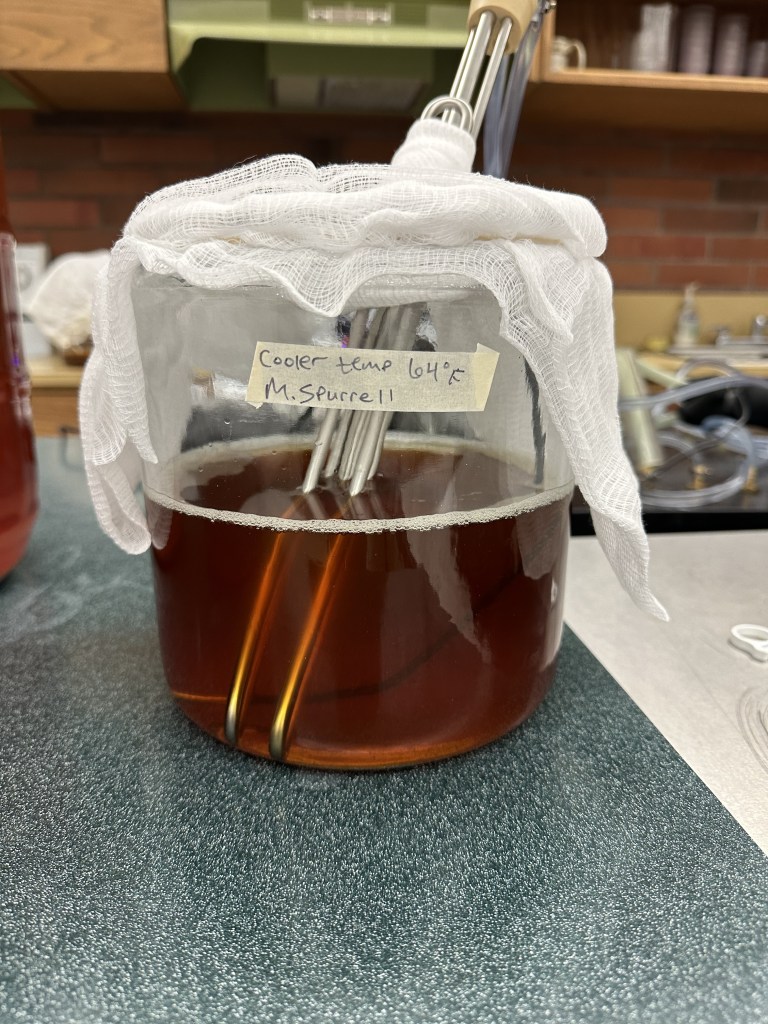
April 19, right after set-up (the rest of the photos are set up in this order)
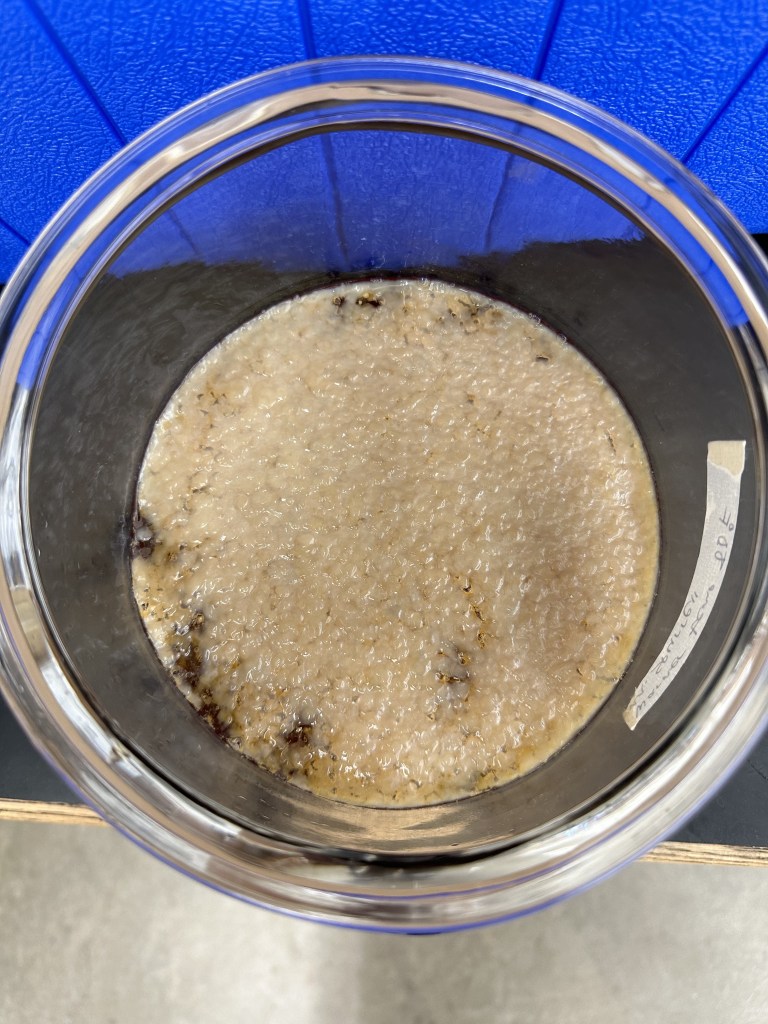

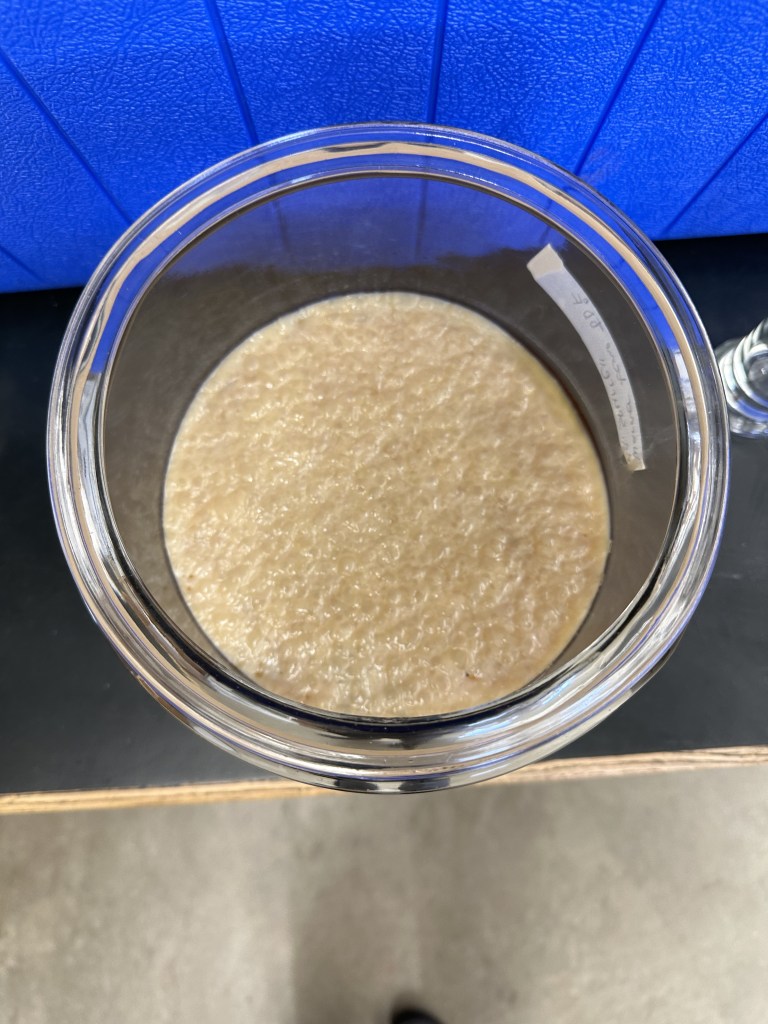
April 26th, one week of growth
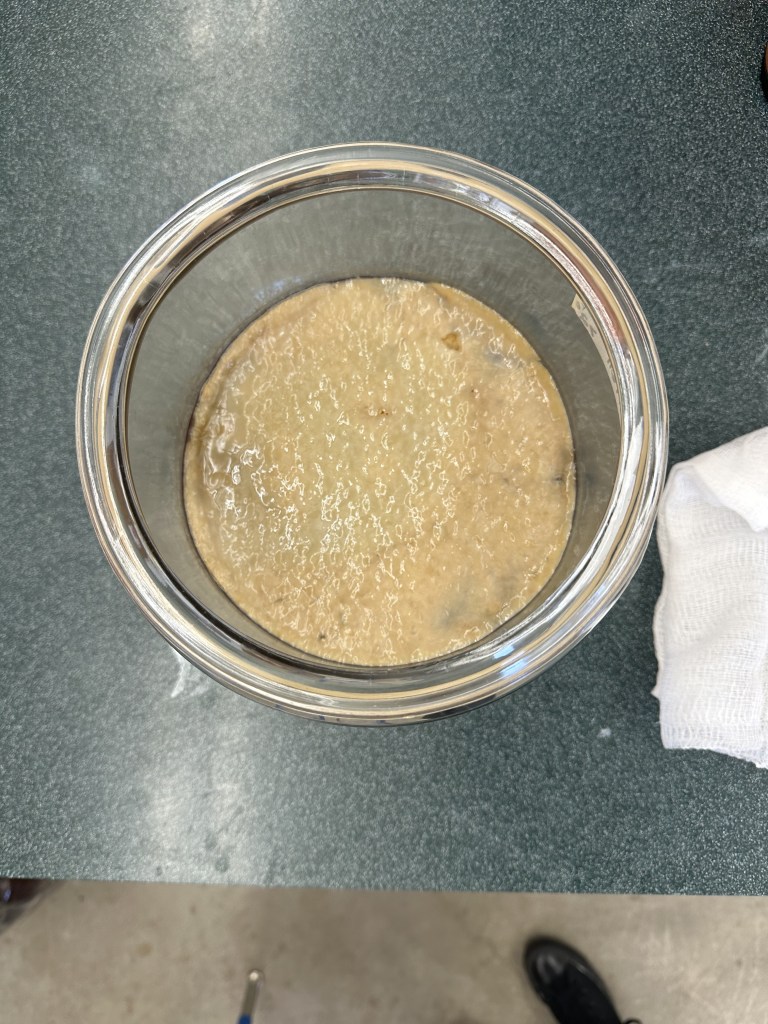
May 1st, 12 days of growth

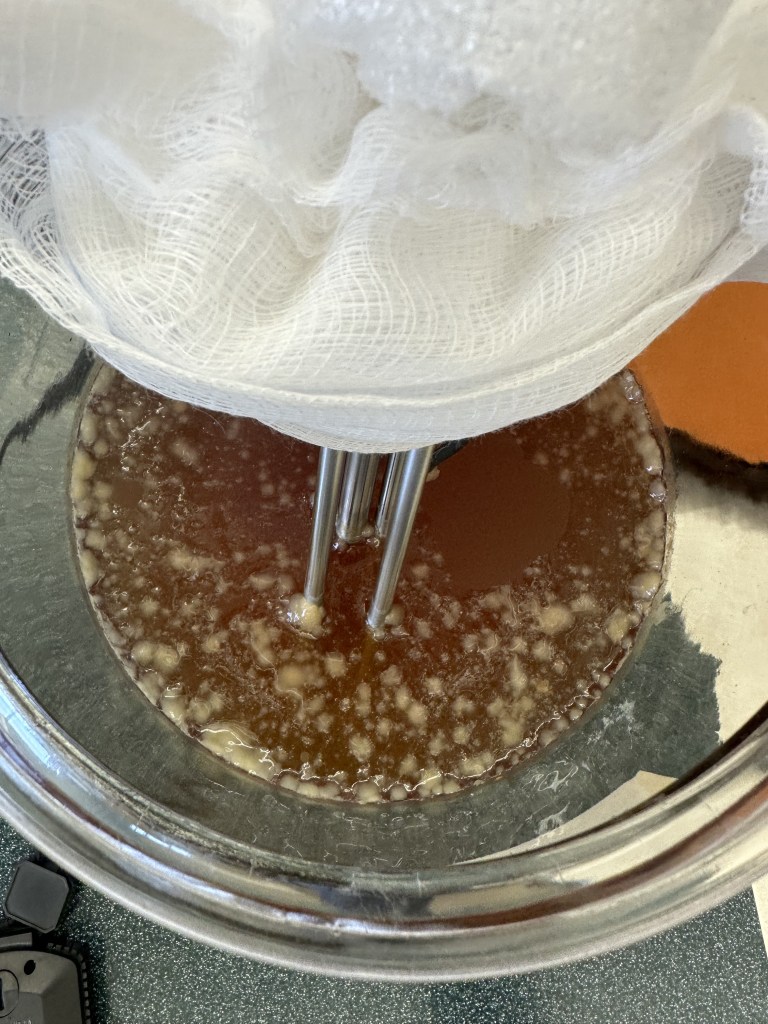
May 5th, final day of growth, taken right before SCOBYs were taken out to dry
-
Gluten-Free Beer!!

Hello, my name is Cody Barthels and I am a senior at Central Washington majoring in Craft Brewing. The idea of this project was to create a 100% gluten free beer for my wife, who has Celiac, to be able to try and drink.
For this gluten free beer I decided to use sorghum for the grain, but in the form of extract. I read through many forums and blogs people have written about gluten free beers and recipes and found that many people had used sorghum in the form of extract, specifically from the brand Briess. So I decided to order two 3.3lbs of BriessSweet: White Grain Sorghum Extract so that I would have enough to make another batch sometime.

I wanted to make a pale ale style beer, so I started looking up some recipes that were using the same Sorghum extract I was using. I came across one on brewersfriend.com and decided to base mine off that. I then wanted to make sure the yeast I got was 100% gluten free and showed it on the package, so I got one pack of Lallemand Voss Kveik ale yeast. For the hops I didn’t want some with high AA (alpha acids), so I decided to go with a pack of SL Styrian Goldings from Yakima Valley Hops, which have a AA of 4.2%. I used the software on brewersfriend.com and put in all the types of yeast, hops, extract and other fermentable and used that to scale down the recipe I based it off from a 5 gallon to 1.5 gallons. It then gave me the estimated OG (original gravity) which was 1.046 and FG (final gravity) at 1.009 as well as the estimated ABV of 4.83% and IBU’s of 28.4.


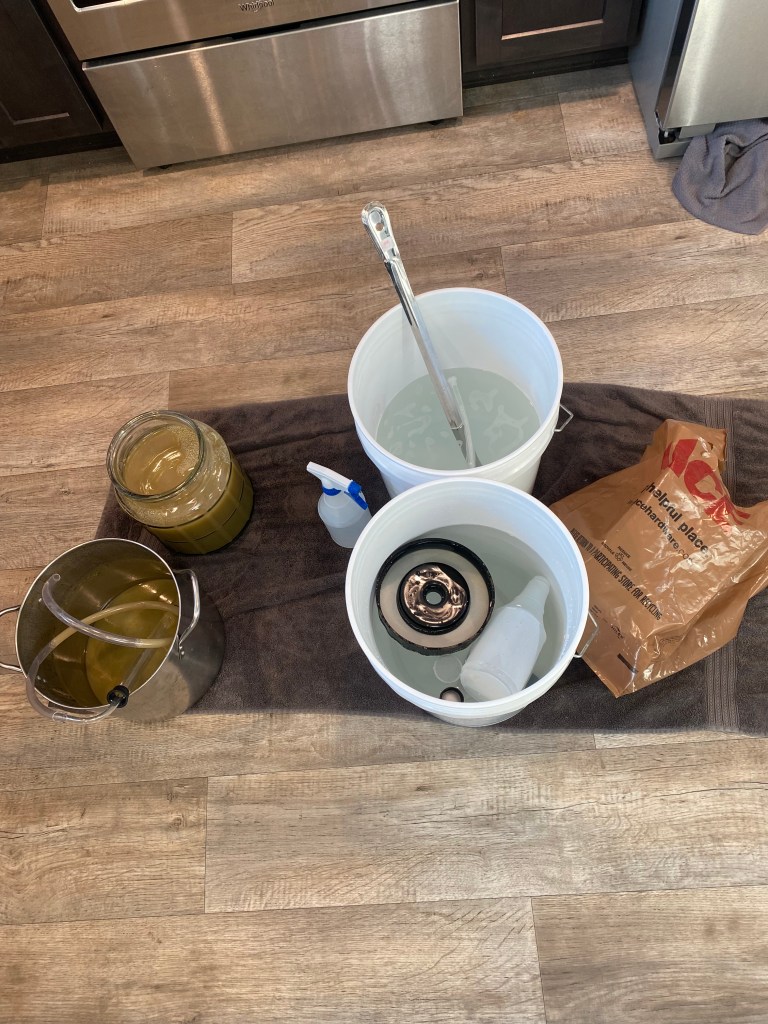
On brew day I started with a good cleaning and sanitizing of all my equipment, including the sanitizing buckets themselves, and all my brewing equipment. After I let everything soak in PBW (Powdered Brewery Wash) and Star Sand, I was ready to begin my gluten free brew. I brought my 3 gallon kettle to a boil and measured out 2lbs of the BriessSweet Sorghum syrup and dropped that into the kettle. I started my 60 minute timer and let that boil for 15 minutes to create a good wort. I then measured out 0.3oz of the SL Styrian Goldings hops and dumped those in at exactly the 45 minute mark. I waited 30 minutes while that boiled and measured another 0.3oz of hops and dumped those in with 15 minutes left.
While that was boiling, I got my ice bath set up and started to sanitize a few pieces of equipment that go onto my fermenter. After it finished boiling I put it into the ice bath for about 45 minutes to get it down to about 60-70 degrees.
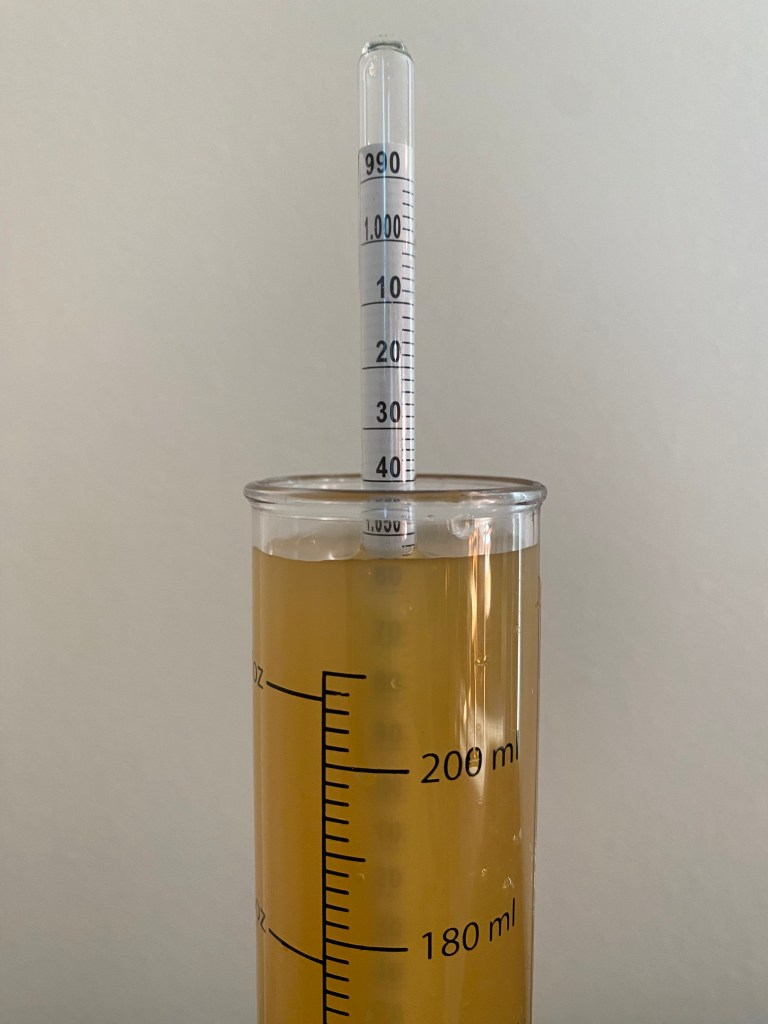
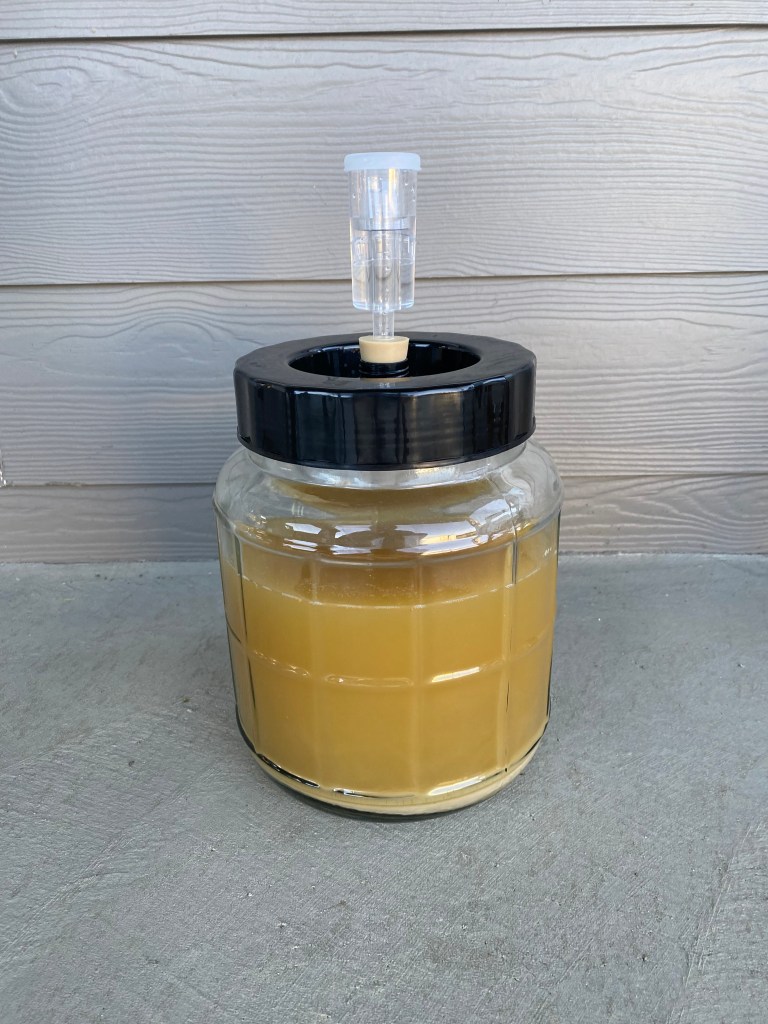
Once it reached 60-70 degrees I was ready to make the switch into my fermenter. I got my siphon and got my graduated cylinder full so I could take a reading for the original gravity, which landed at 1.054. I then started pumping the rest of it into the fermenter and gave it a nice swish around to aerate the wort. I then measured out 5.5 grams of Lallemend Voss Kviek ale yeast yeast and put that onto the top in my fermenter.

After everything was put into the fermenter and all air tight, I put the carboy into the closet away from light to start the fermentation process.

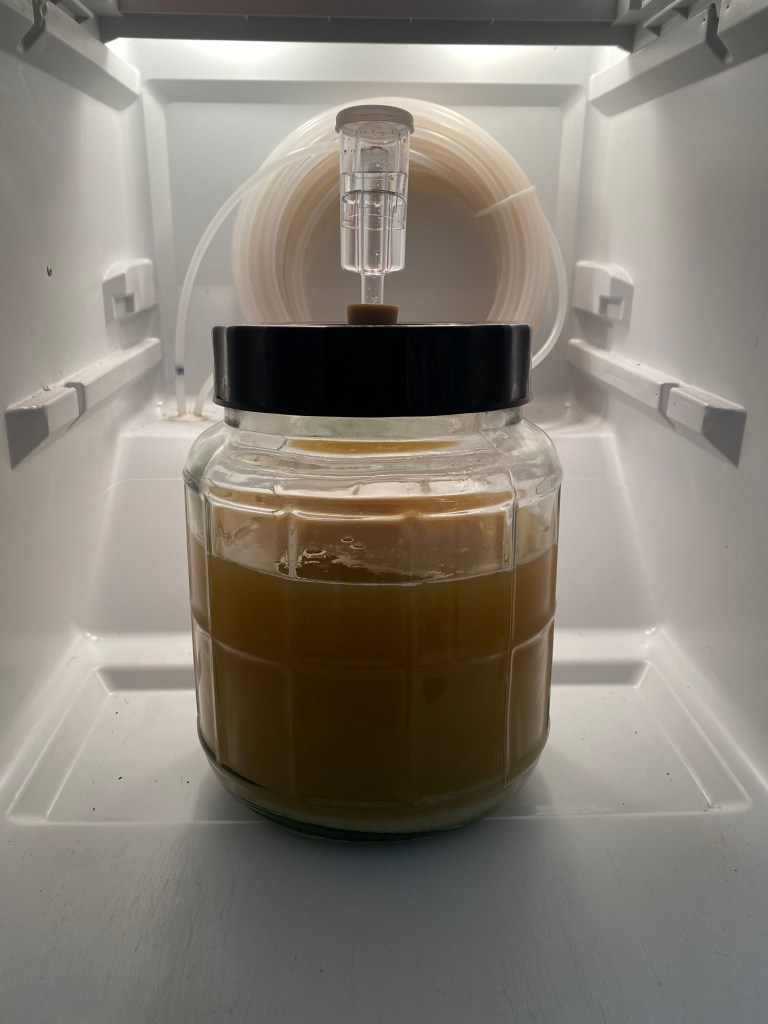
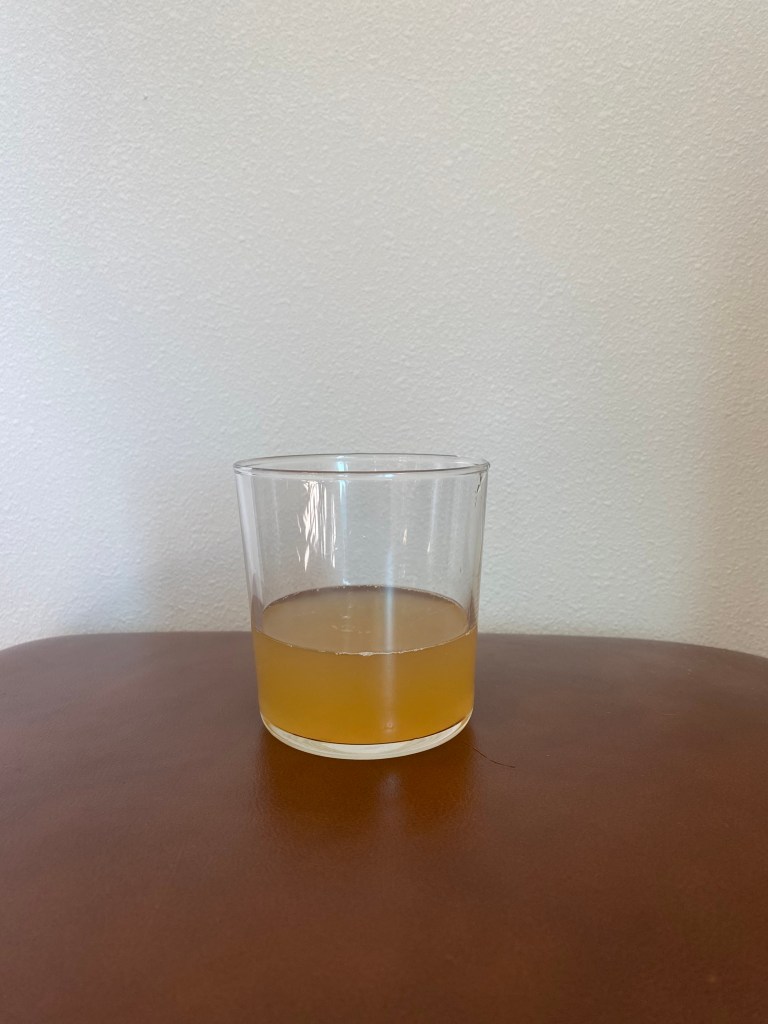
Two weeks later I took it out and decided to do a cold crash for 24 hours because it looked a bit too hazy for what I was looking for. So I moved it to the bottom of my fridge and let that sit for a whole day.
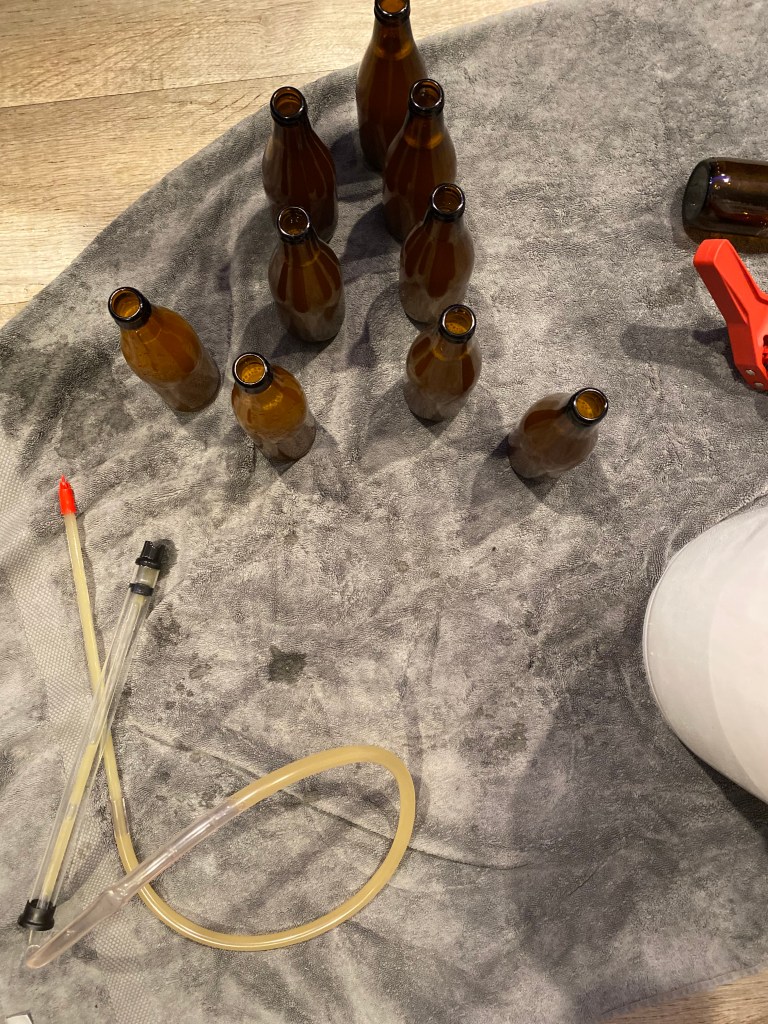
The next day was bottling day, which I was lucky to get a bunch of bottles and caps from my good friend Michael. First I fully cleaned and sanitized each bottle I was using and let those air dry so they were ready to bottle. I got my carboy out of the fridge and brought it into the kitchen. I took another reading in my graduated cylinder with my hydrometer and got a reading of 1.014. I then boiled 2 cups of water and added 1.15 oz of dextrose (corn sugar) and mixed that up until it was fully dissolved. After it cooled down, I dumped that into the carboy and swished it around so it got mixed up. I then gave my bottle filler and siphon one last rinse and started to fill each bottle. I was able to get 9 bottles, which I was very happy with. After bottling was done, I took all the bottles back up and put them into the closet to stay away from light and let them condition for another 2 weeks before drinking.

After the two weeks were up, I threw the bottles into the fridge to get nice and cold. I let them sit for a day or two before trying it.
Conclusions:Everything turned out better than I had expected, it was a very fun experiment brewing with sorghum and seeing the differences between sorghum and other grains. The beer came out to just around 5.25% ABV which is what I was aiming for and the coloring was perfect!
Trying the beer with my wife was very exciting. The taste of the beer was very crisp at first with a heavy carbonation and bit of a sour aftertaste. I was satisfied with how the beer came out, especially since I used sorghum, and sorghum beer has some funky tastes and is supposed to have a bitter and sour taste.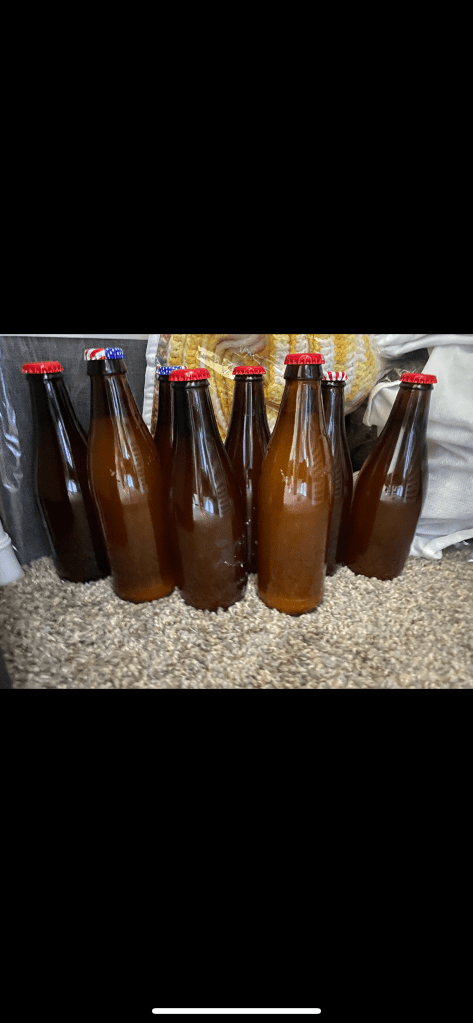
-
The American Iteration of a Lichtenhainer.

Hello, My name is Austin Haase and I am currently a senior here at Central Washington University. I will be graduating with a Bachelors of Science of Biology with a Specialization in Biomedical Sciences, a Chemistry Minor, and a Craft Brewing Certificate. For my spring practicum to obtain my certificate, I wanted to start with the basics and do my first ever home brew. Being German myself, I wanted to do a German style beer. However, being a STEM major also involves maybe being a little bit too ambitious.
Historical Context:
Germany is certainly known for its unique characteristic of brews. Primarily the lager, which is bottom fermenting, that has taken over the country. However, dozens of other top fermenting beers were once popular throughout the area. Those who carried on the tradition post WWII have keep certain brew recipes alive like the Gose and certainly the Lichtenhainer. This beer is characteristically brewed with smoked malt, light hops, and purposely inoculated with lactobacillus to make a weak sour beer. Preferably served young, this beer is a smoked sour German Weissbier or “wheat beer”. It is most commonly brewed in Thuringia, Germany. Since this beer is meant to be served young it worked out for this quarters scheduling and is not meant to be very high in ABV, around 3.75%!
Starting the project:
Since I wanted to home brew beer on my own once I graduate, I went ahead and purchased my own home brew kit. The brew kit alone comes with the majority of the supplies and includes a kettle, fermenter, testing equipment, and other various quality of life tools. Since the Lichtenhainer is traditionally a Weissbier and the kit comes with a Hefeweizen brew kit, the American version is being cost effective and using the Hefeweizen brew kit to make the beer, inoculating it to sour it, and then using a smoked malt for the wort.
Tentative recipe:
For this project I followed an online recipe from HomeBrewAcademy.com by Steve Thanos. This was apart of his 99 beers in 99 weeks series. This post also gave specific numbers expected from this beer and what we should shoot for when brewing and souring.
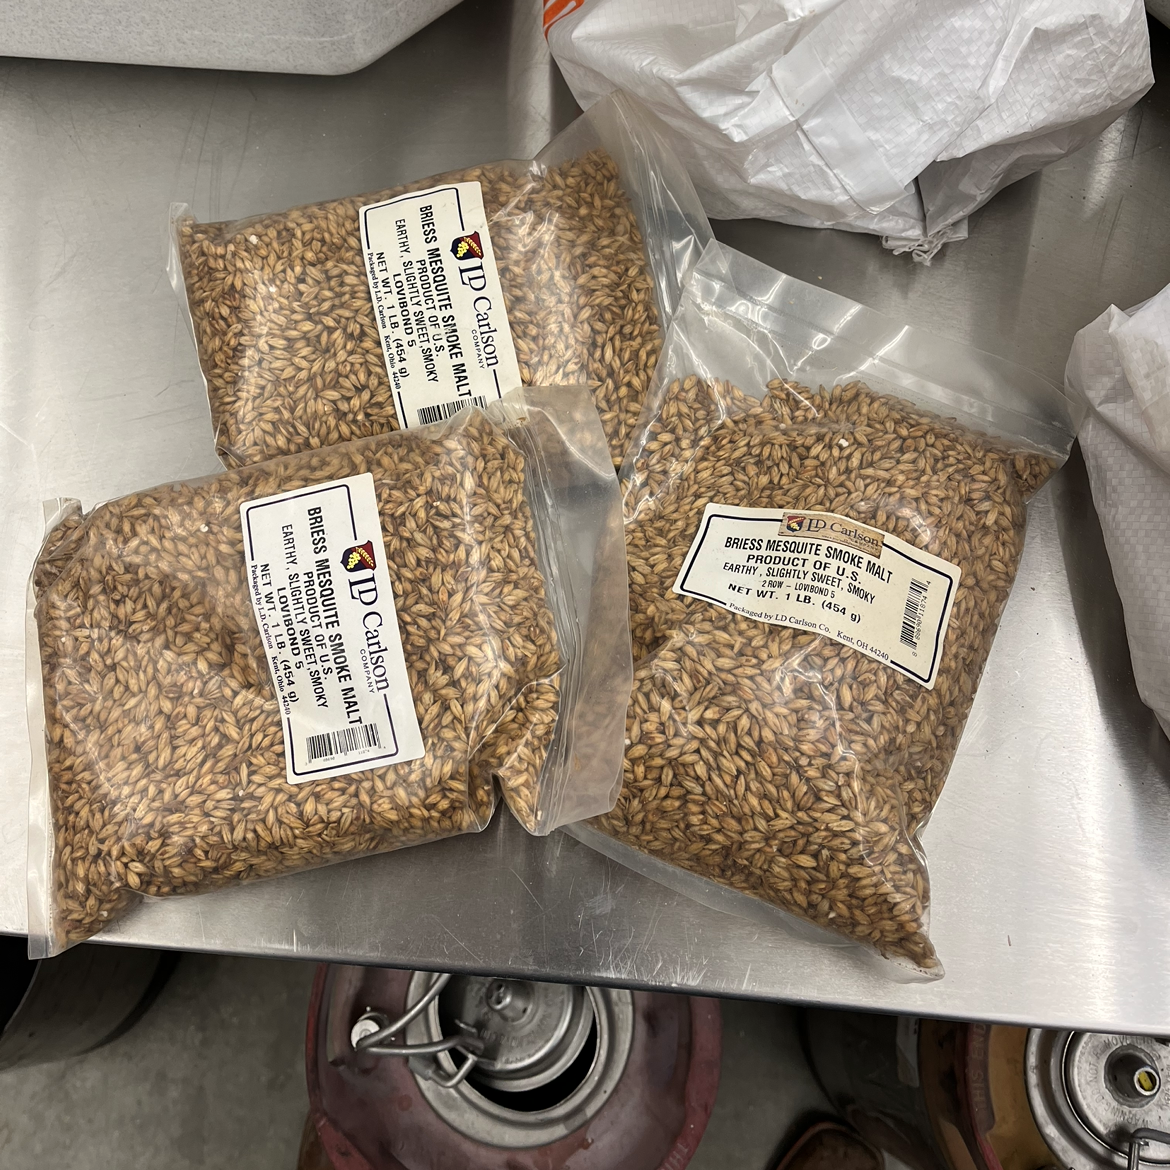
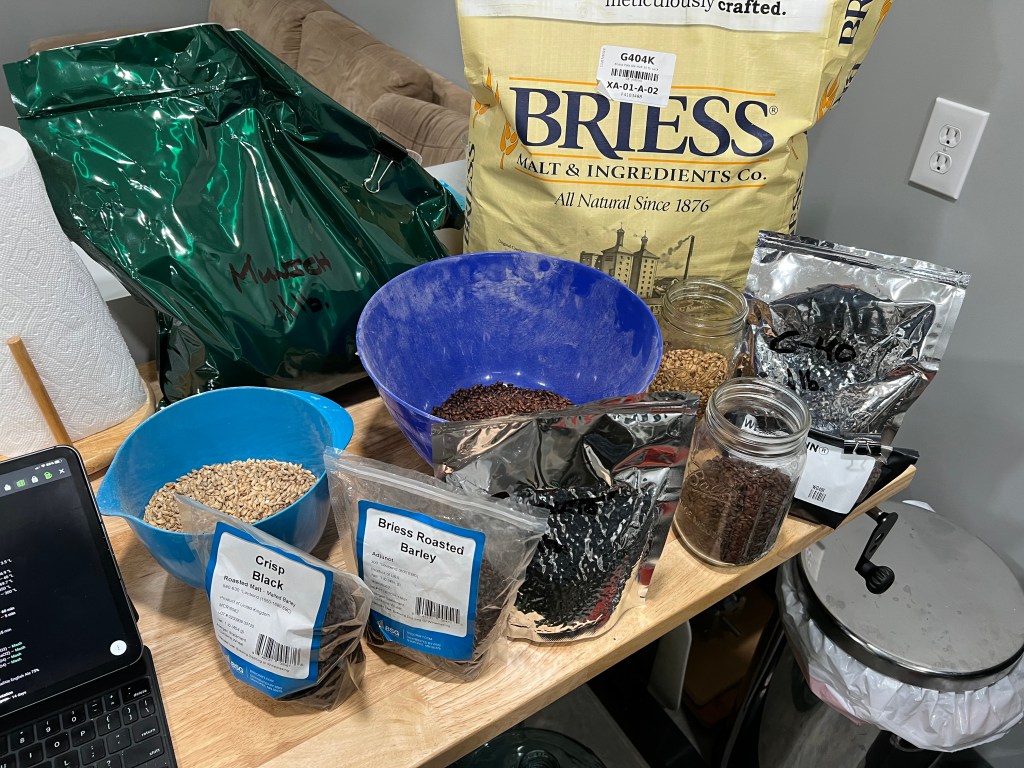
We started out this project with having 3lb smoked barley malt (mesquite), 6lb of wheat malt extract syrup, 1lb of DME (Briess golden Light), and lots of Munich base malt. Before we started brewing, following the recipe, it called for 3lb smoked wheat malt, 3lb pilsner, and 1.5lb Munich base malt. However, with the ingredients that we had, we opted for just 3lb of milled smoke barley malt, and 1.5lb milled Munich for base malt.
Protocol for Brew Day: (April 27, 2023)
1. Sanitize and Preparation
- Thoroughly clean and sanitize ALL brewing equipment and utensils with Star San for 5 minutes.
- Place the malt extract syrup bottle into a container of warm water to help transfer it to the boil later.
- Install spigots onto fermenter and test for leaks.
2. Mashing Grain
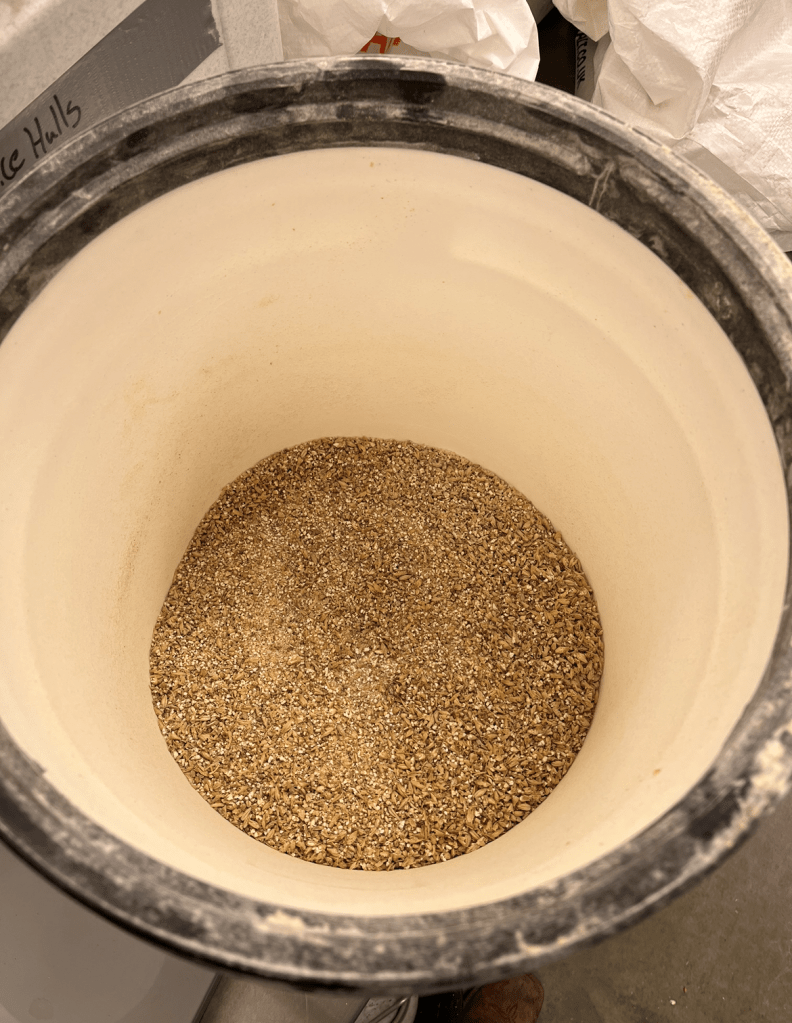
- Mill the smoked barley malt (3 x 1lb bags).
- Pour ~ 3 gallons of clean pre-warmed water into a kettle: Total water: 3 gallons.
- Heat water until (152° F or 67° C).
- Add milled barley and Munich base malt to the kettle and mash for 60 minutes, stirring occasionally.
3. Measuring and Adjusting O.G.
- Heat another gallon of hot water and sparge the grain into the electric kettle.
- Total Water: 4 gallons- bring to boil for 15 to stop enzymatic activity.
- Add wheat malt extract syrup ~ half of bottle (3lb) to start adjusting to 1.038-1.056 specific gravity.
- Add clean water until the 5-gallon mark is reached ~ 1 gallon
- Total Water: ~5 gallons
- After O.G. is in range using algebra to adjust for the additional water, boil the mixture for 15 minutes to pasteurize it.
Protocol for Kettle Souring/ Fermenting: (May 1, 2023)
4. Cool Wort Down/ Transfer/ Kettle Sour
- Chill wort down quickly till (95° F or 35° C) using a external water chiller- the wort should still be in the kettle.
- Measure pH and add acid blend (preferably lactic acid) until wort is equal to 4.5 pH or less.
- Pitch in the lactobacillus bacteria, and cover to reduce any oxygen (maybe swapped with previous step if no pH adjust is ideal).
- Sour for 1 day at (95° F or 35° C) or until pH ~ 3.8. monitor very closely (possibly hourly).
- Once souring is done, bring back to a boil to pasteurize and kill the lactobacillus bacteria.
(Date souring is done May 2, 2023) (07:00 TIME)
5. Hops and Fermentation (Date 05/04/23)
- Add hops (clean hops – little aroma, just need bitterness) and boil for 60 minutes to bitter.
- Take the final-original gravity.
- Cool rapidly again with another water chiller to (68-71° F or 20° C) and transfer sour wort into fermenter with sanitized tubing.
- Pitch yeast into the mixture/ stir well with sanitized spoon or shake/ securely fasten lid
- Add the airlock on top and fill it halfway with Star San.
- Place into a temperature stable environment and ferment at (68-71° F or 20-22° C) for 1 week or until bubbles stop forming in the airlock.
- Take F.G – bottle beer and bottle condition or infuse with CO2.
1st Practicum Update:
For this update, the previous instructions were developed before we started brewing and slightly modified after brewing was done and the beer was fermenting. This section is an explanation of what we did while trying to follow the instructions made. First off, we started by washing out and sanitizing the kettle with Star San.
At this point, I only purchased a metal pot kettle but we needed to sour the beer at 95 F for a long period of time and need precise control of temperature. So we borrowed a donated kettle from last practicum to mash the wort and kettle sour.

While we let that sit, we milled the 3lb of smoked barley malt and 1.5lb of Munich base malt in a electric mill provided by the CWU Brew lab.
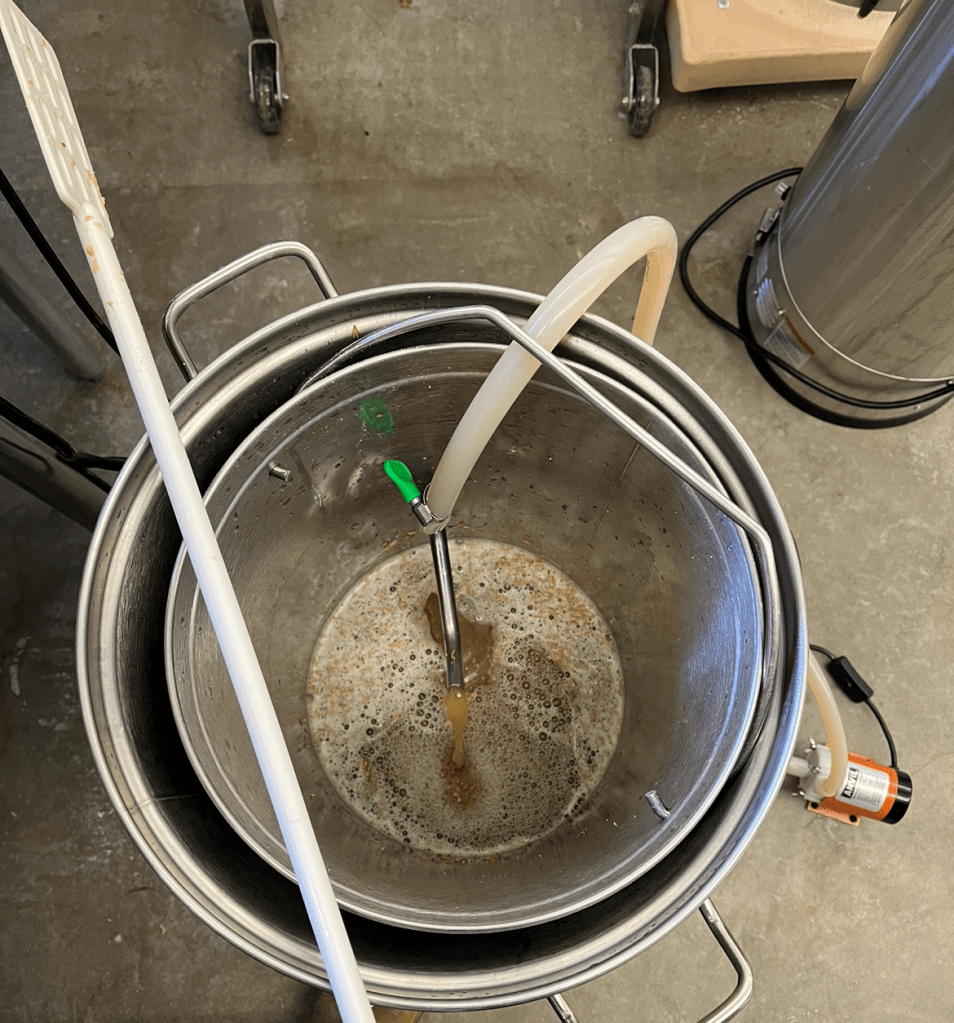
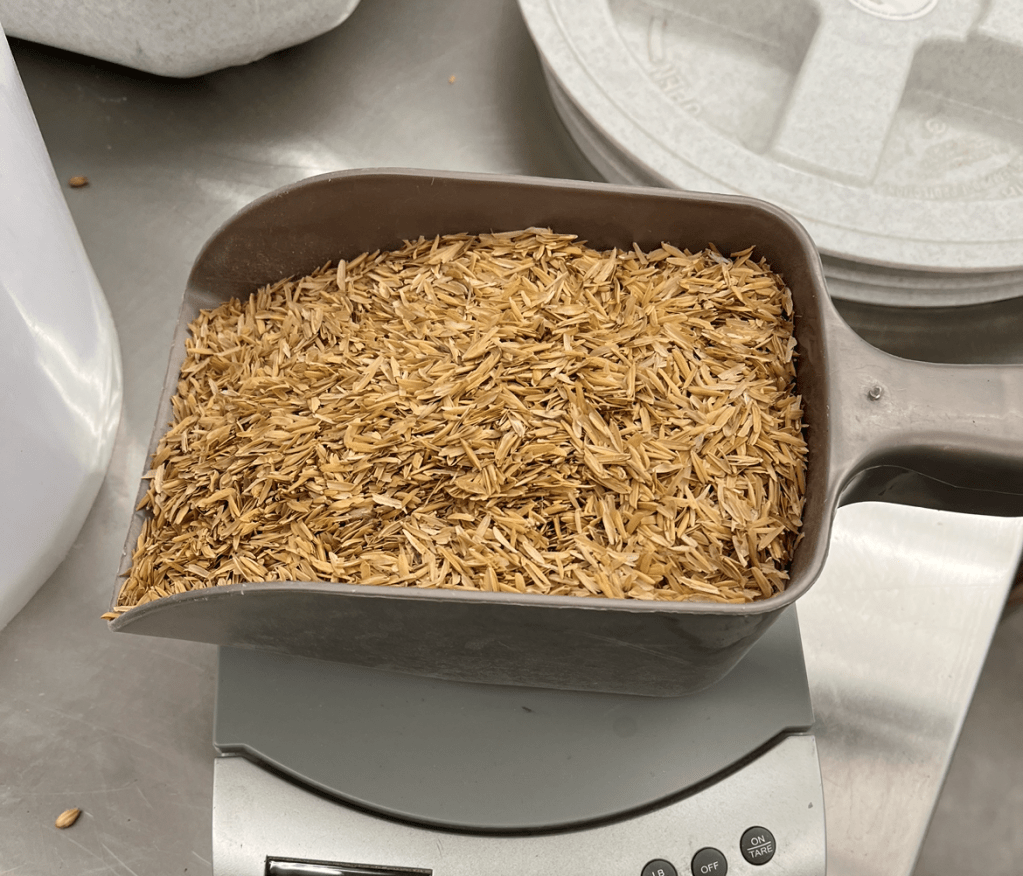
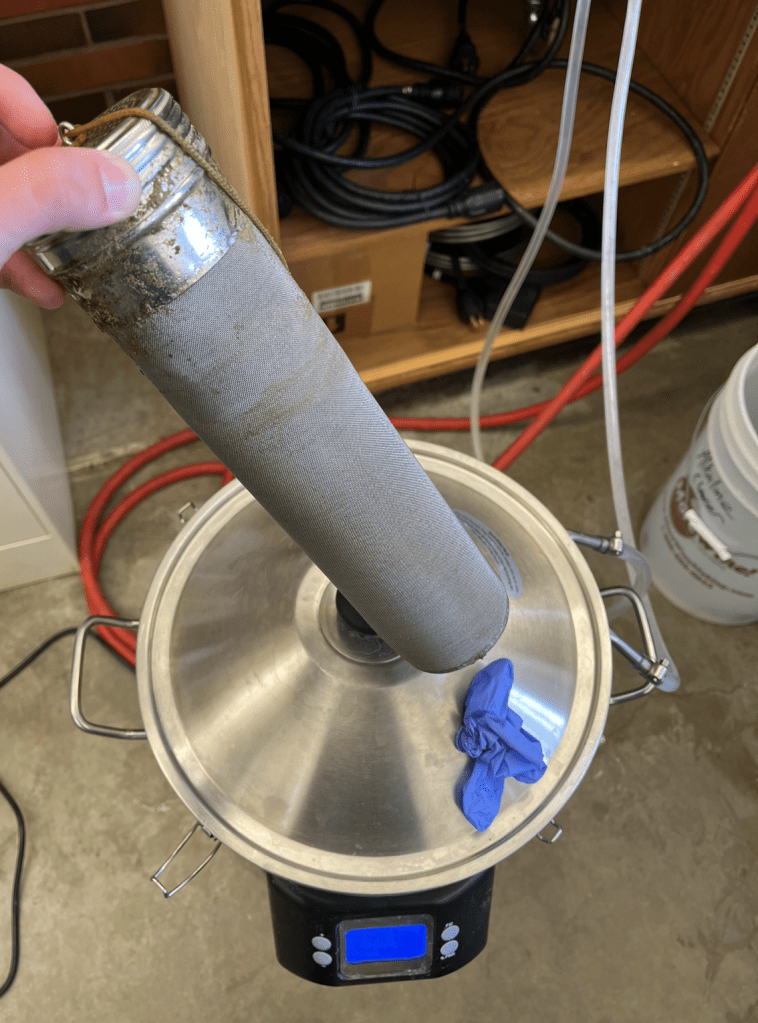
We heated 3 gallons of water in the kettle and mashed for 60 minutes, afterwards we pulled the grain strainer out and let it drip into the kettle. In the beginning of the mash, we added some rice husks in order to liquify the grain and make it easier to stir.
We sparged the grain with another gallon of water and let it all drip into the kettle. We added 3lb of wheat malt extract syrup and added more clean hot water to the kettle. We didn’t need to add any DME as the gravity was already in range after the addition. We then boiled the wort to pasteurize it and due to scheduling conflicts, we let the wort sit over the weekend, or 4 days. Unfortunately, our kettle malfunctioned and sprung a leak and we lost some wort over the weekend. We were left with 3.25 gallons. Pushing forward, it was time to kettle sour and after the wort was brought up to a boil again to kill anything, we let it cool to 95 F using a copper external water chiller. We then added 125mL of 85% FCC lactic acid into the wort. After checking that the pH was in range for the bacteria, we then added the lactobacillus wet solution of 125mL.
We finished about midafternoon and let the lactobacillus sour the wort overnight. Around 7am the next day, the pH was at 3.71 which is just in range, and we brought it back up to boil and killed off the bacteria to stop the souring.
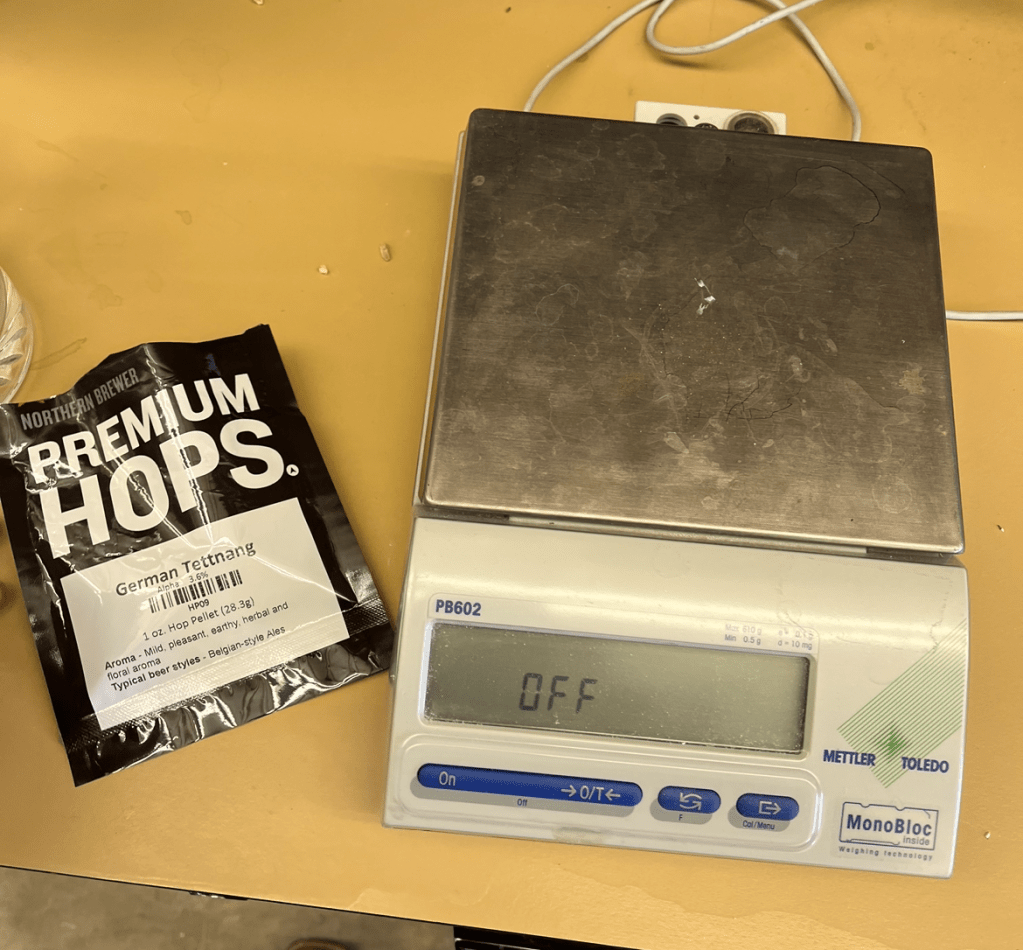
On Thursday (May 4, 2023), we had a 1oz bag of Tettnang hops from the purchased brew kit and it was meant for 5 gallons, so we determined for 3.25 gallons, we needed 0.65oz of hops to bitter the wort. We measured out and boiled the hops in a hop’s strainer for 60 minutes. Keeping to the American way, we actually had the slow roiling boil come first before we added the hops, while traditionally, the hops in German beer is added while the wort is coming up to a boil.
While this was going on we sanitized the fermenter with a much stronger acid than Star San. Afterwards, we cooled the wort with an internal water chiller to 71 F and transferred the sour wort into the fermenter using sanitized tubing.
We took the true OG after we added the wort to the fermenter. All measurements of Specific Gravity was done using a smart hydrometer and the reading was taken off the associated phone app. All pH readings were done using an electric pH probe. After, we pitched 8g of Cali dry yeast and mixed it in and shook it lightly. We had a package of SafeAle yeast provided by the Hefeweizen kit but it would have added flavors of clove and banana and we decided that it would go against the complex flavor profile we had already developed. So we went with the Cali dry yeast that we had on hand for its very weak addition of any flavor. We installed the airlock and filled it with Star San solution. We then locked the lid and made sure there was no leaks this time. Currently, the fermenter is working its magic and the yeast are producing gas which means its working. There is a scheduled checkup on the fermenter next Thursday, May 23, 2023 to see the progress of the yeast.

We calculated, with the OG and expected FG, and an 80% attenuation, to have about a 5.38% ABV. This is also were the Americanization comes in as, yes, the true recipe says the beer is supposed to be a very low ABV but we wanted to increase it as most American light beers are within this range. Further steps include waiting for the fermentation to finish, then bottling the beer and adding CO2. I have plans to set up a tasting event where we will ask people to come in and try the beer and let them describe the flavors they get to determine the profile of the beer without any outside influences. This is mostly going to be recruitment within the brew club and Craft Brewing Program as they already have a keen nose and flavor profile developed. Some outside responses also may help to determine what its like for someone who doesn’t drink specialty beers like this one.
Measurements:
Mash in Gravity-1.030 pH- 5.38
1st wort Gravity- 1.042 pH-5.25
Last wort Gravity-1.034 pH-5.29
Last wort + 3lb MES-1.060 pH-5.36
OG at 3.25 gallons and 125mL of lactic acid-1.051 pH-4.26
Post hops OG-1.052 pH-3.68
OG-1.052 pH-3.68
FG- ??? pH-???
Final Report 06/04/2023
My idea for this project was to brew my very first beer. I didn’t want to do anything basic, but I also wanted mine to be unique. I always liked German style beers and the process they went about brewing. I began my research for unique German style beers and landed on the Lichtenhainer. Post WWII there was a huge push for bottom fermenting beers but seldom top fermenting beer styles were kept alive and brought into the new century. This beer is characteristically brewed with smoked malt, light hops, and purposely inoculated with lactobacillus to make a weak sour beer. What makes this unique is that its a smoked sour German wheat beer and today, its commonly brewed throughout the region of Thuringia, Germany. Being a beer that is meant to be served young, have a low ABV, and certainly get the attention of a beer enthusiast, I set forth developing my proposal.
My initial proposal included me collecting all of the supplies, generating a recipe for the beer, getting signed off to do the beer, and then setting up a schedule to brew and work through the necessary steps to make the beer. Since I wanted to home brew after I graduated, I opted to purchase a home-brew kit for myself. One of the first challenges to overcome was figuring out the necessary supplies to make the wort. The kit I had bought included a free Hefeweizen kit with liquid malt extract, DME, and even hops, but I needed to convert all of that into the Lichtenhainer recipe I was using off of Homebrew Academy. We figured out that we can use the smoked barley malt that was donated to the program as the smoke aspect but we also needed a base malt. We opted to settle for 3 lb’s of smoked barley malt and 1.5 lb’s of Munich base malt for the bulk of the mash. We also used lactobacillus isolated from Icelandic yogurt that was grown in lab that we used to inoculate our beer for kettle souring. We also used a very plain yeast to ferment the beer as we didn’t want any yeast flavors to be added to the already complex flavor profile. After the initial recipe was made, I talked to my advisor and got signed off to do the project with much enthusiasm and interest which was nice to hear. Unsurprisingly, an unforeseen problem was that making beer is a major time commitment, being a full time college student, working 2 jobs, and well, basic living necessities, it was very difficult to make time for. By the time the wort was done and it had accidently leaked all over the floor over the weekend, we developed a clearer schedule as when the next step in the process was taking place. Otherwise than that we followed the recipe that I had drawn up and started by milling the grain, mashing the grain, adding the liquid malt extract until the correct OG was met, added some water here, added some lactobacillus there, waited until the pH was right, and then added the yeast and fermented it. By the end of the quarter, I had produced a viable beer with enough time to do taste testing and clean up.
For the results of this project, I tried to collect as much numerical data as I could that is highlighted above and all that was left was obtaining the final gravity and pH in order to calculate the final ABV of my beer.
OG-1.052 pH-3.68
FG- 1.016 pH-3.61
Final ABV: 4.59% Apparent attenuation: 68%
We ended up collecting about 4 growlers worth of beer even with the significant loss earlier in the project timeline. The last stretch was carbonating the beer. I knew that we could bottle condition the beer and do a secondary fermentation and wait several more weeks but I made the executive decision to just keg it and pour it into growlers. We sanitized and cleaned a Cornelius keg, poured the beer in, connected a CO2 canister to it and left it overnight to see how much CO2 would diffuse into it. The next day we were ready to bottle and I left with several growlers, finished them off, then came back for the rest of it the last week before finals and cleaned the keg and collected all of my supplies.
I would say that the project was indeed a success and we hit all of our goals. We were able to develop a recipe for the beer, collect the necessary supplies, brew the actual beer, kettle sour the beer, and ferment it. An interesting aspect that should be noted is this beer changed its flavor many times with many being unexpected. When the brew was first going it would fill the room with a very nice smelling mesquite smokey flavor and we were worried it would be too overpowering. Further along the brew time line, after the souring, the smoke almost disappeared and was now more backseat with the other flavors of toast and barley. Even the sour was hardly there though the pH was so low. It wasn’t until the fermentation had finished that the beer truly showed its final flavor profile. Comments from my advisor and myself on the flavor included, a pleasant sour taste on the front that fills your mouth following by toast and barley, then the smokiness follows at the end and lingers around. Once the yeast had ate all of the sugar, the sour was much more prominent and the smoke went from the main dominating flavor to a more subtle backseat approach. I don’t want to say any personal bias, but I certainly enjoyed the taste of this beer. After several taste tests from friends, the majority of them concluded that they are more surprised by how much they like it, even though those flavor combinations wouldn’t be their first choice. I think this is an excellent observation and could be expanded on if this beer were to be made at another point in time.
For future work, setting up a real blind taste test would be a start to collect data on the flavor profile. I think open conversation about the beer is also important as that’s how it would be traditionally served in a bar and not by someone who’s blindfolded or from a marked glass 1-10. The beauty of this project is that I have the recipe already made and can easily print it out and recreate it. I also was able to develop key experiences from this class that I am able to apply to the real world. The process wasn’t perfect, but I think that’s the main point of brewing, it’s very hard to exactly recreate a beer. I think that having experiences were things go wrong is much more beneficial than it going perfectly. I now know what to expect and what to do if something like this ever happens again. In the future, I would want to actually learn to wait and bottle condition my beer and see how it ends up being after the 2nd fermentation. I want to thank the CWU Craft Brewing Program for a great quarter to send me off as this is my last quarter in college ever. Thank you and Cheers.
-
Ale Yeast Fermentation Trials on Barley Wort.
Hello, my name is Jonathan Hughes and I am a senior at CWU and I am majoring in Craft Brewing. For this Spring practicum, I wanted to experiment with a variety of different ale yeasts to understand the different characteristics each yeast can contribute.
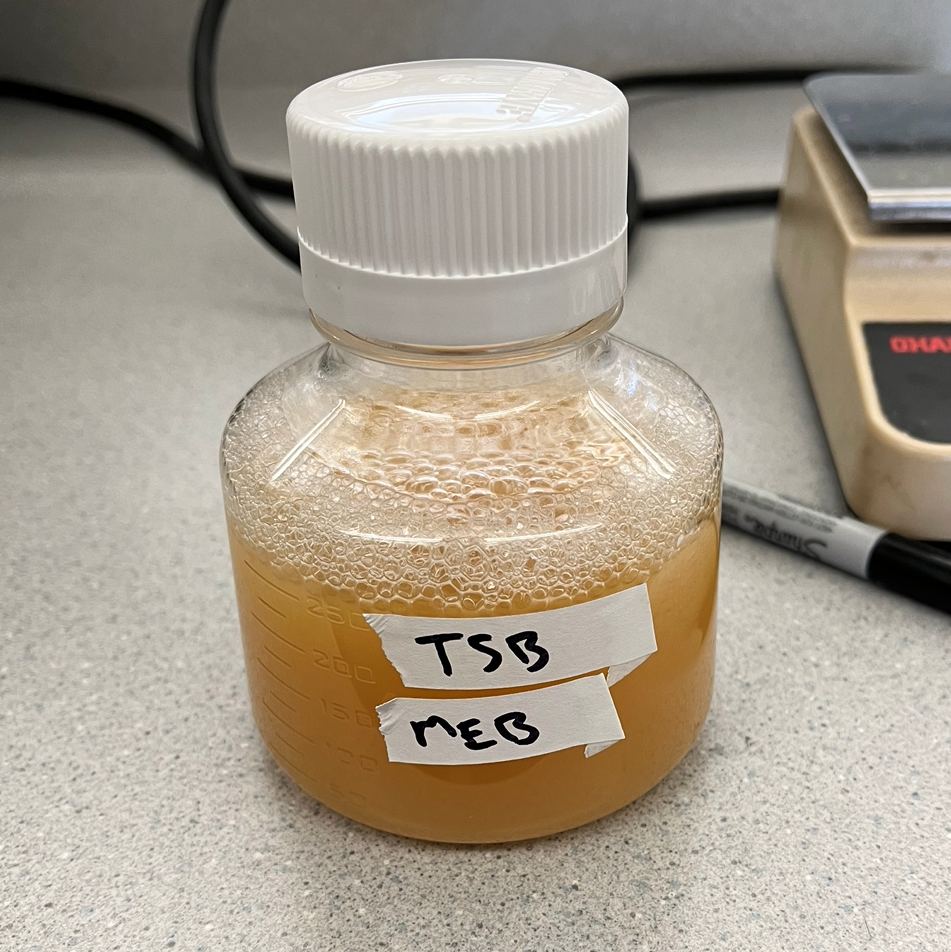
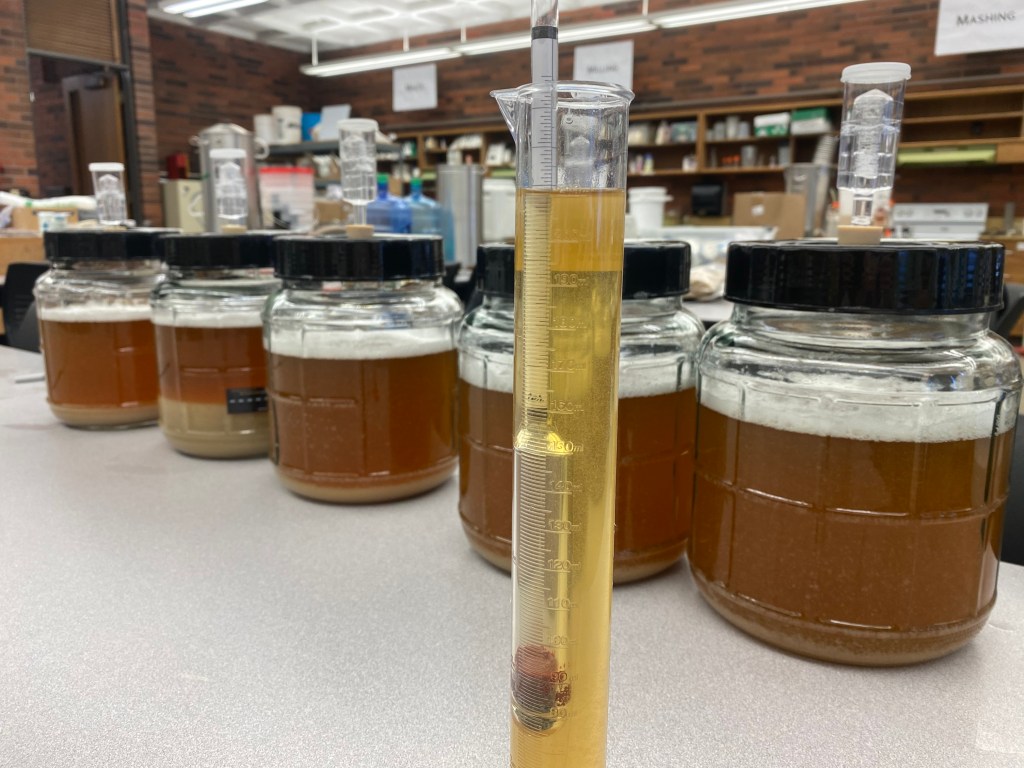
On April 26, 2023 I brewed a large batch of all-barley wort and divided it between five different 1-gallon fermenters. I then pitched five different ale yeast strains. They are currently fermenting right now at 68 degrees F and I plan to bottle them all up on May 10, 2023. Once they are finished, I will measure quantitative differences in the finished beers, and describe sensorial differences caused by the different yeast strains. The wort that I brewed was a medium gravity, simple pale malt barley wort with medium-low bitterness from a single 60-minute hop addition of Cashmere. The yeast strains I used are: American/Chico ale, English Ale, German Ale, Belgian Saison, and Wheat beer/Weissbier yeast.

-
Determining Ideal Saison Fermentation Temperatures Based on Sensory Analysis.
Hello, my name is Ken Tinseth and I am a craft brewing certificate student at CWU. I first became interested in brewing beer while spending several months in Hagerstown, MD on business. I had recently become very interested in craft beers and being raised in the NW enjoyed many beers from classic craft brewers such as those from the Widmer Brothers, Deschutes and Portland brewing (now closed). When I was in MD I enjoyed many beers from Dogfish, Ommegang and Flying Dog which further peaked my interest and opened my eyes to the wonderful world of craft beers. Along the way someone mentioned the home brewing process and from then on, I was hooked. When I eventually returned home I set up my first home brewery. This home brewery was a gas fired, single kettle system where I mashed and batch sparged using an insulated cooler. This worked great for several years but then it was time for me to move and with that move came an opportunity to change it up a bit.
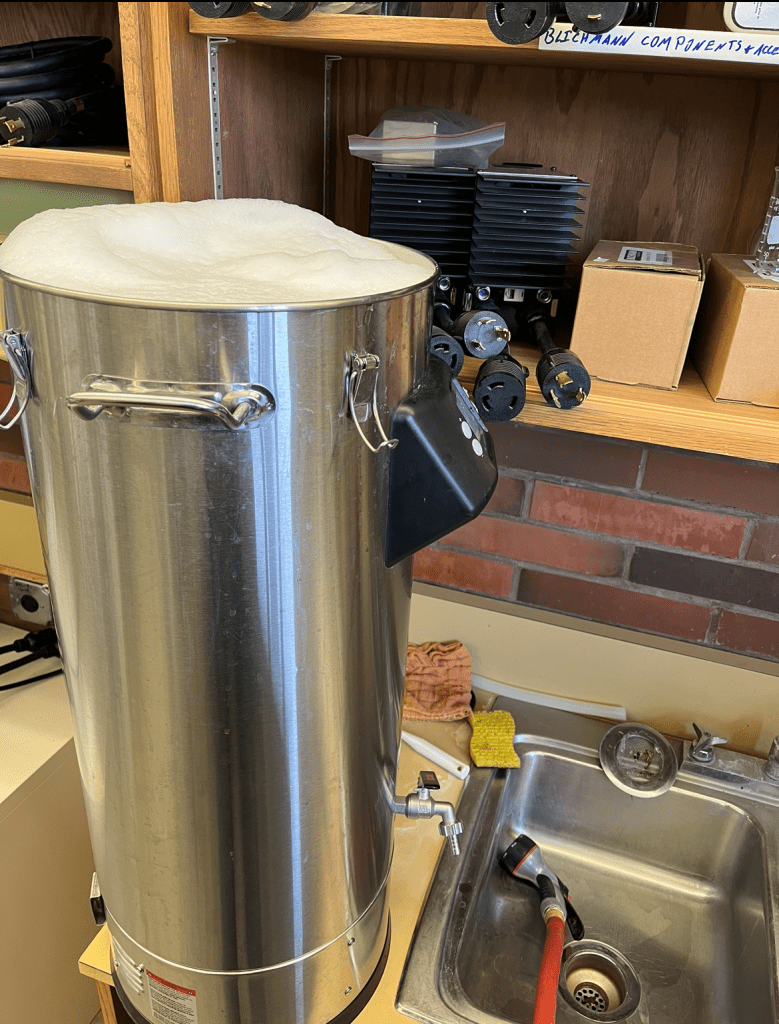
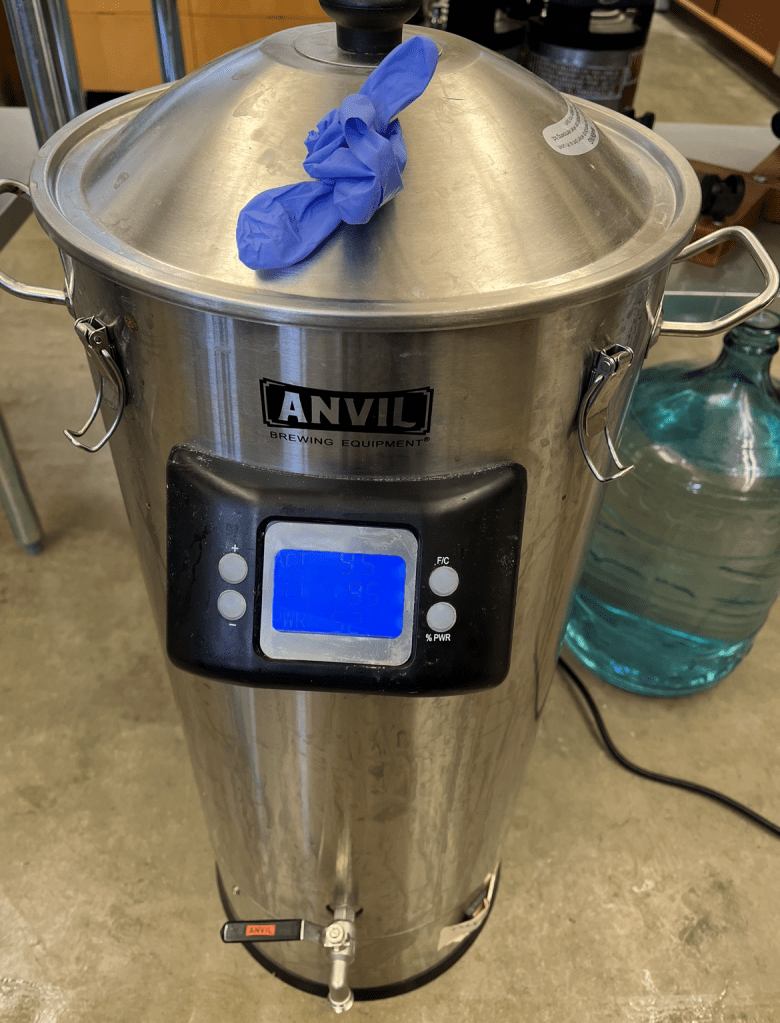
Lessons learned, from the the first home brewery, were that I wanted an electric system that allowed greater control of temperature and did not produce the excess heat and particulates that the gas fired systems produced. I also wanted the option to brew 10 gallon batches and to pump the wort vs relying on gravity transfers. I settled on a Blichmann 10gallon Electric RIMS system.
During this practicum I elected to do the following:
- Set up an all electric brewery and perform a trial test run (using only water) on this system prior to brewing.
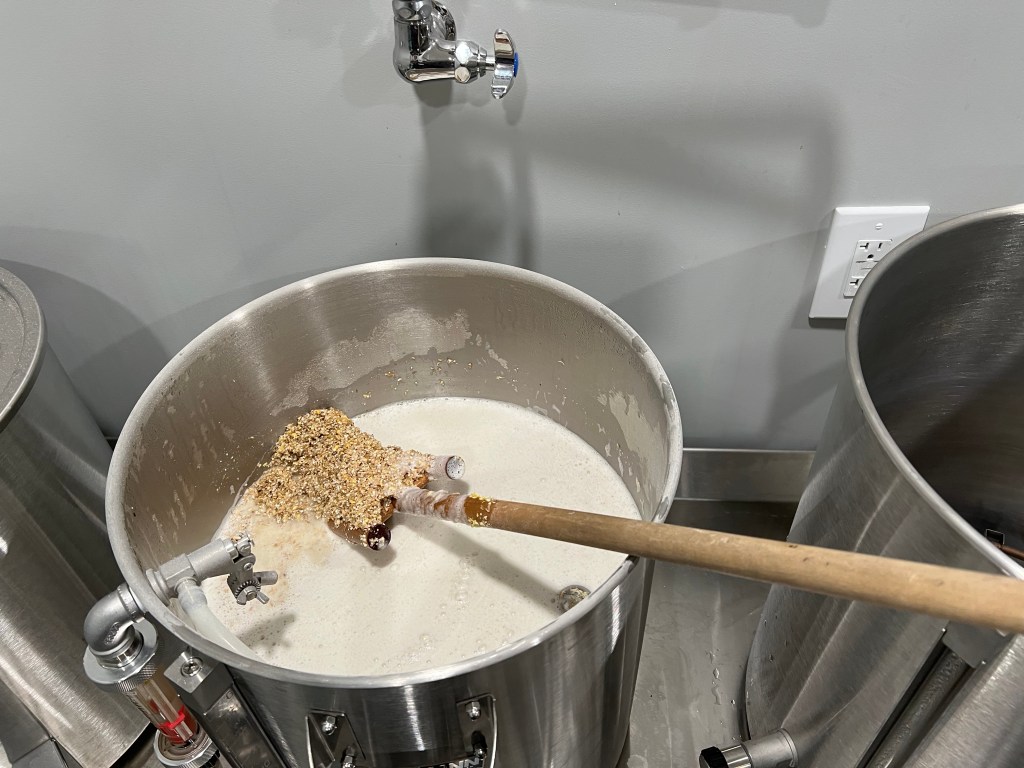
- Perform an initial test brew on this system and determine brew house efficiency.
- Brew a 10 gallon evaluation batch of a modern take on a Belgium Saison.
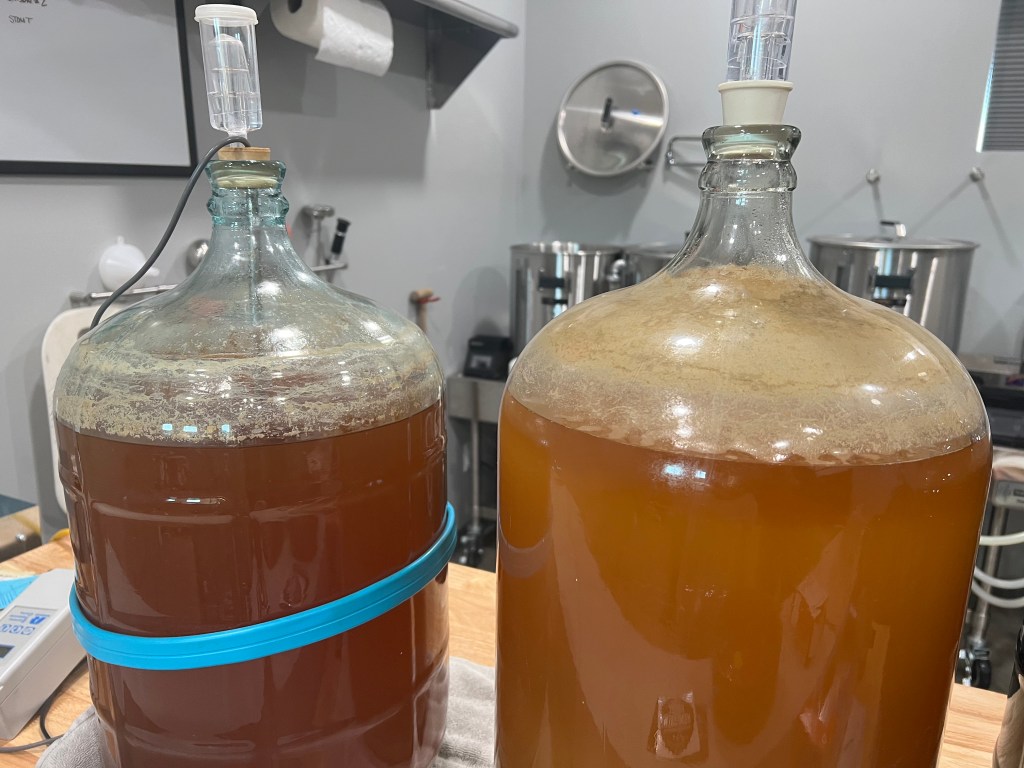
- Divide this batch up equally and ferment one batch at 65-75 and the other at 75-85, always keeping a 10 degree F difference between the two. Both batches using the same yeast (Belle Saison dry yeast)
- After fermentation and conditioning, determine if there was a noticeable difference in the flavor profile between the two beers and if so which one is more desirable.
As of May 7, 2023 this is the status:
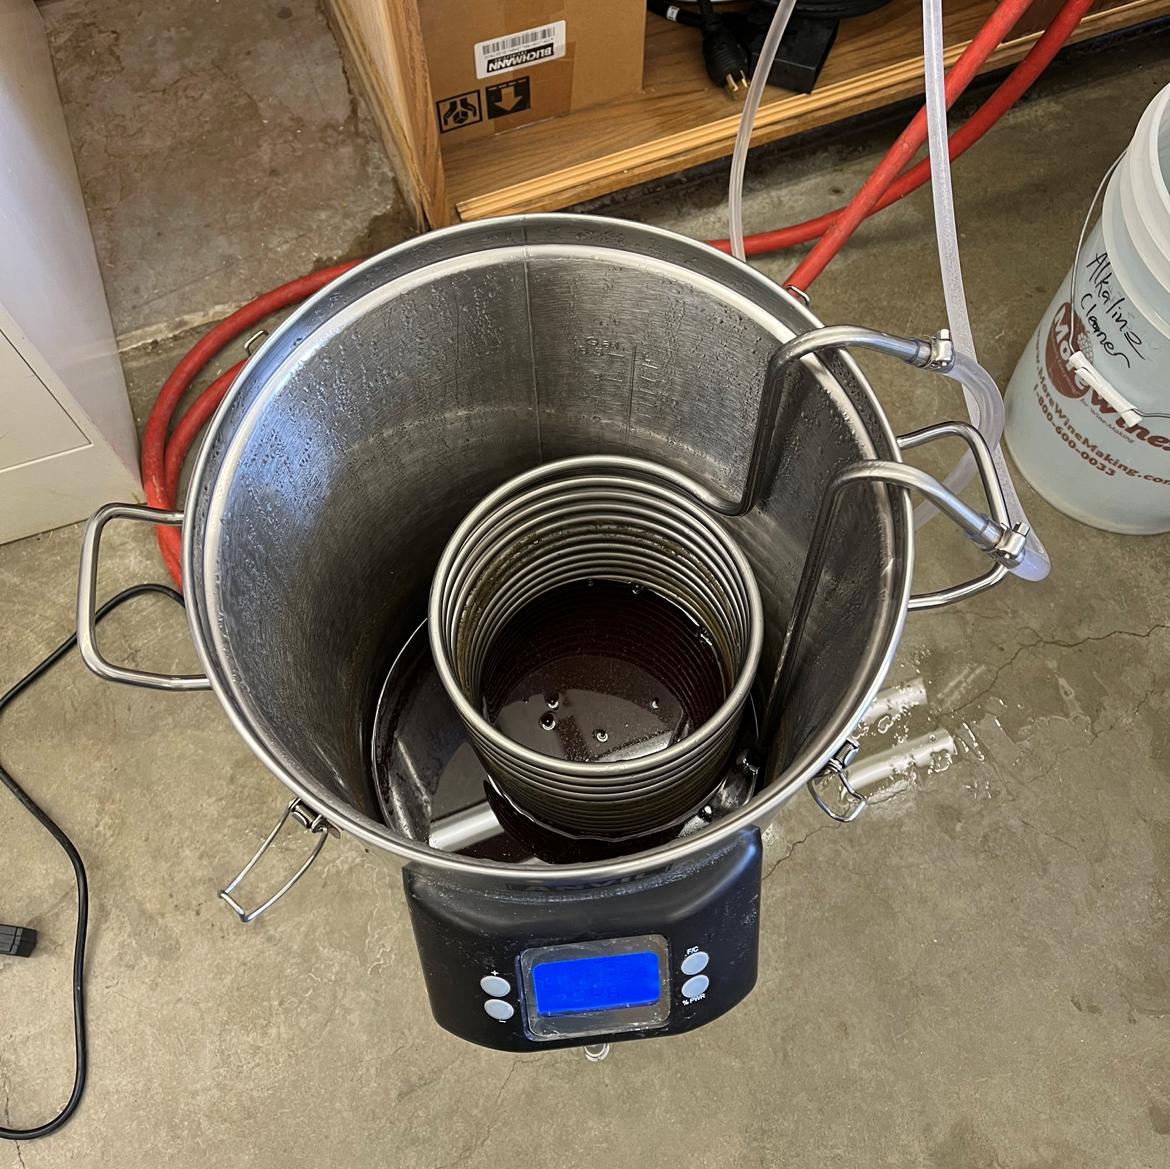
The set up and trial run is complete. Several issues such as 2x30AMP power requirements for electric system, layout of room, work flow, ingredient storage, water supply, and water analysis were all evaluated and room/equipment was designed and built/installed. Also a trial run using water only was conducted to become familiar with the system and to test for leaks and other issues prior to brewing the test batch:

Acquired all ingredients necessary:
Test batch to evaluate brew house efficiency was brewed and the brew house efficiency was determined to be around 75%. Then the 10 gallon evaluation batch of saison was brewed:
Divided 10 gallon batch in half and fermented at different temperatures. Higher temperature batch with heater belt attached on left and lower temperature batch on right. Note difference in color after two weeks of fermentation:
June 4, 2023 update and final report:
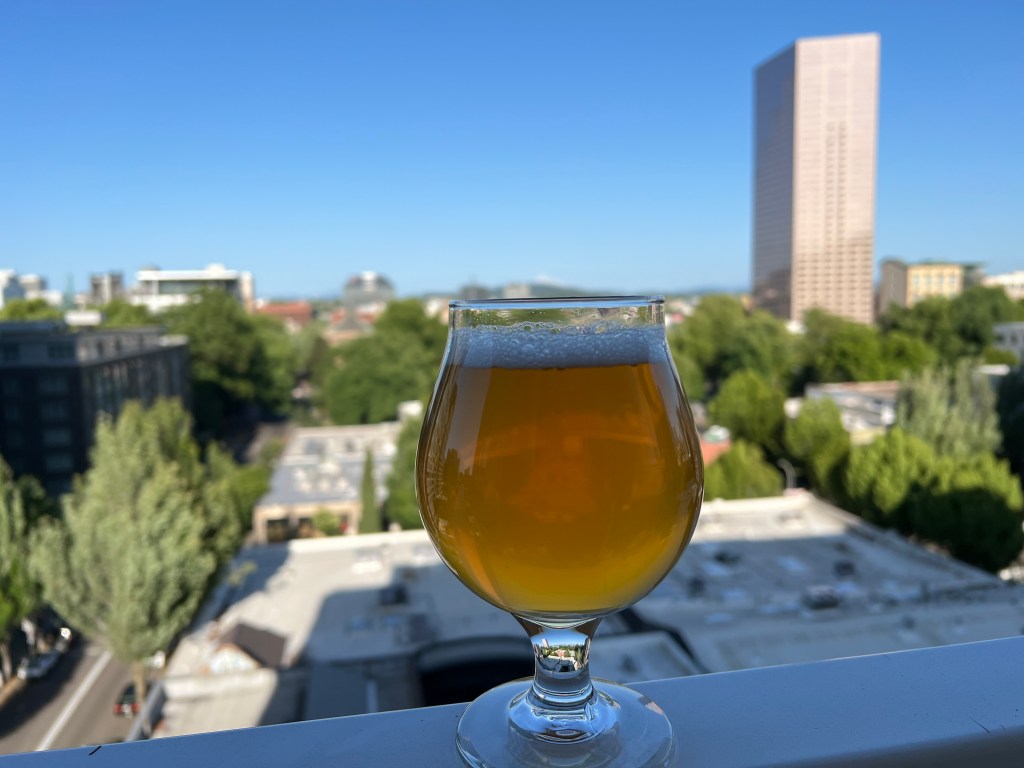
These evaluation beers were transferred to corney kegs, cold crashed, conditioned and forced carbonated. Samples were bottled and taken to CWU for formal evaluation using a standard triangle test at the sensory lab by the Craft Brewing Sensory Analysis of Brewing class on June 2, 2023. Below is a summary of this project:
For me this project was about bringing this past academic years studies, in the Craft brewing program at CWU, all together. It gave me the opportunity work with all the challenges of putting together a small brewing operation from the ground up. Then I was able to use what I had learned from the various Craft Brewing classes such as biochemistry and micro biology of brewing, Hop science and sensory analysis to brew a specific style of beer and to understand why/how each step is done, how it effects the beer and how changes to those parameters might effect the final product.
During this practicum I was able to complete all the items listed in the initial proposal above. It was meant to simulate a real world scenario where a brewery, trying to tweak a recipe/process of a beer/brewing operation, brews a beer, changes some thing about it and formally evaluates the final product. Whether it is to save on heating/cooling costs, ingredient costs, create efficiencies or to improve the taste of a beer, the process is very similar.
The final sensory of analysis of these two evaluation beers seems to be somewhat inconclusive. A p-value to determine significance was set at .05. This evaluation yielded a p-value of .07, indicating that there was no difference in the taste/aroma of these two beers (see data below):
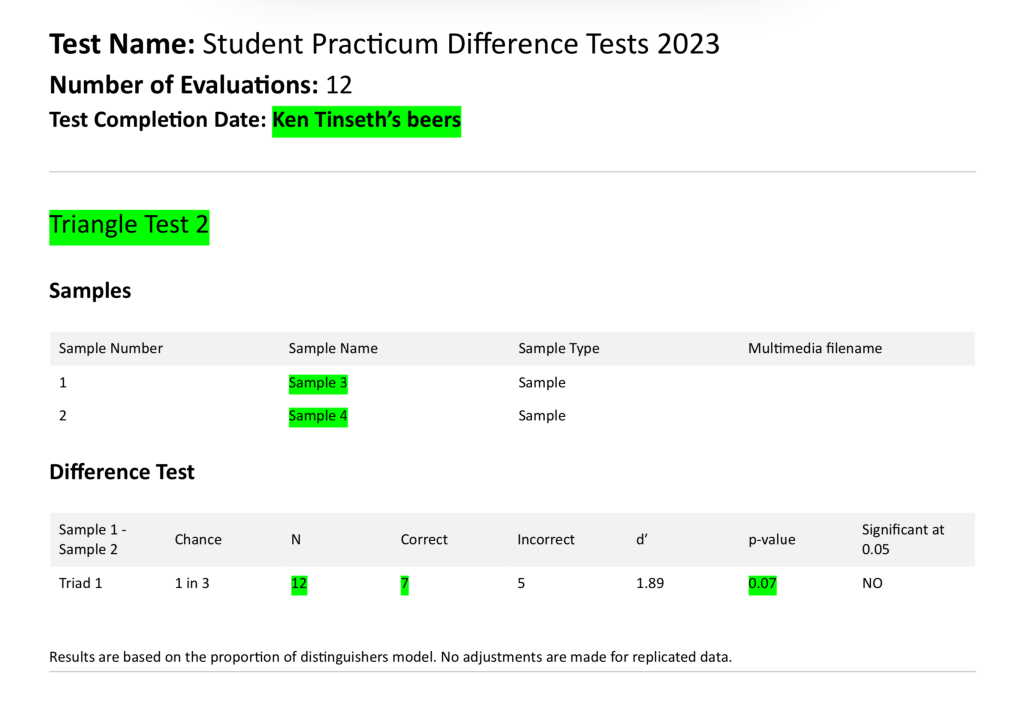
Based on the p value being so close to the .05 threshold of significance and the small number of judges (12) it would be prudent not base any major decisions on this evaluation but instead re-evaluate the 2 beers using a larger number of judges. However, using this data and my analysis of this beer and style that I am intimately familiar with, personally I would probably elect not to utilize the additional electricity required to maintain this fermentation temperature at 85 degrees nor would I utilize the energy required to lower the temperature down to 75. Instead I will probably set 75 F as the low end and let the temperature rise naturally into the mid 80’s during fermentation and then let it settle back to 75F. I can do this now because I feel the temperature range evaluated (75 and 85) produced very similar taste and aroma profiles for this specific style and yeast (Lallemand Belle Saison).
In the future I will continue to use this technique to brew personal flagship beers and tweak parameters and then evaluate the results. This particular evaluation was done after the hot side (pre fermentation). In the future I hope to become proficient enough with my system to be able to brew two identical beers while making slight changes to the hot side and then evaluating those results.
Cheers!
-
Creating a Recipe For Brew Kits to Sell.
My name is Eve Rice and I am a Junior, almost Senior, here at Central Washington University. My major is Craft Brewing with a minor in business entrepreneurship and Wine Trade and tourism of the World. For this quarter Dr. Graham, our head of the department, and I decided it was time we came up with ideas and ways to help the program grow, and we decided that we should create a kit as a project that we could potentially sell.
The crazy thing about this project is that it started as something completely different and evolved into an even bigger project. So for this quarter my goal was to do a home brew and try to create a kit that we as a club and program would be able to sell.
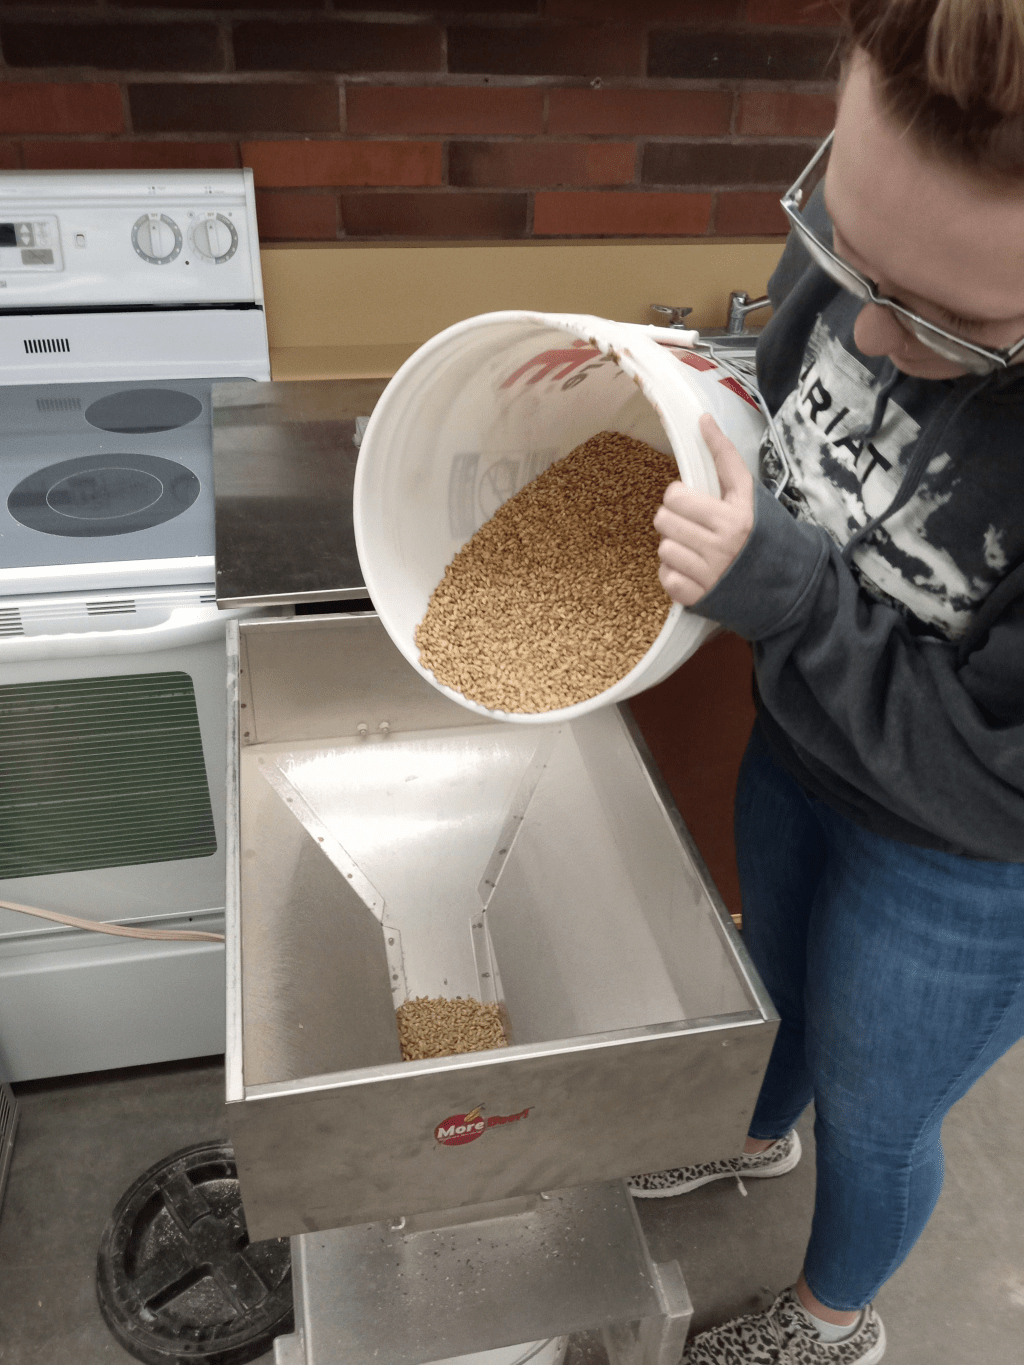
So my first step was to create a recipe and see how we can make the best beer for a first time brewer. So Brian, our brew lab tech, spent almost nine hours in the lab testing out a recipe that we could potentially use in the kit for a first time brewer. The recipe we created was as simple as possible with getting maximum amount of flavor as we could. We used a base malt, a caramel malt, and amarillo hops as our main “trio” to create this wort. Once we let this beer ferment for a week and a half we dry hopped it and let it sit for a few more days. We kegged the beer and did a force carbonation in the keg.


We then served our beer at a CWU staff event in mid February and got tons of feedback from the attendees. What I did is I collect all the sheets that were filled out at the event and put all the information into an excel spreadsheet to create a graph to get more of a visual of what was most present and least in the recipe. This was a great help when trying to tweak the recipe into something better for our home brew kits. I then brewed at home and took pictures and wrote down my entire process of what I brewed and how I changed my recipe. I really wanted more hop bitterness and flavor so I altered the recipe so the hops boiled for a bit longer and I added half a pack more of the hop pellets then I did the first time.

Once I got my recipe fully planned, I started researching ways that we could put a kit together. I looked on amazon and at an Ace Hardware in Yakima that has multiple kinds of brew supplies we can get a good price. I then talked more with Dr. Graham and we came up with a game plan on how we are going to make multiple kits for all different levels of brewing from first time brewer to an expert home brewer and that we will put in supplies that one would need for each. We came up with our supply list of what would likely go into each kit. This is where we stopped for the quarter and my next practicum will be to create these kits with the recipe and instructions and take photos for advertisement. The idea and goal is to try and get these kits done and ready for selling by the end of this school year. I can’t wait to update the blog on the kits and post them when they are ready to sell. Thanks for reading!
-
The Correlation Between Brewers’ Intentions and Students’ Perceptions of Beer Flavors.
Hi there! My name is Ashley Brookey and I am a senior at CWU studying for my Craft Brewing minor. While my bachelor’s degree is in Biomedicine, I have a passion for understanding how different sciences interact with each other. Currently, I am completing my Craft Brewing Practicum and I have chosen to overlap my project with my job at Ellensburg Brewing Co. & Tilted Tree Cidery where I work as a waitress. My goal is to ensure that customers are satisfied with the products we offer.
I wanted to investigate whether the brewers at Ellensburg Brewing Co. are achieving their intended flavor profiles, and this became the focus of my project. To achieve this, I decided to approach the college students associated with the Craft Brewing department at CWU. The brew master at Ellensburg Brewing Co. has taught and advised many students in the department, making it an excellent choice for my project given the inspiration and motivation of the students.
History of Ellensburg Brewery
The Ellensburg Brewery is a German brewery and restaurant with a rich hundred-year history. It was originally founded as St. Louis Brewing & Malting Company in 1895 and operated under that name until 1907 when it was succeeded by Ellensburg Brewing & Malting Co. until 1915. The company was later re-established as the Ellensburg Brewing Co., Inc. from 1933-1937, and then as Mutual Brewing Co., Inc. from 1937 until 1943. In the 2000s, the business was revived and now strives to preserve the establishment’s history while bringing back older styles of German beer.
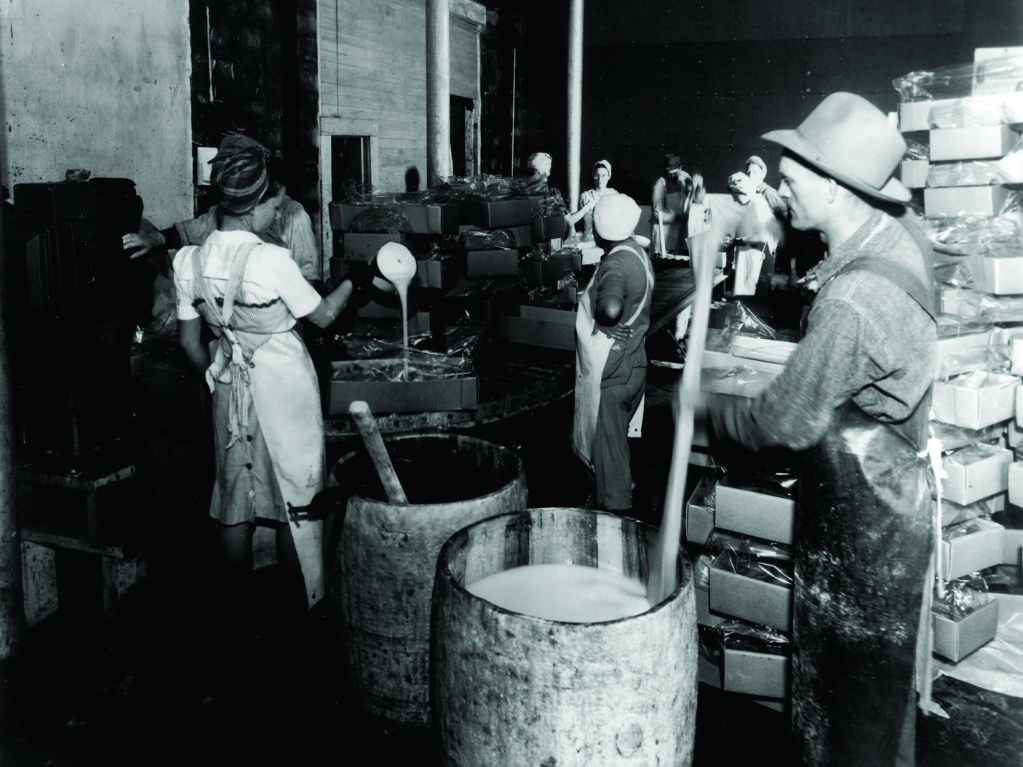
This picture exhibits men and women stirring local product in large barrels, as a part of the Ellensburg Brewery. This picture can be found at The Kittitas County Historical Museum and Ellensburg Brewing Co. & Tilted Tree Cidery.
Beer Styles Chosen for the Project
This project consists of four beer styles: Olde Style Pilsner, Edel-Brau Amber Lager, Eburg IPA, and Dogtown Porter. All of these styles are brewed and sold at the Ellensburg Brewery. I chose these four styles because they are distinct from each other and use different brewing techniques to produce the beer.
Olde Style Pilsner is a light-bodied beer with spicy notes from the Saaz hops used in brewing. Saaz is one of four noble hops and has a low alpha acid percentage, which provides a pronounced herbal aroma and hoppy finish. Saaz also contains elevated levels of polyphenols, which help diminish oxidation and improve the beer’s shelf-life. The Olde Style Pilsner at Ellensburg Brewery is 4.5% ABV and has 33 IBUs. The Brew Masters at Ellensburg Brewery are aiming for a more traditional take on this style by using the traditional hop Saaz.
Edel-Brau Lager is a dark-amber lager style with 5.0% ABV and 23 IBUs. This beer has a caramel sweetness with a well-balanced finish between hoppiness and maltiness. Historically, the term Edel-Brau has been used to describe the highest quality of beer made with the best ingredients. The brewers at Ellensburg Brewery are striving for this beer to have a sweet, malty finish and to preserve the history of older beer styles.
Eburg IPA is a classic American West Coast piney, citrusy IPA with 6.6% ABV and 80 IBUs. The brewers used a 4-part hop blend of Chinook, Cascades, Centennial, and Simcoe to produce this beer, and American Pale and Caramel malts to help balance the finish. This beer is an excellent example of the complexity involved in producing a top-selling beer for a local brewery.
Dogtown Porter is a Baltic Porter with a dark color, smoothness, and cold-fermented Lager yeast. This beer has 6.0% ABV and 28 IBUs. The hops used in making this beer is German Polaris, and the brewers used a combination of malts including Pilsner, Vienna, Munich I, Cara Red, and Cara Munich. Ideally, this beer should have layers of aromas and flavors of chocolate malt and dark, rich fruits.
Overall, these four styles showcase the range of beer styles and brewing techniques used at Ellensburg Brewery.
Project Overview
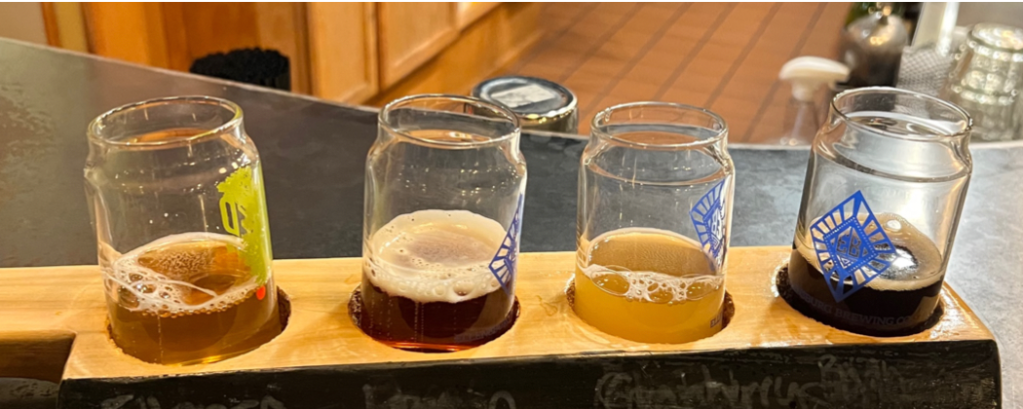
Participants in the blind tasting were given four beers in consecutive order from left to right: Olde Style Pilsner, Edel-Brau Amber Lager, Eburg IPA, and Dogtown Porter. After careful evaluation, each participant, including brewers and students, was given a tasting sheet and asked to rate their perceptions of the beer’s flavor profile on a 5-point Likert scale ranging from 1-5 (Strongly Disagree/Disagree/Neutral/Agree/Strongly Agree), with higher scores representing a greater agreement with the given flavors. The participants were also asked to provide additional comments on each beer, including suggestions for improvement. The given survey for each of the four beers provided looked like:
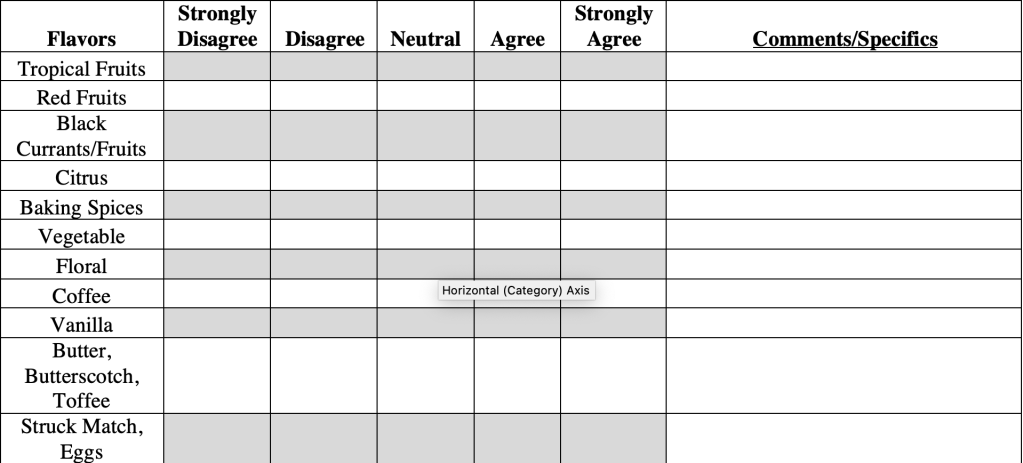
After the tasting evaluation project was completed, the participants were debriefed on the beers they had sampled. They were provided with information on each beer, including its name, style, and ABV. The feedback gathered from the participants will be used to make improvements to the beers offered at Ellensburg Brewing Co. and ensure that they meet the expectations of their customers.
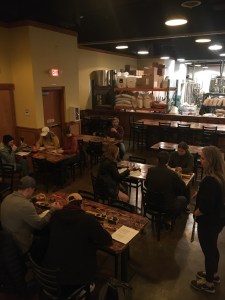
Tasting evaluation with CWU Craft Brewing Students at Ellensburg Brewing Co. Study Overview
As a student in the Craft Brew Department at CWU, I have gained a deeper understanding of the brewing process, from the selection of ingredients to the control of fermentation conditions. In addition to my academic studies, I work at Ellensburg Brewing Co., where I have gained practical experience in the brewing industry. One question that interests me is whether the brewers at Ellensburg Brewery are successfully achieving the flavor characteristics they aim for. While the brewers aim to produce beers with specific flavor profiles, such as fruity, malty, or hoppy notes, it is not always clear if these goals of the brewers are being achieved. Taste is subjective, and what one person perceives as hoppy or malty might be different from another’s interpretation. Therefore, I wanted to explore this question further and see if there is a correlation between the brewers’ intentions and the perceptions of their customers.
Given that Ellensburg is a college town, I decided to focus my analysis on college students. College students are an important demographic for the brewing industry, as they are often looking for new experiences and are willing to try new products. I believe that by understanding the flavor preferences of college students in Ellensburg, the brewers at Ellensburg Brewery can create more targeted products that appeal to their customers.
By combining my academic knowledge and working experience, I hoped to gain more of an insight into the brewing process and the factors that affect flavor perception. I planned to use a combination of surveys and taste tests to collect data from college students and the brewers. Ultimately, my goal was to provide useful information that can help improve the quality and appeal of the products produced by Ellensburg Brewery.
Study Proposal
Initially, my plan was to conduct a study with a larger, and more diverse demographic. However, I encountered difficulties in recruiting non-craft brewing students, possibly due to insufficient advertising. In the end, I decided to include craft brewing students and brewers at Ellensburg Brewery in my study. While the findings of this study may not be generalized to a broader population, I believe they can still provide valuable insights into the beer preferences and characteristics of those with some degree of knowledge in the field.
Furthermore, while I had initially planned to assess a wider range of beers, I chose to focus on four key varieties that are popular staples at Ellensburg Brewery. This allowed me to more thoroughly investigate the sensory characteristics and overall quality of each beer. By selecting these four beers, I was able to gain a deeper understanding of the specific factors that contribute to the taste and aroma profiles of these varieties, which could ultimately inform the development of new or improved brewing techniques.
Study Results
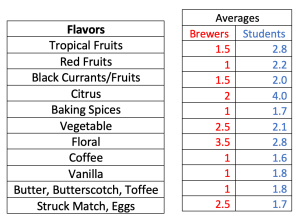
Table 1: Averages of flavor profiles between Brewers and Students for Olde Style Pilsner (beer #1). 
Figure 1. Blind tasting beer #1. 
Table 2: Averages of flavor profiles between Brewers and Students for Edel-Brau (beer #2). 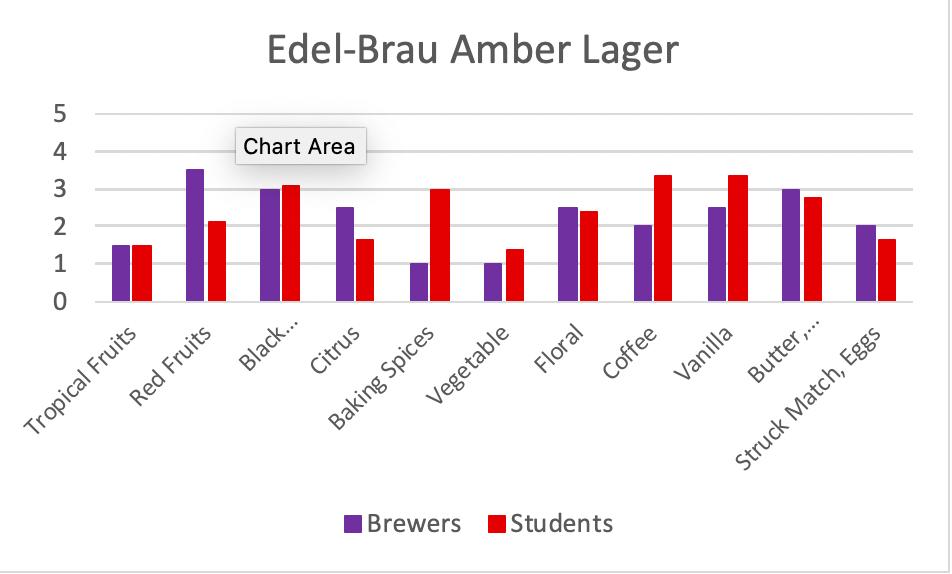
Figure 2. Blind tasting beer #2. 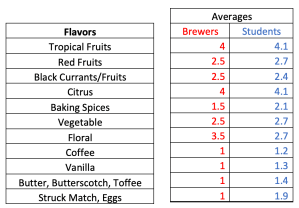
Table 3: Averages of flavor profiles between Brewers and Students for Eburg IPA (beer #3) 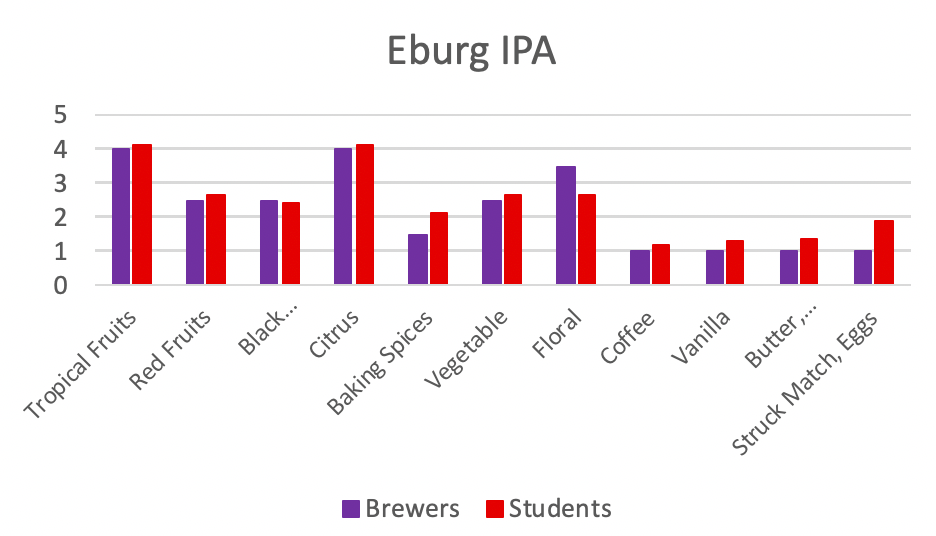
Figure 3. Blind tasting beer #3. 
Table 4: Averages of flavor profiles between Brewers and Students for Dogtown Baltic Porter (beer #4). 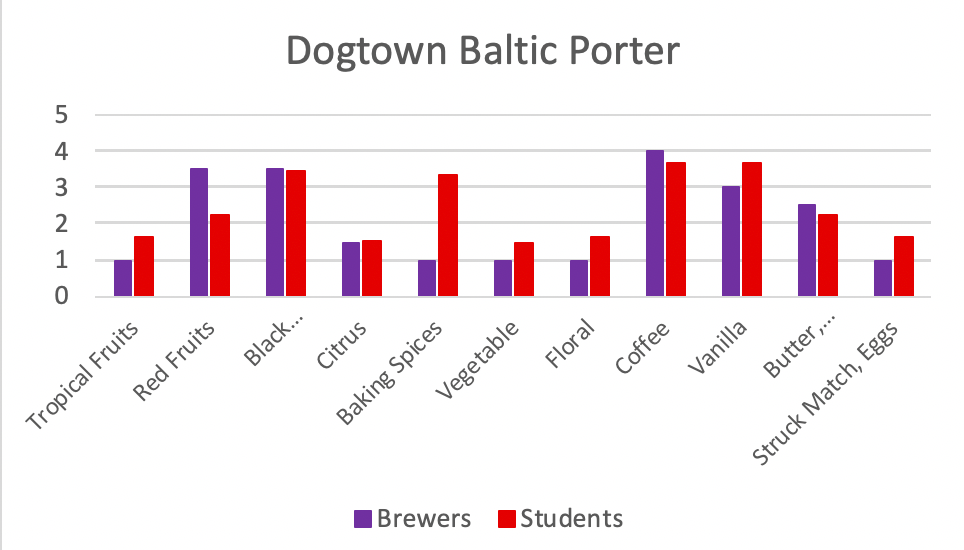
Table 4: Averages of Flavor Profiles between Brewers and Students for Dogtown Baltic Porter. 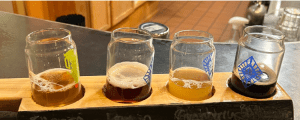
Figure 5: Olde Style Pilsner (left); Edel-Brau Amber Lager (middle-left); Eburg IPA (middle-right), Dogtown Baltic Porter (right). The blind tasting evaluation of the four beers, Olde Style Pilsner, Edel-Brau Amber Lager, Eburg IPA, and Dogtown Porter, was conducted with both the craft brewing students from CWU and the brewers at Ellensburg Brewing Co. Participants were asked to rate their perceptions of the beer’s flavor profile on a 5-point Likert scale ranging from, Strongly Disagree (1) to Strongly Agree (5), with higher scores indicating a stronger agreement with the given flavor profile. The results indicated that the perceptions of flavor profiles varied slightly between the two groups, particularly in the case of the Olde Style Pilsner and the Edel-Brau Amber Lager. The craft brewing students perceived a higher citrus flavor and more tropical fruits in the Olde Style Pilsner compared to the brewers, who assessed the other flavor profiles similarly. The Edel-Brau Amber Lager was perceived to have more baking spices by the students compared to the brewers, whereas the brewers picked up on more red fruits in comparison to the students. The Eburg IPA was rated similarly by both groups, with parallel fruit profiles noted. The Dogtown Baltic Porter was perceived to have more baking spices by the students compared to the brewers, while the brewers detected more red fruits than the students.
Overall, the results suggest that the perceptions of flavor profiles between the craft brewing students and the brewers are relatively similar, with a few variations in individual beers. This may be due to the differences in experience and training between the two groups. The findings suggest that both groups have a good understanding of the flavor profiles of the beers, and this is important for brewers and those studying to become brewers in order to create consistent and desirable products.
In addition, the results highlight the unique flavor profiles of each beer. Olde Style Pilsner was found to have a pronounced herbal aroma and hoppy finish, with a higher citrus flavor and more tropical fruits perceived by the craft brewing students. Edel-Brau Amber Lager was described as having a caramel sweetness with a well-balanced finish between hoppiness and maltiness, with more baking spices detected by the craft brewing students and more red fruits noted by the brewers. Eburg IPA was noted to have a classic piney, citrusy flavor profile, with a complex blend of hops and malts. Finally, the Dogtown Baltic Porter was found to have layers of aromas and flavors of roasted, chocolatey malt and rich, dark fruits.
These findings have important implications for both the craft brewing industry and the study of brewing. The results can be used to inform the brewing process and help brewers create consistent and desirable products. They can also help to inform the education and training of those studying to become brewers, providing them with a better understanding of the flavor profiles of different beers and how to achieve them.
Conclusion
In conclusion, the data reveals that the majority of the craft brewing students and brewers shared similar perceptions of flavor profiles with the provided beers. However, there were slight differences in the way they perceived the Dogtown Porter and Pilsner. Specifically, the students detected more baking spices in the Porter and more citrus flavors in the Pilsner than the brewers did. Despite these disparities, the overall results show no significant difference between the two groups, which suggests that the craft brewing students were adequately equipped with the necessary knowledge and skills to evaluate the beers. Additionally, the brewers seem to have successfully targeted the flavor profiles that resonates with this particular demographic. Overall, the findings of this study provide insight for the craft brewing department and could easily be built on for future research in this area.
Future Work
There are several areas that could be explored in future research pertaining to this study. First, a more comprehensive approach could be taken to gather data from a wider range of participants. While this study focused on the perspectives of CWU Craft Brewing students and the Brew Masters at Ellensburg Brewery, it could be expanded to include non-craft brewing students and members of the general public in the community. This would provide a more diverse range of perceptions and insight of craft beer in Ellensburg.
Additionally, follow-up research could focus on other types of beer that are produced at Ellensburg Brewery. This study analyzed four different varieties: Olde Style Pilsner, Edel-Brau Lager, Eburg IPA, and Dogtown Baltic Porter. However, the taproom offers about 15 different types of beer at a time. Surveying a wider range of beers could help in recognizing factors that contribute to the perceptions people are perceiving, and aid in giving the college students and locals what they want.
Overall, there are many opportunities to build on from this study, as well as expanding our understanding of the craft beer culture in Ellensburg. By broadening the scope of participants and exploring additional varieties of beer, future research could provide valuable understandings for both the local brewing industry and craft brewing department at CWU.
References
Baltic Porter. Wyeast Lab. https://wyeastlab.com/style/baltic-porter/
Beer Style Guidelines. Beer Judge Certification Program. (1999). https://www.bjcp.org/beer-styles/beer-style-guidelines/
History. Ellensburg Brewery & Tilted Tree Cidery. (2019). https://ellensburgbeerandcider.com/history/
Saaz. Hopslist. (2018). https://www.hopslist.com/hops/aroma-hops/czech-saaz/
-
My First Home Brew.
STUDENT PRACTICUM / CODY BARTHELS
My name is Cody Barthels and I am a senior at Central Washington, and I am studying to get my Major in Craft Brewing. I am very excited to go through and show how my process went for my first home brew!
My home brew was based off of a kit I received from my wife a year ago. I never made the time to actually start this project, and since this was my first practicum I thought this would be a perfect time to get invested and start to begin brewing at home. The kit that I was given was a Centennial SMaSH IPA kit.
I started my brew in late January and was able to get all the materials I needed from Ace Hardware down in Yakima, which was very convenient. I had gotten all my cleaning materials set out and had made 2 buckets of cleaning solution on hand for while I brew.
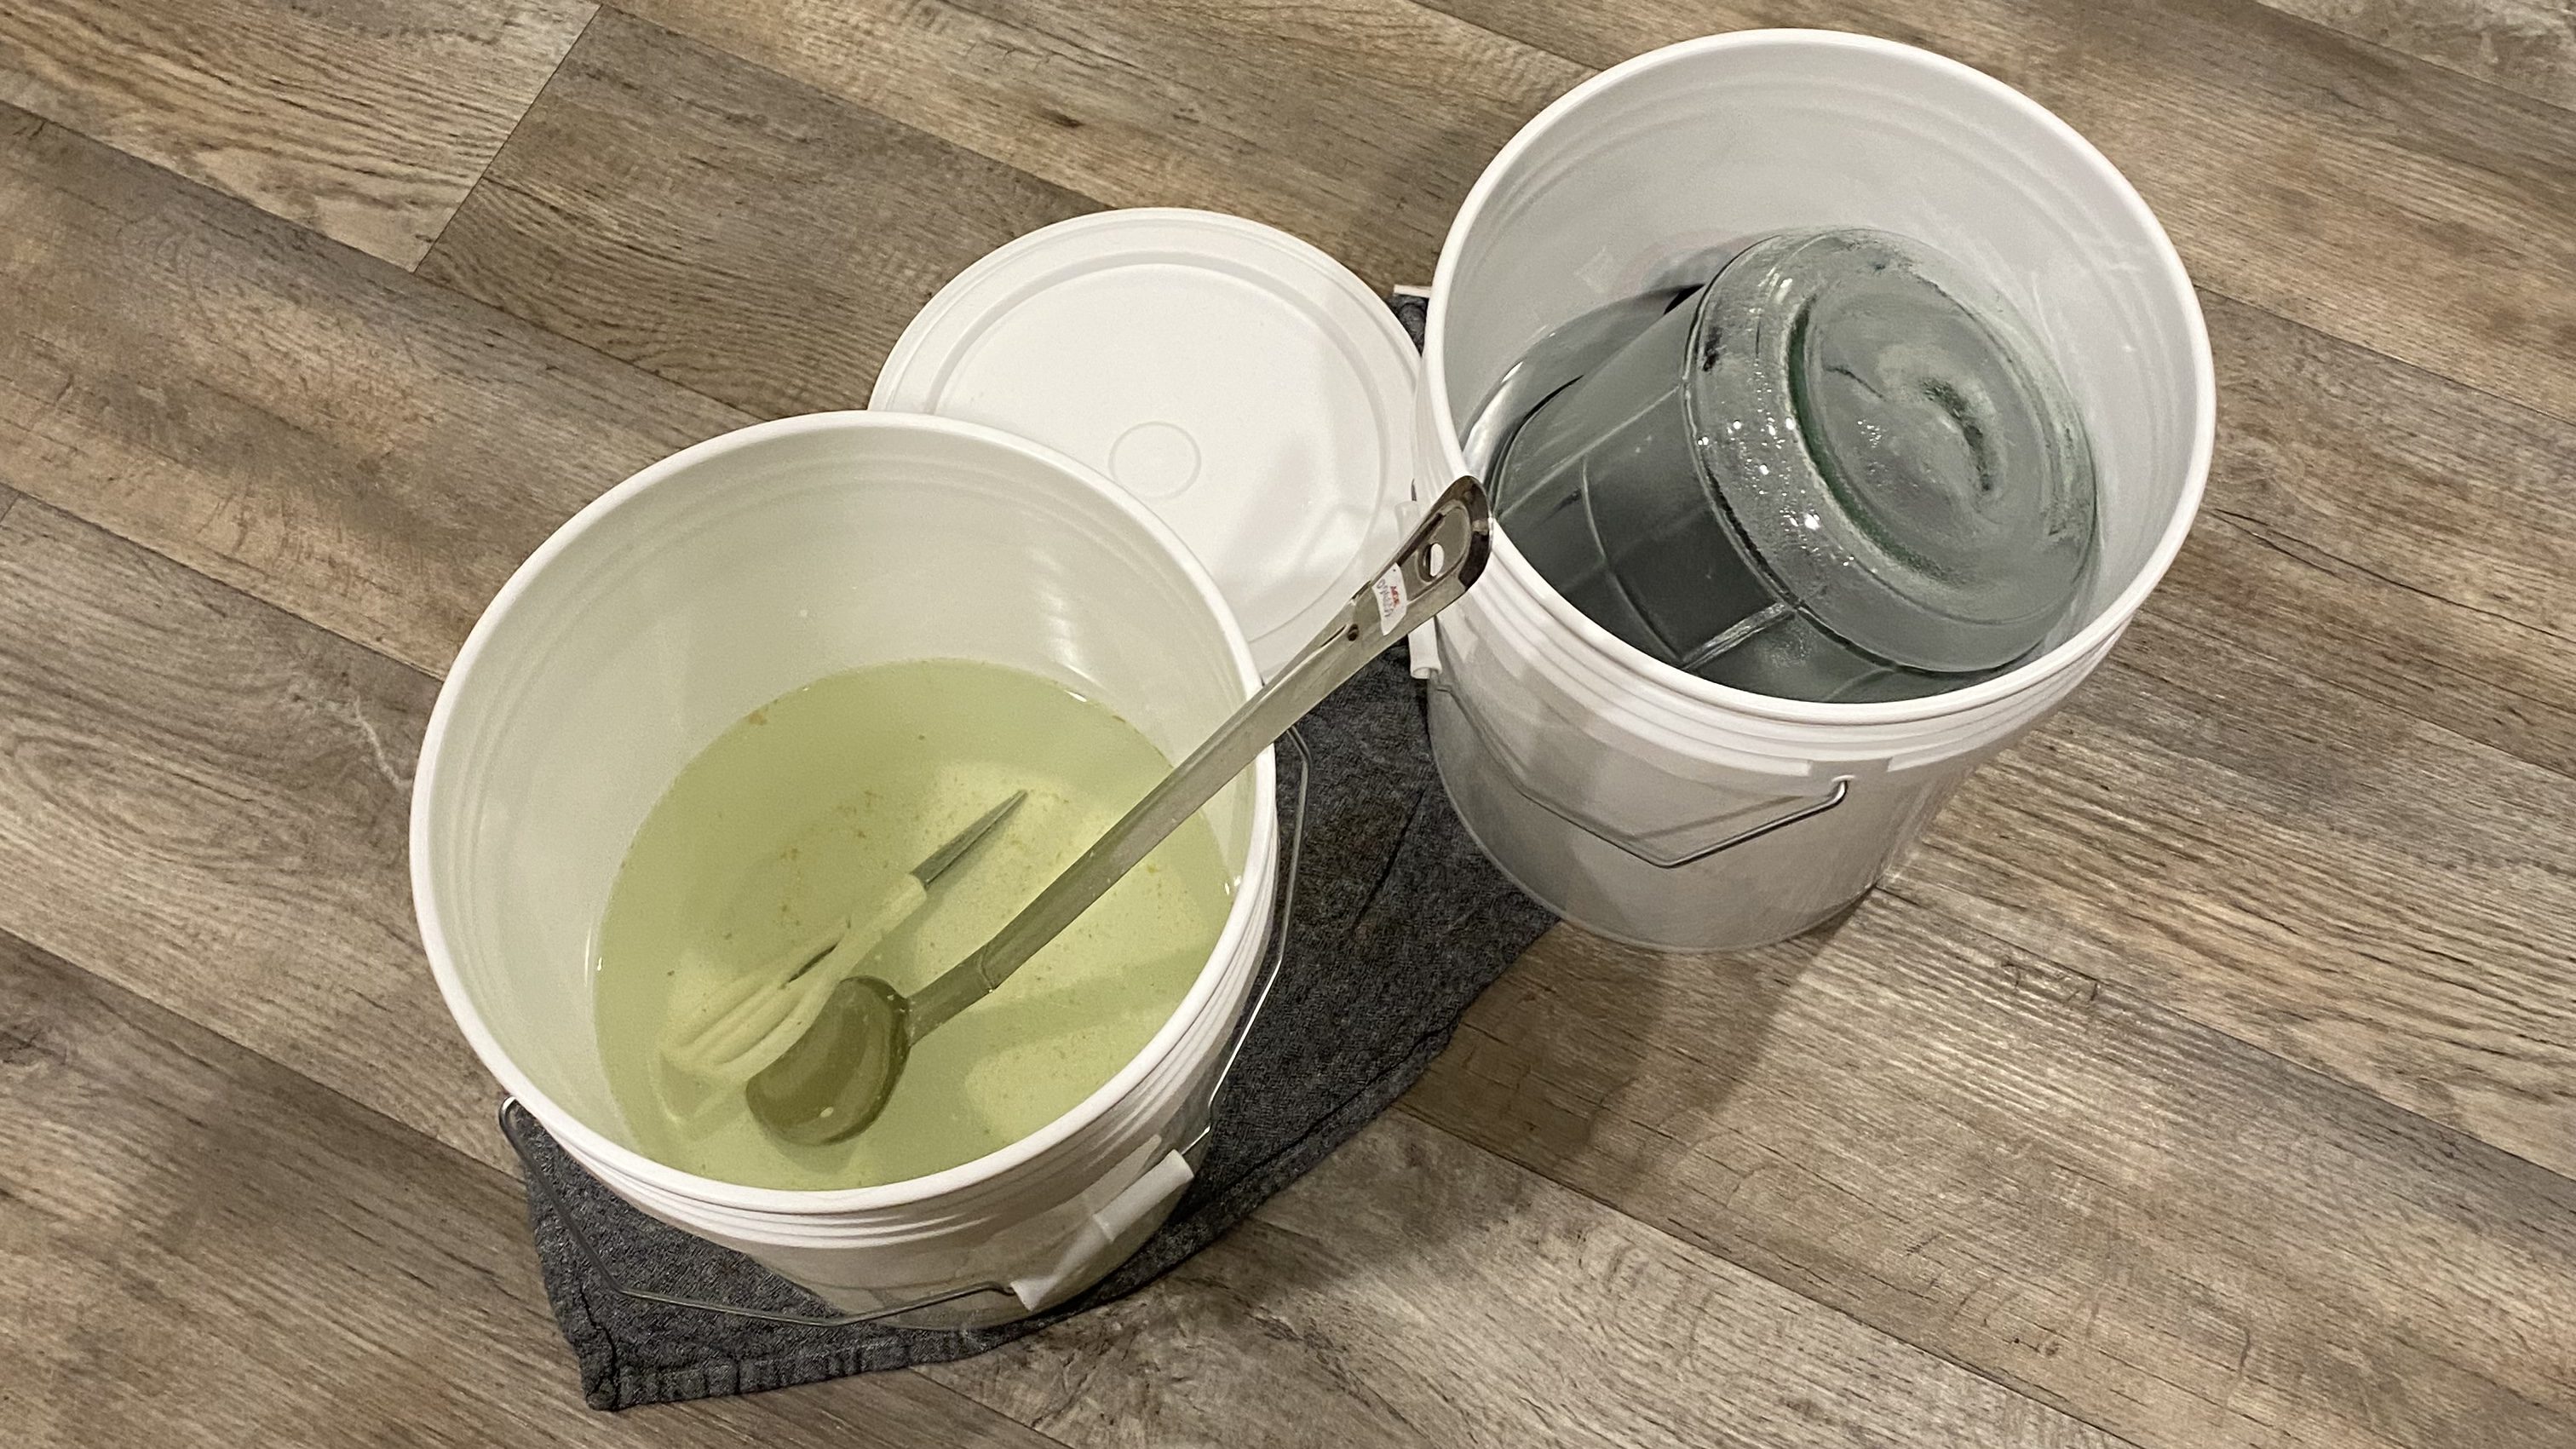
I thought I had all the right materials on my brew day when all of a sudden I saw that I was missing my rubber carboy stopper. I immediately drove to Ranch & Home in town and was able to have one made for me which was fantastic. I got home and started my brew in my 20 quart stock pot, and I realized that it was much bigger than I needed for a 1 gallon brew. I got a 12 qt stock pot from the store and eventually started my brew. I filled my stock pot with 1.25 gallons of water and brought that to a boil. After it was at a perfect boil I added my malt extracts which were:
- 1.5 lbs of Maillard Malts Pilsen malt extract syrup
- 1 lb of Pilsen dry malt extract
I stirred this into the boiling water and this became into my beautiful wort that I created.
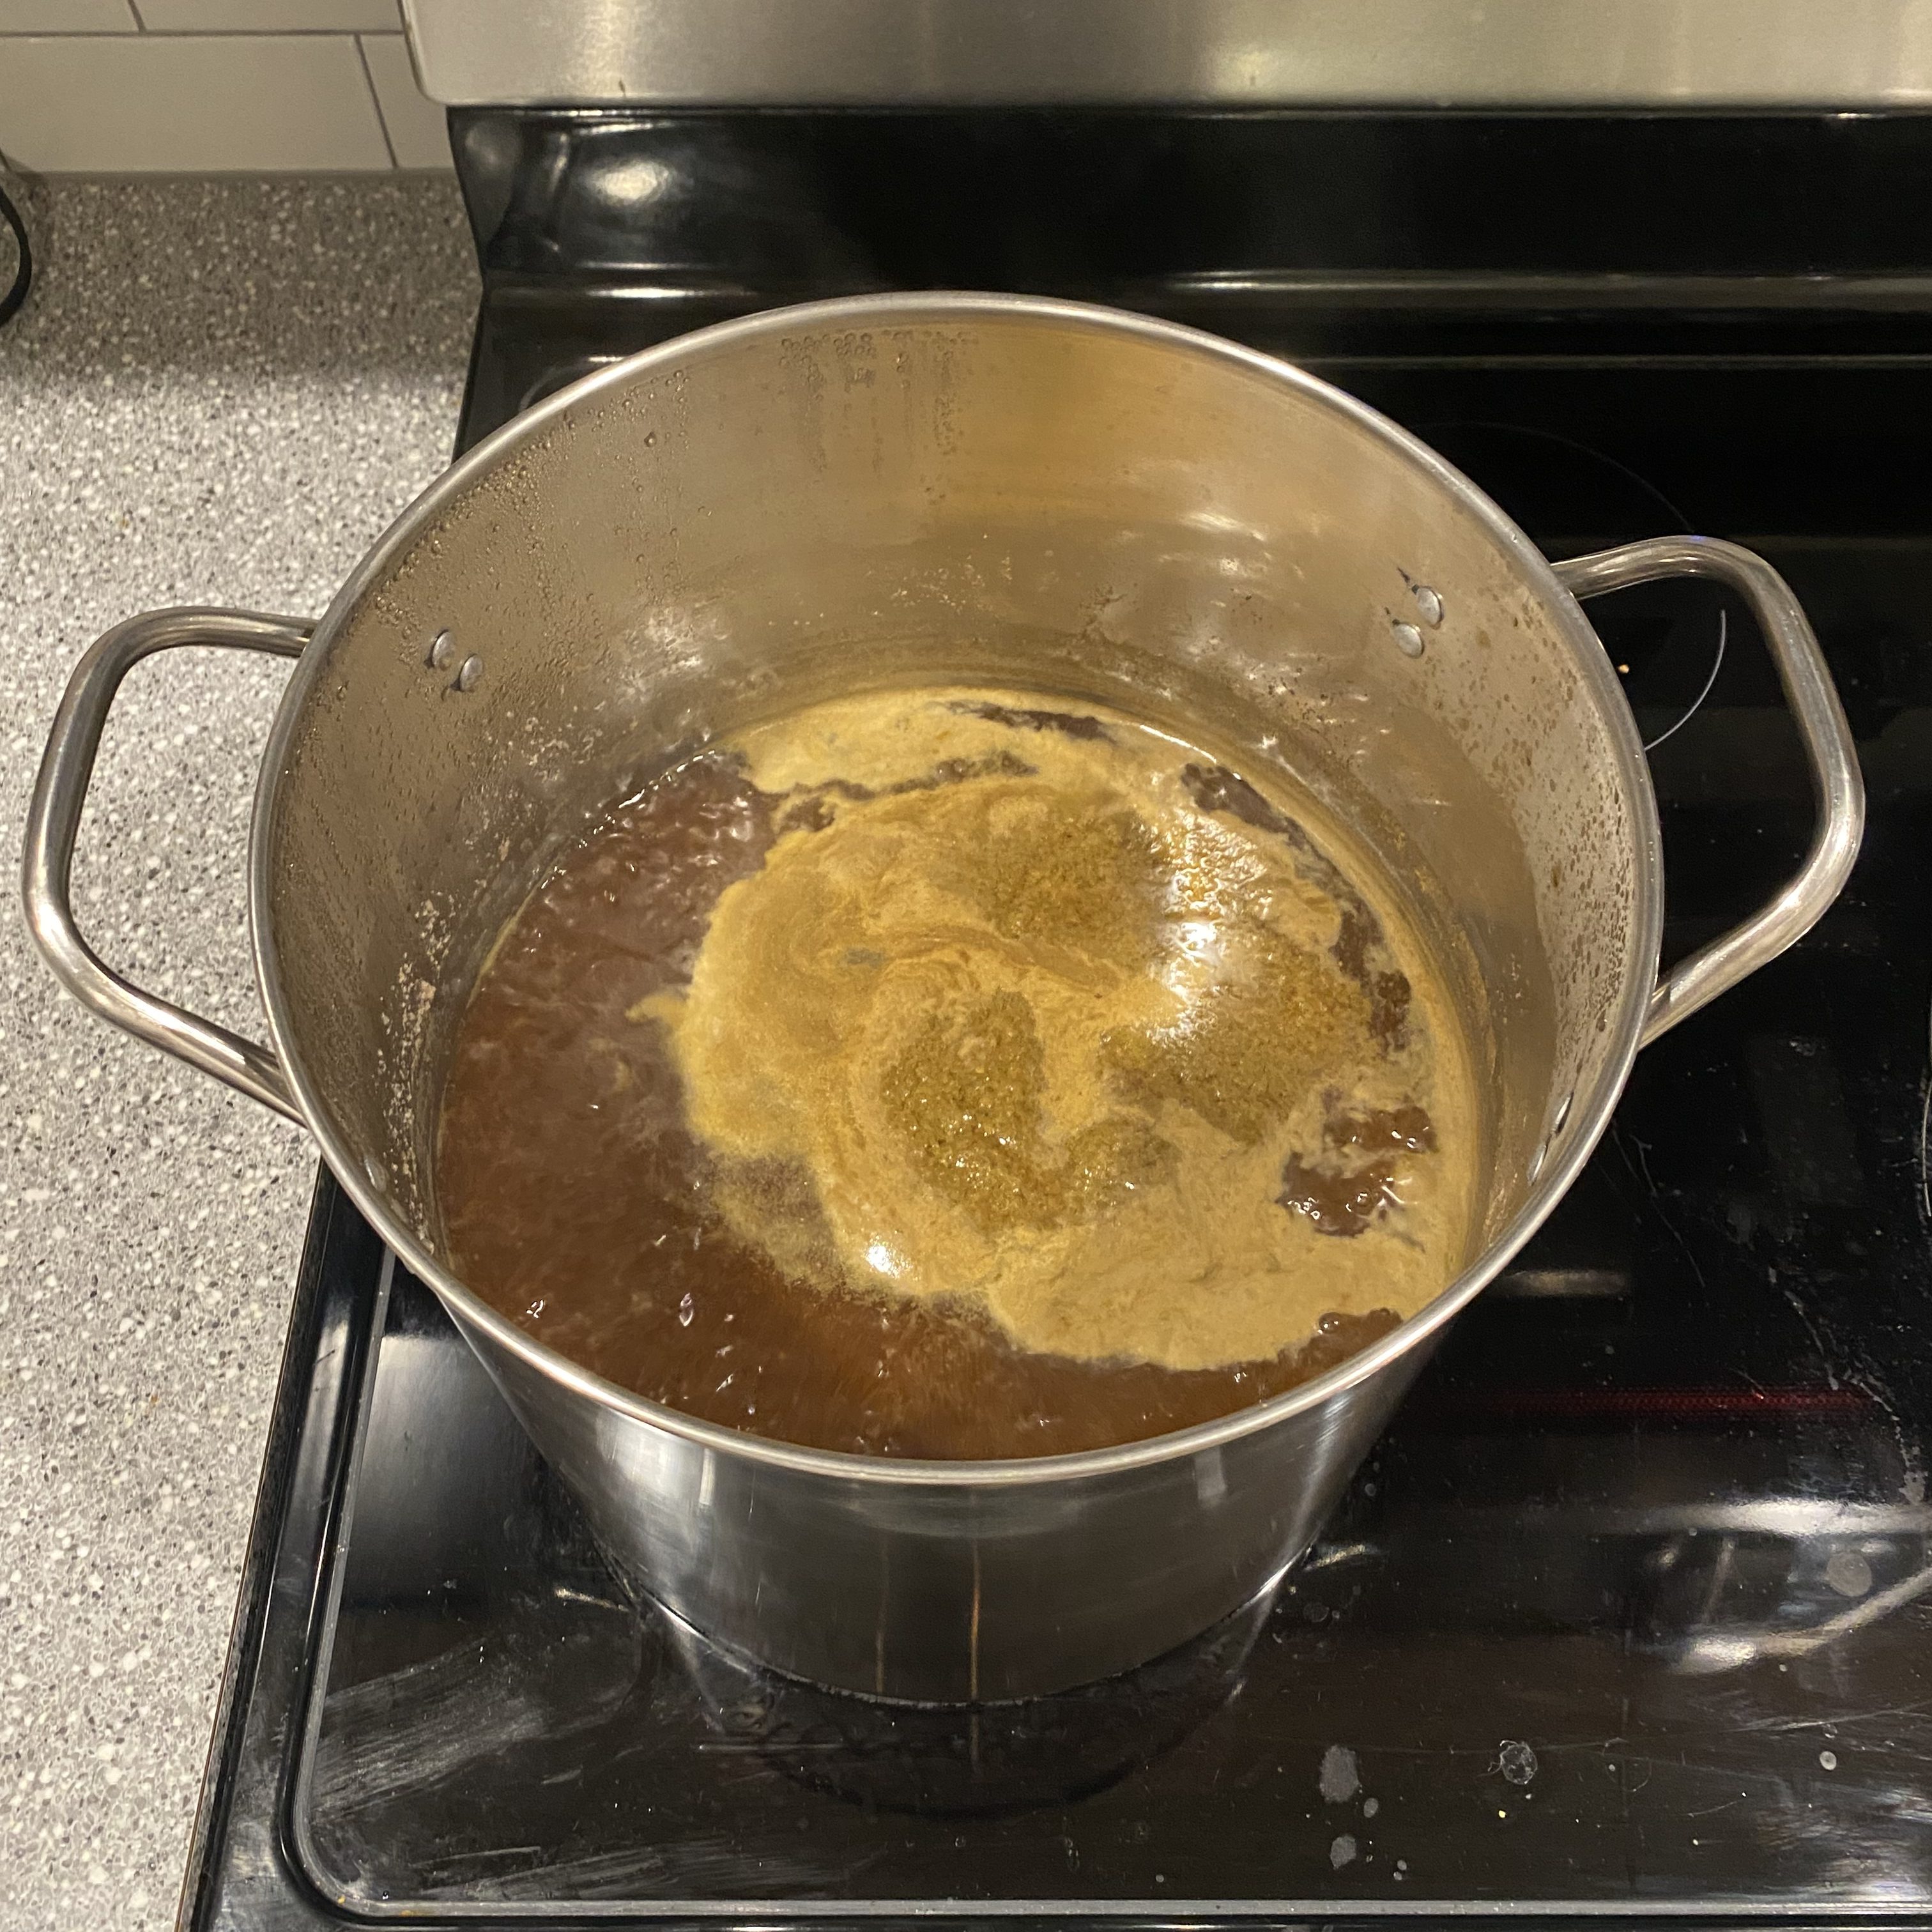
I boiled the wort for 45 minutes starting with my first addition of my Centennial Hops with an alpha of 8.2%, and the packet was a total of 28.3 g of hops.
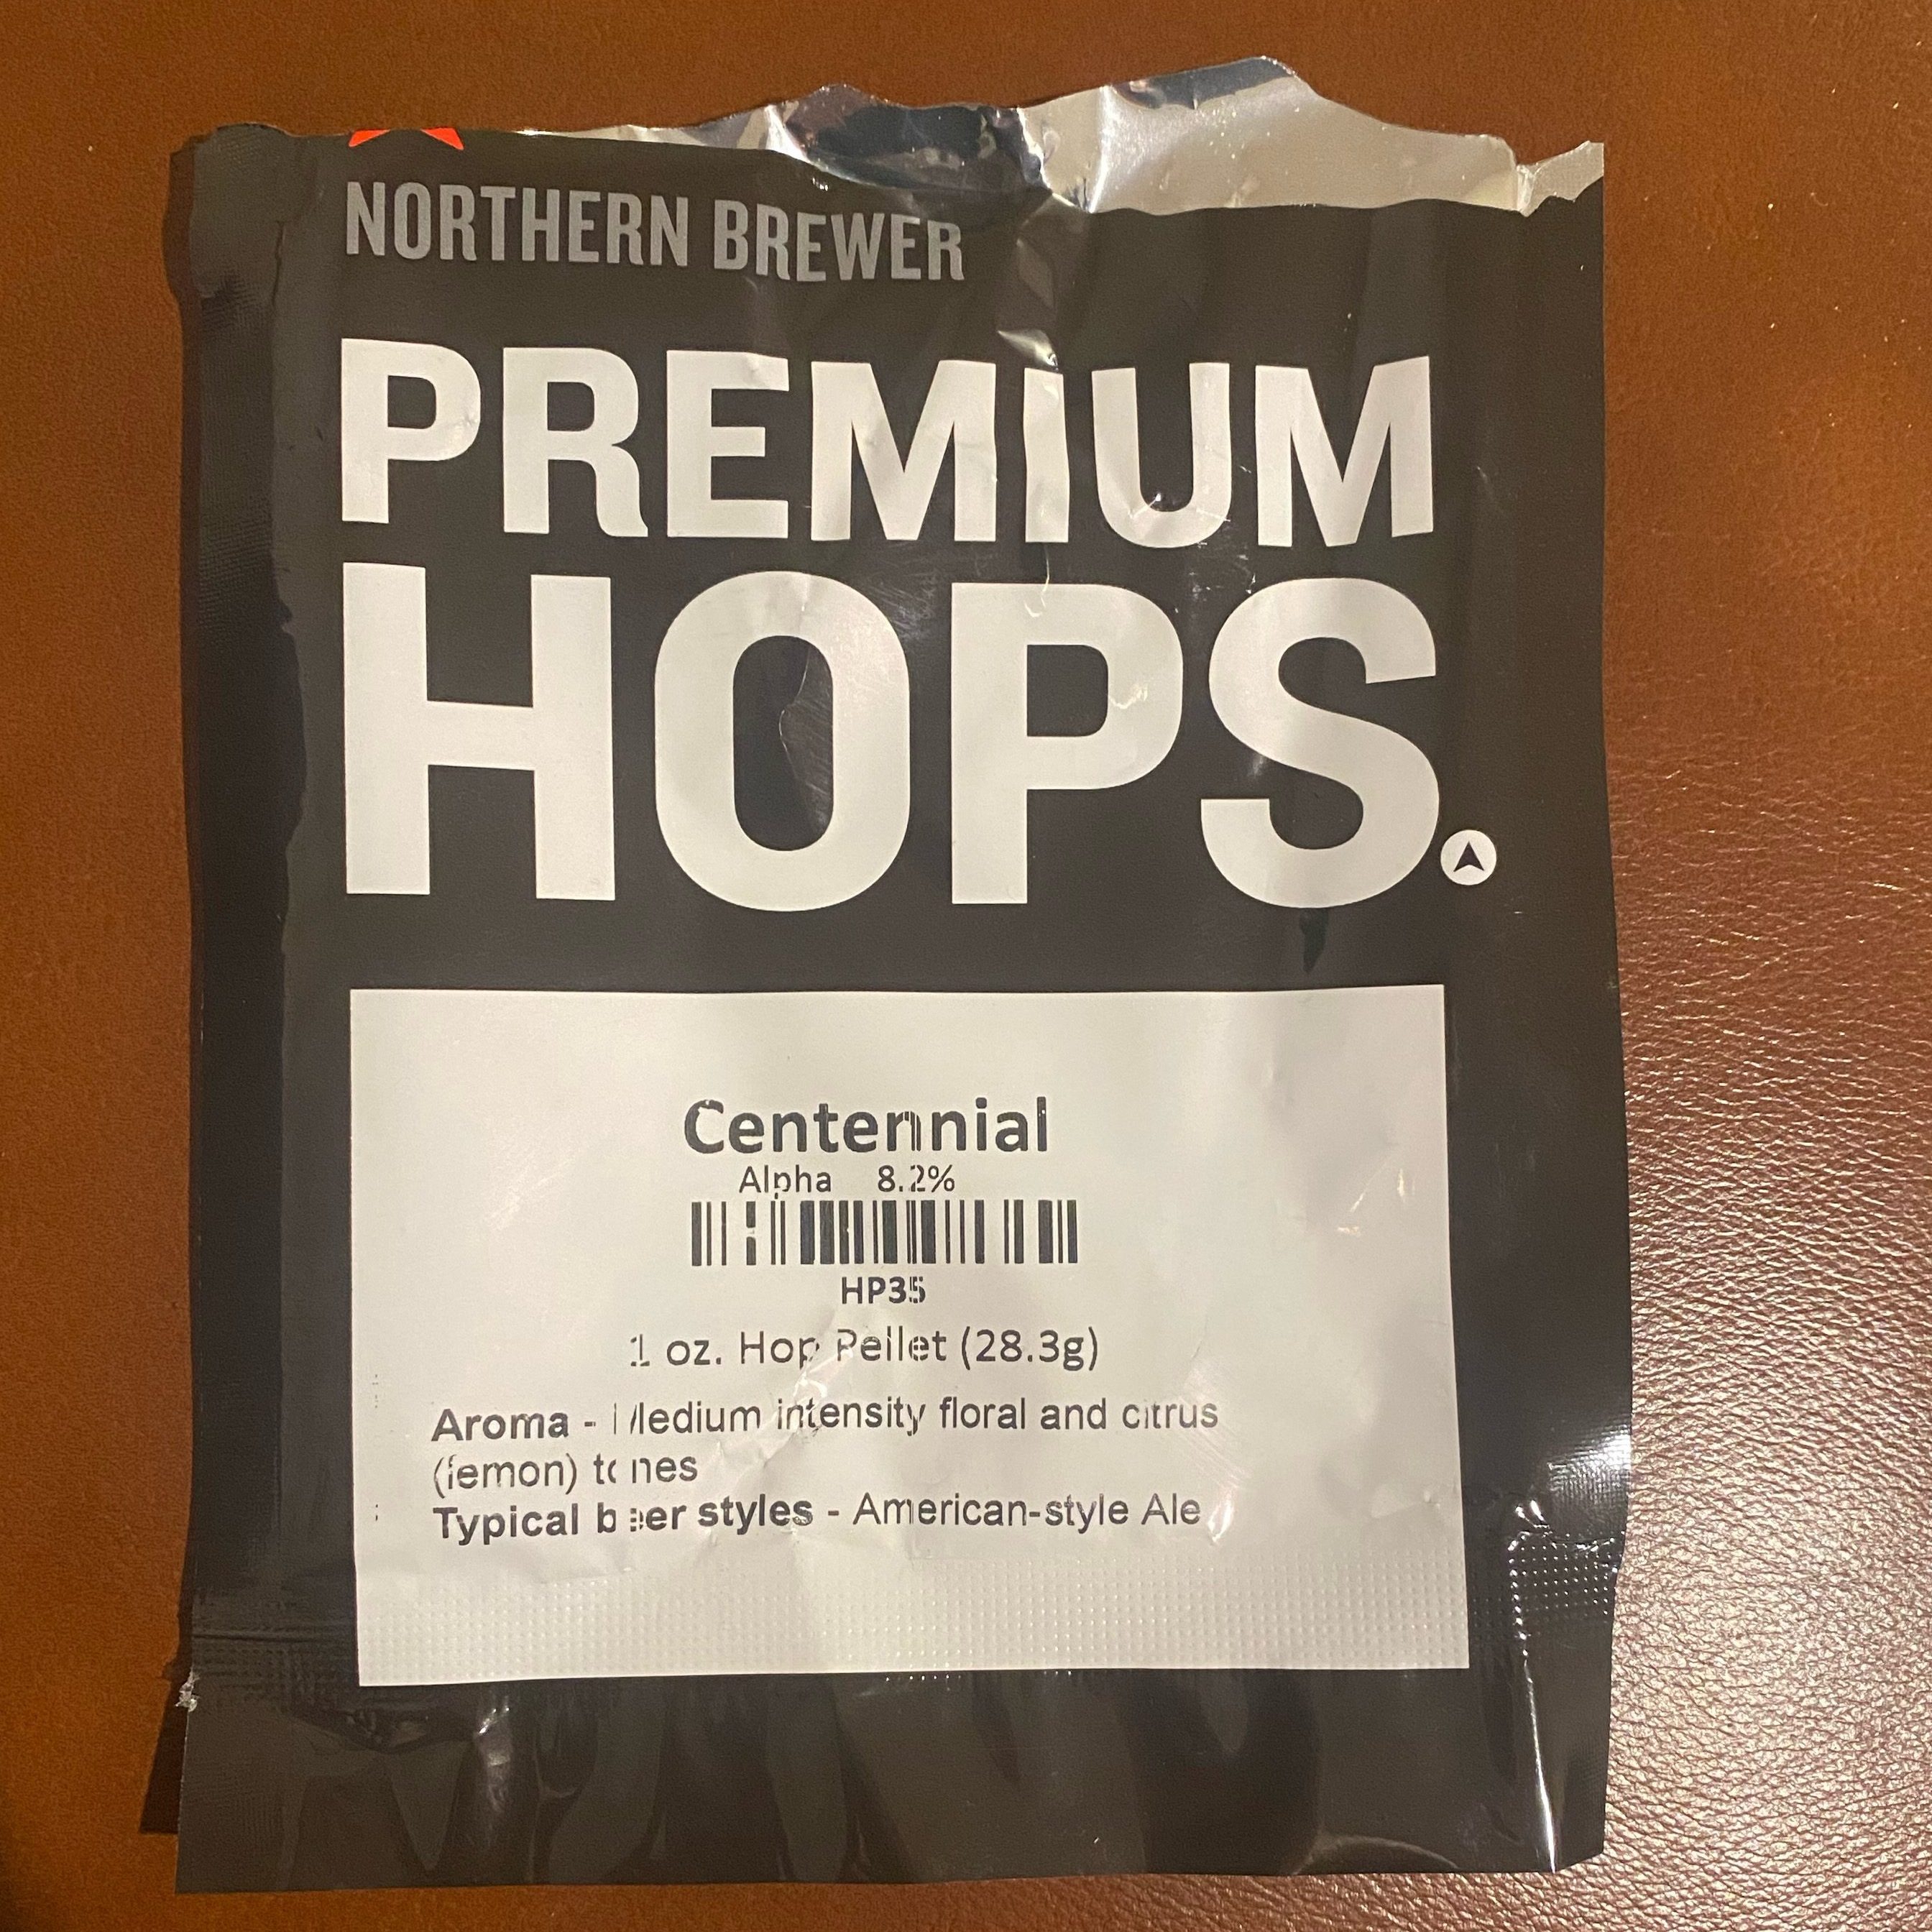
I started with the first addition at 45 minutes and dropped 7 grams into the pot. This boiled for 25 minutes before I dropped in the second addition of hops at 20 minutes left, again this was 7 g of hops. My third addition of 7 g was dropped in at 10 minutes left of the boil and the final hop addition was added after the 45 minute boil had finished.
This next part was fun yet difficult. I cooled my wort by setting it into the sink and filling the sink with cold water and ice. It sat in there for about 30 minutes before reaching 60-70 degrees Fahrenheit.
Before anything, I filled my graduated cylinder with some of the new brewed wort and put my hydrometer in and took my original gravity (OG) reading which was a big 1.092.

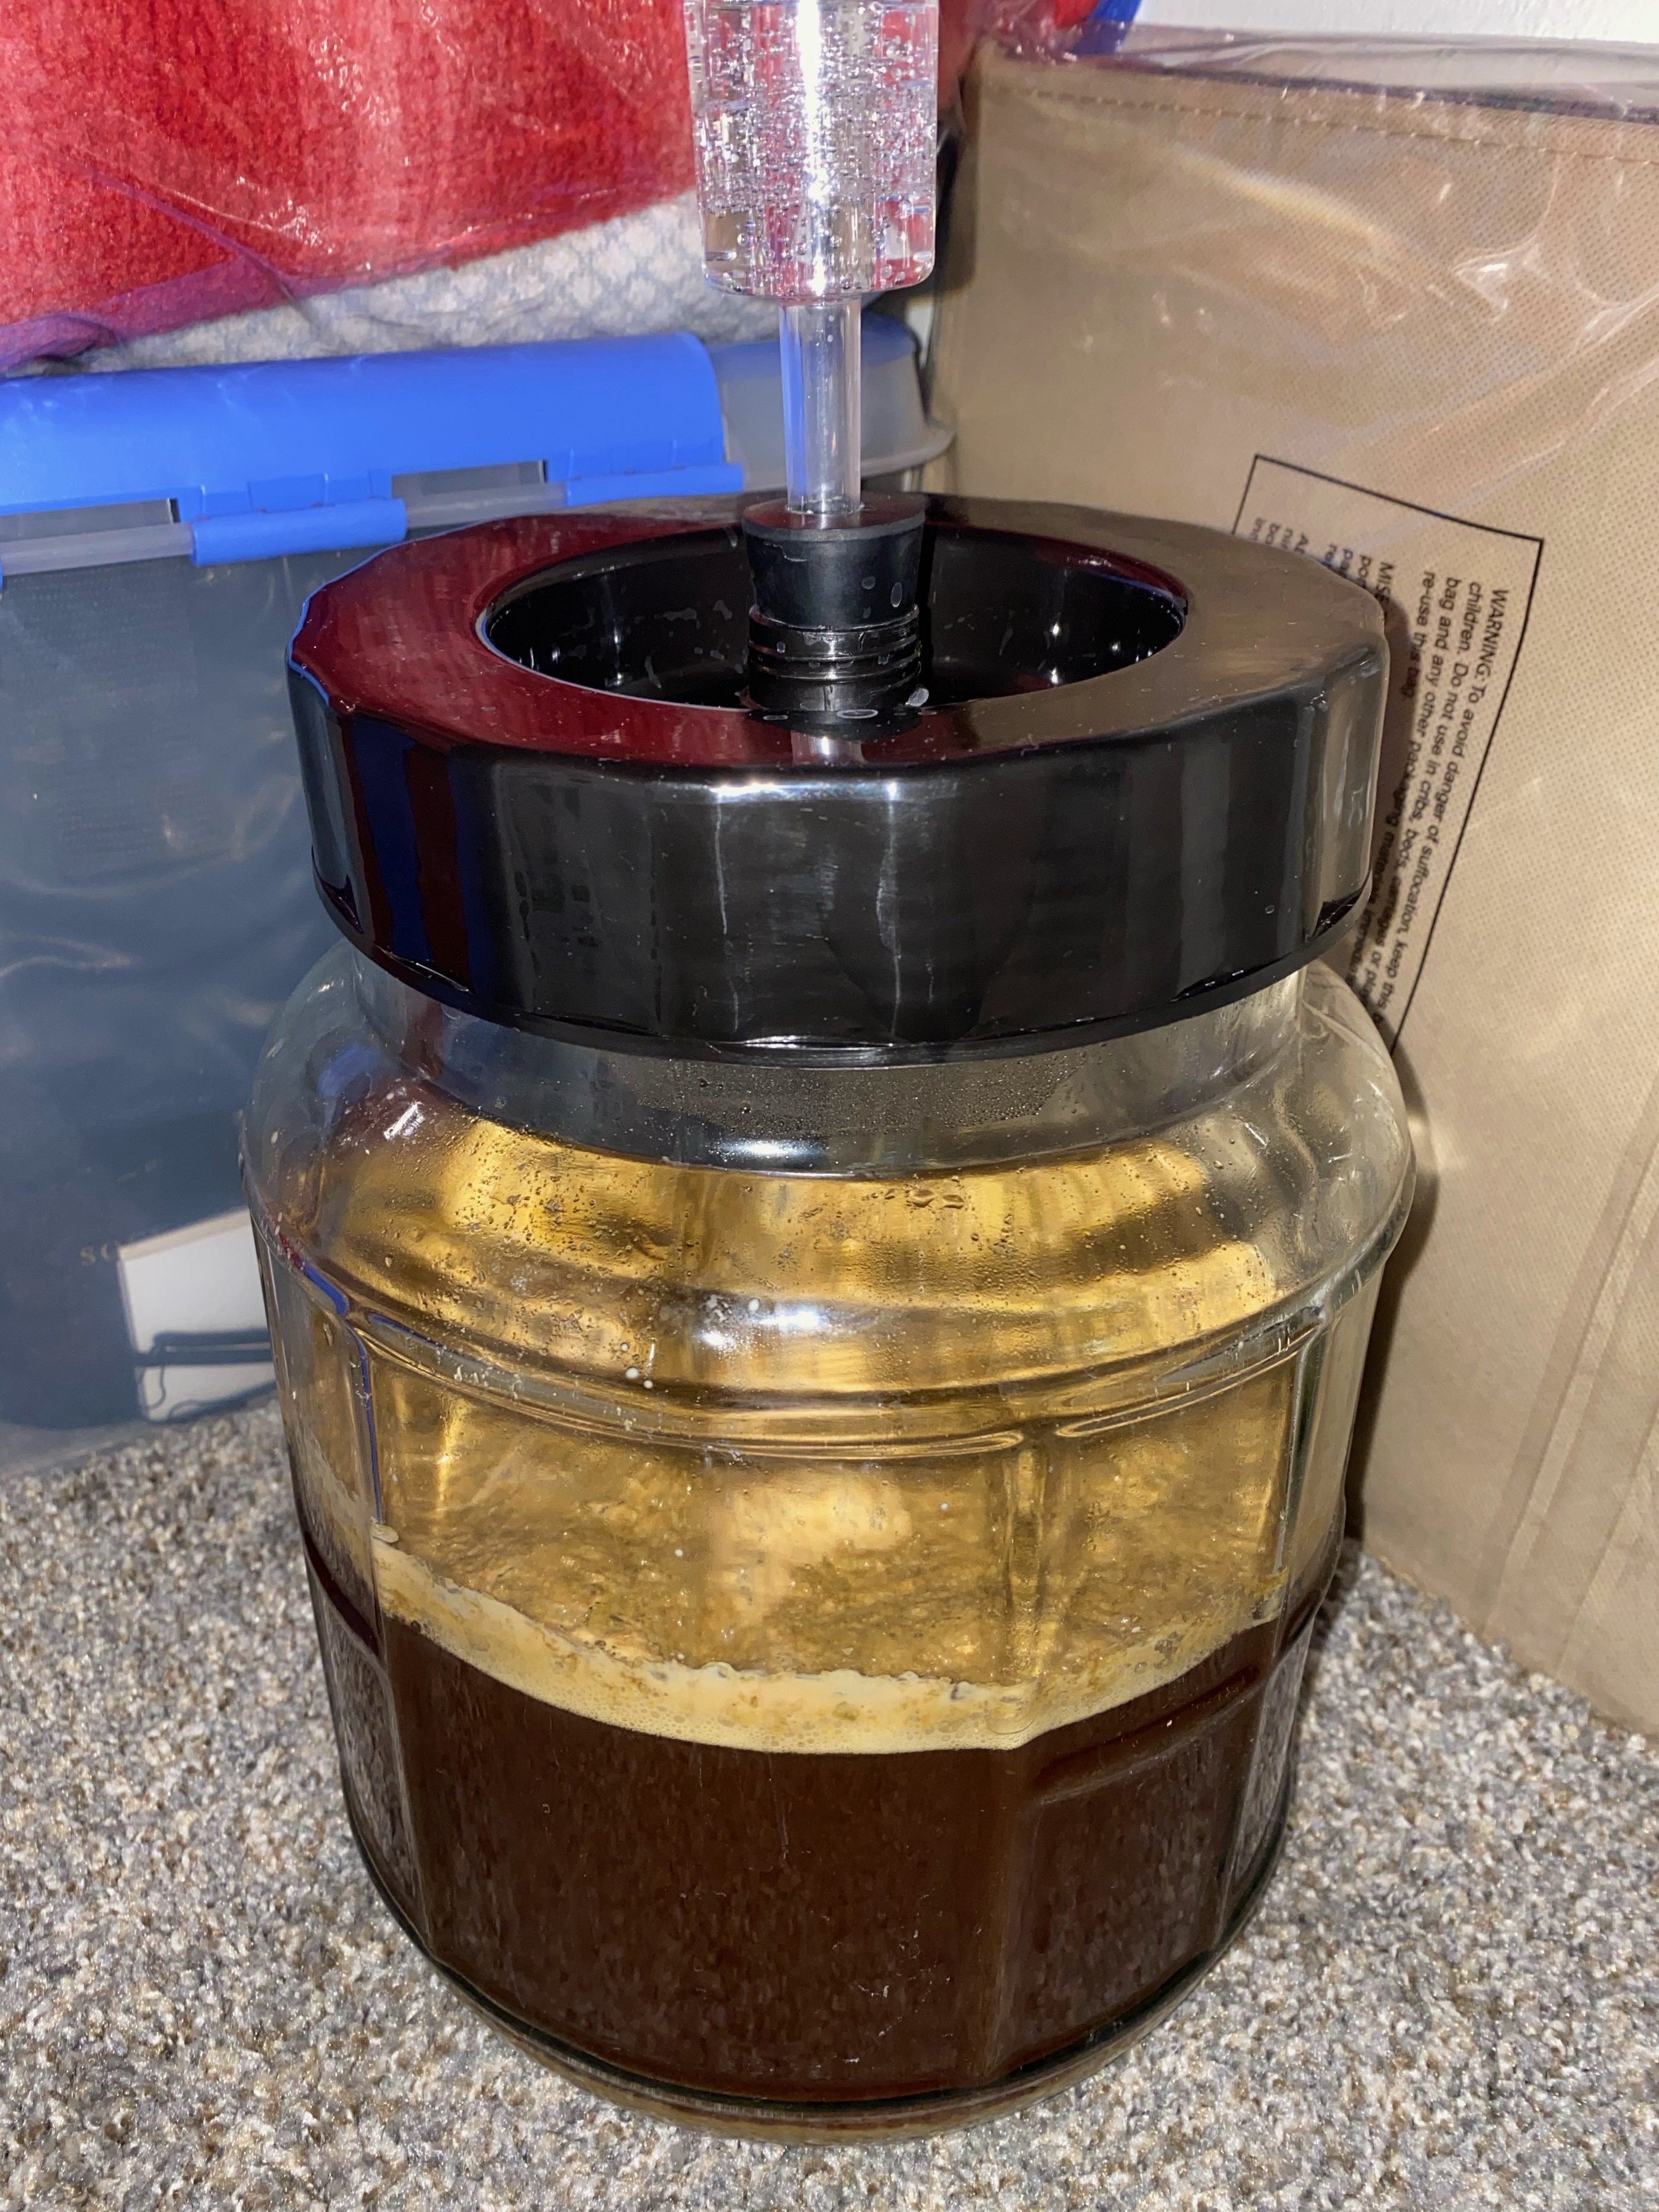
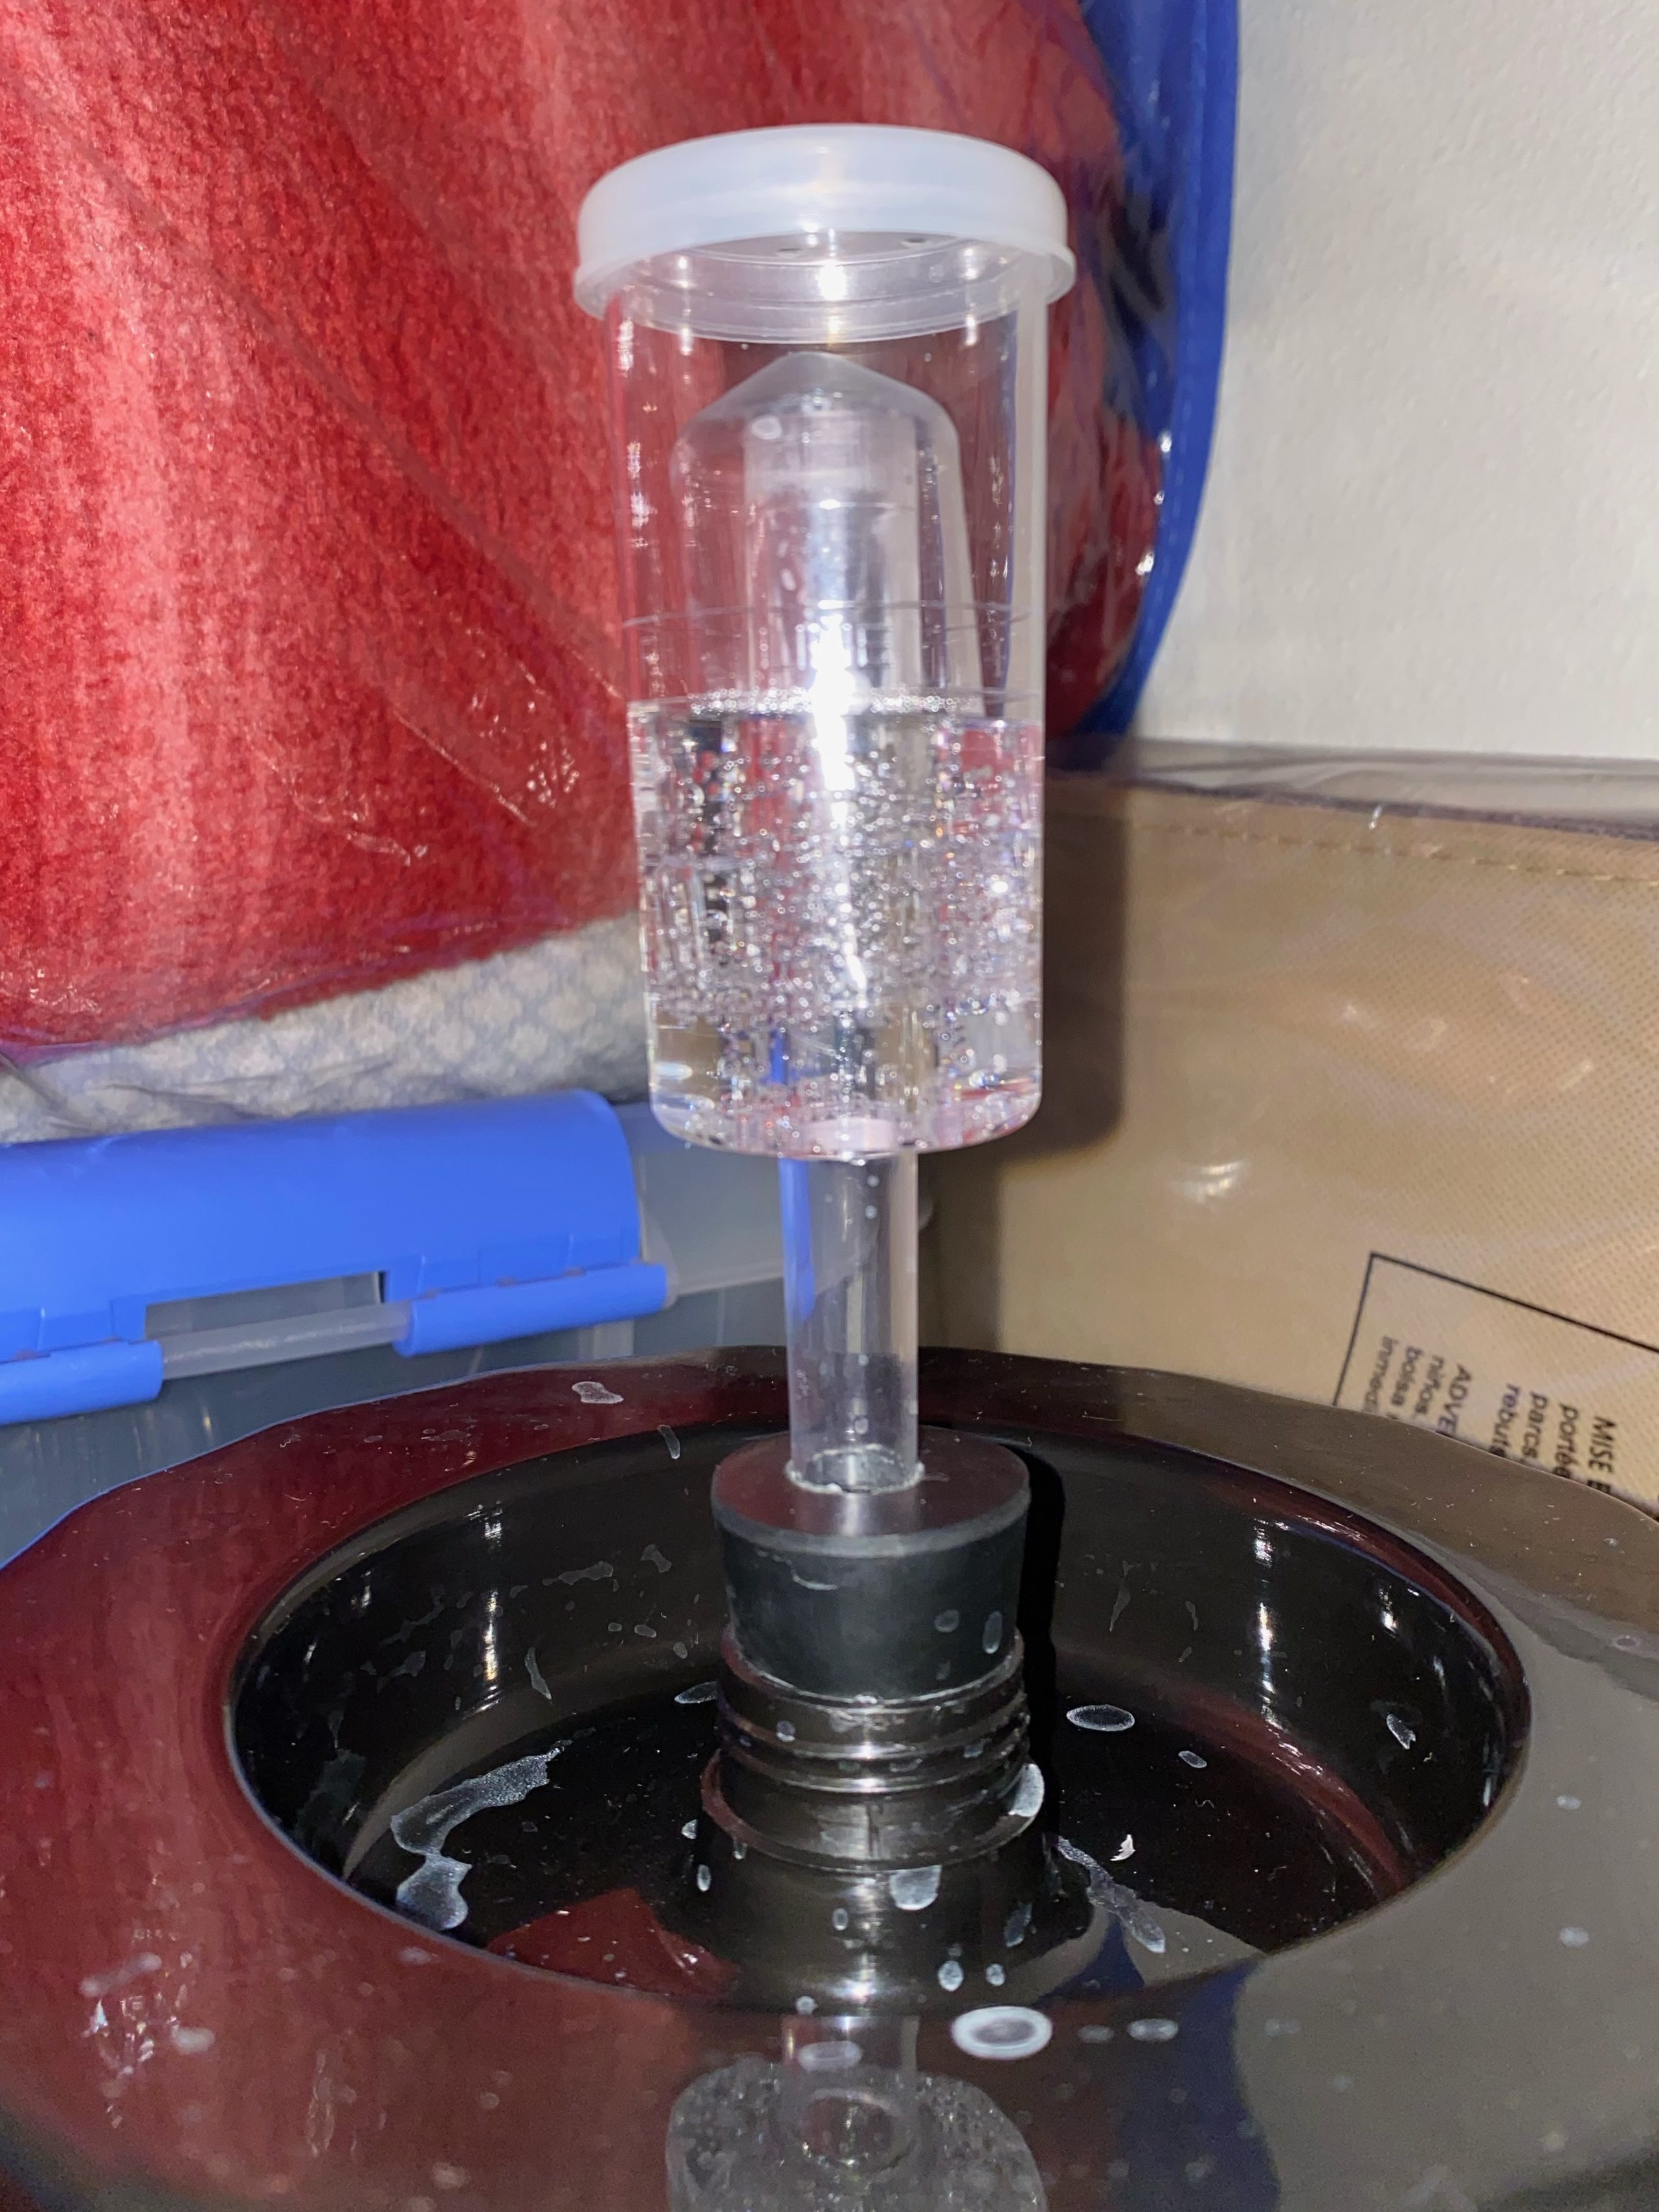
While it was cooling, I was busy cleaning up everything I had used for my brew. I sanitized all my gear and got my glass carboy ready for action for when the beer was nice and cooled. I had gotten my airlock, screw cap, rubber stopper, auto siphon, and hose ready and cleaned. After the 30 minutes I siphoned my beer into the 1 gallon glass carboy and screwed it tight with the cap, stopper and airlock.
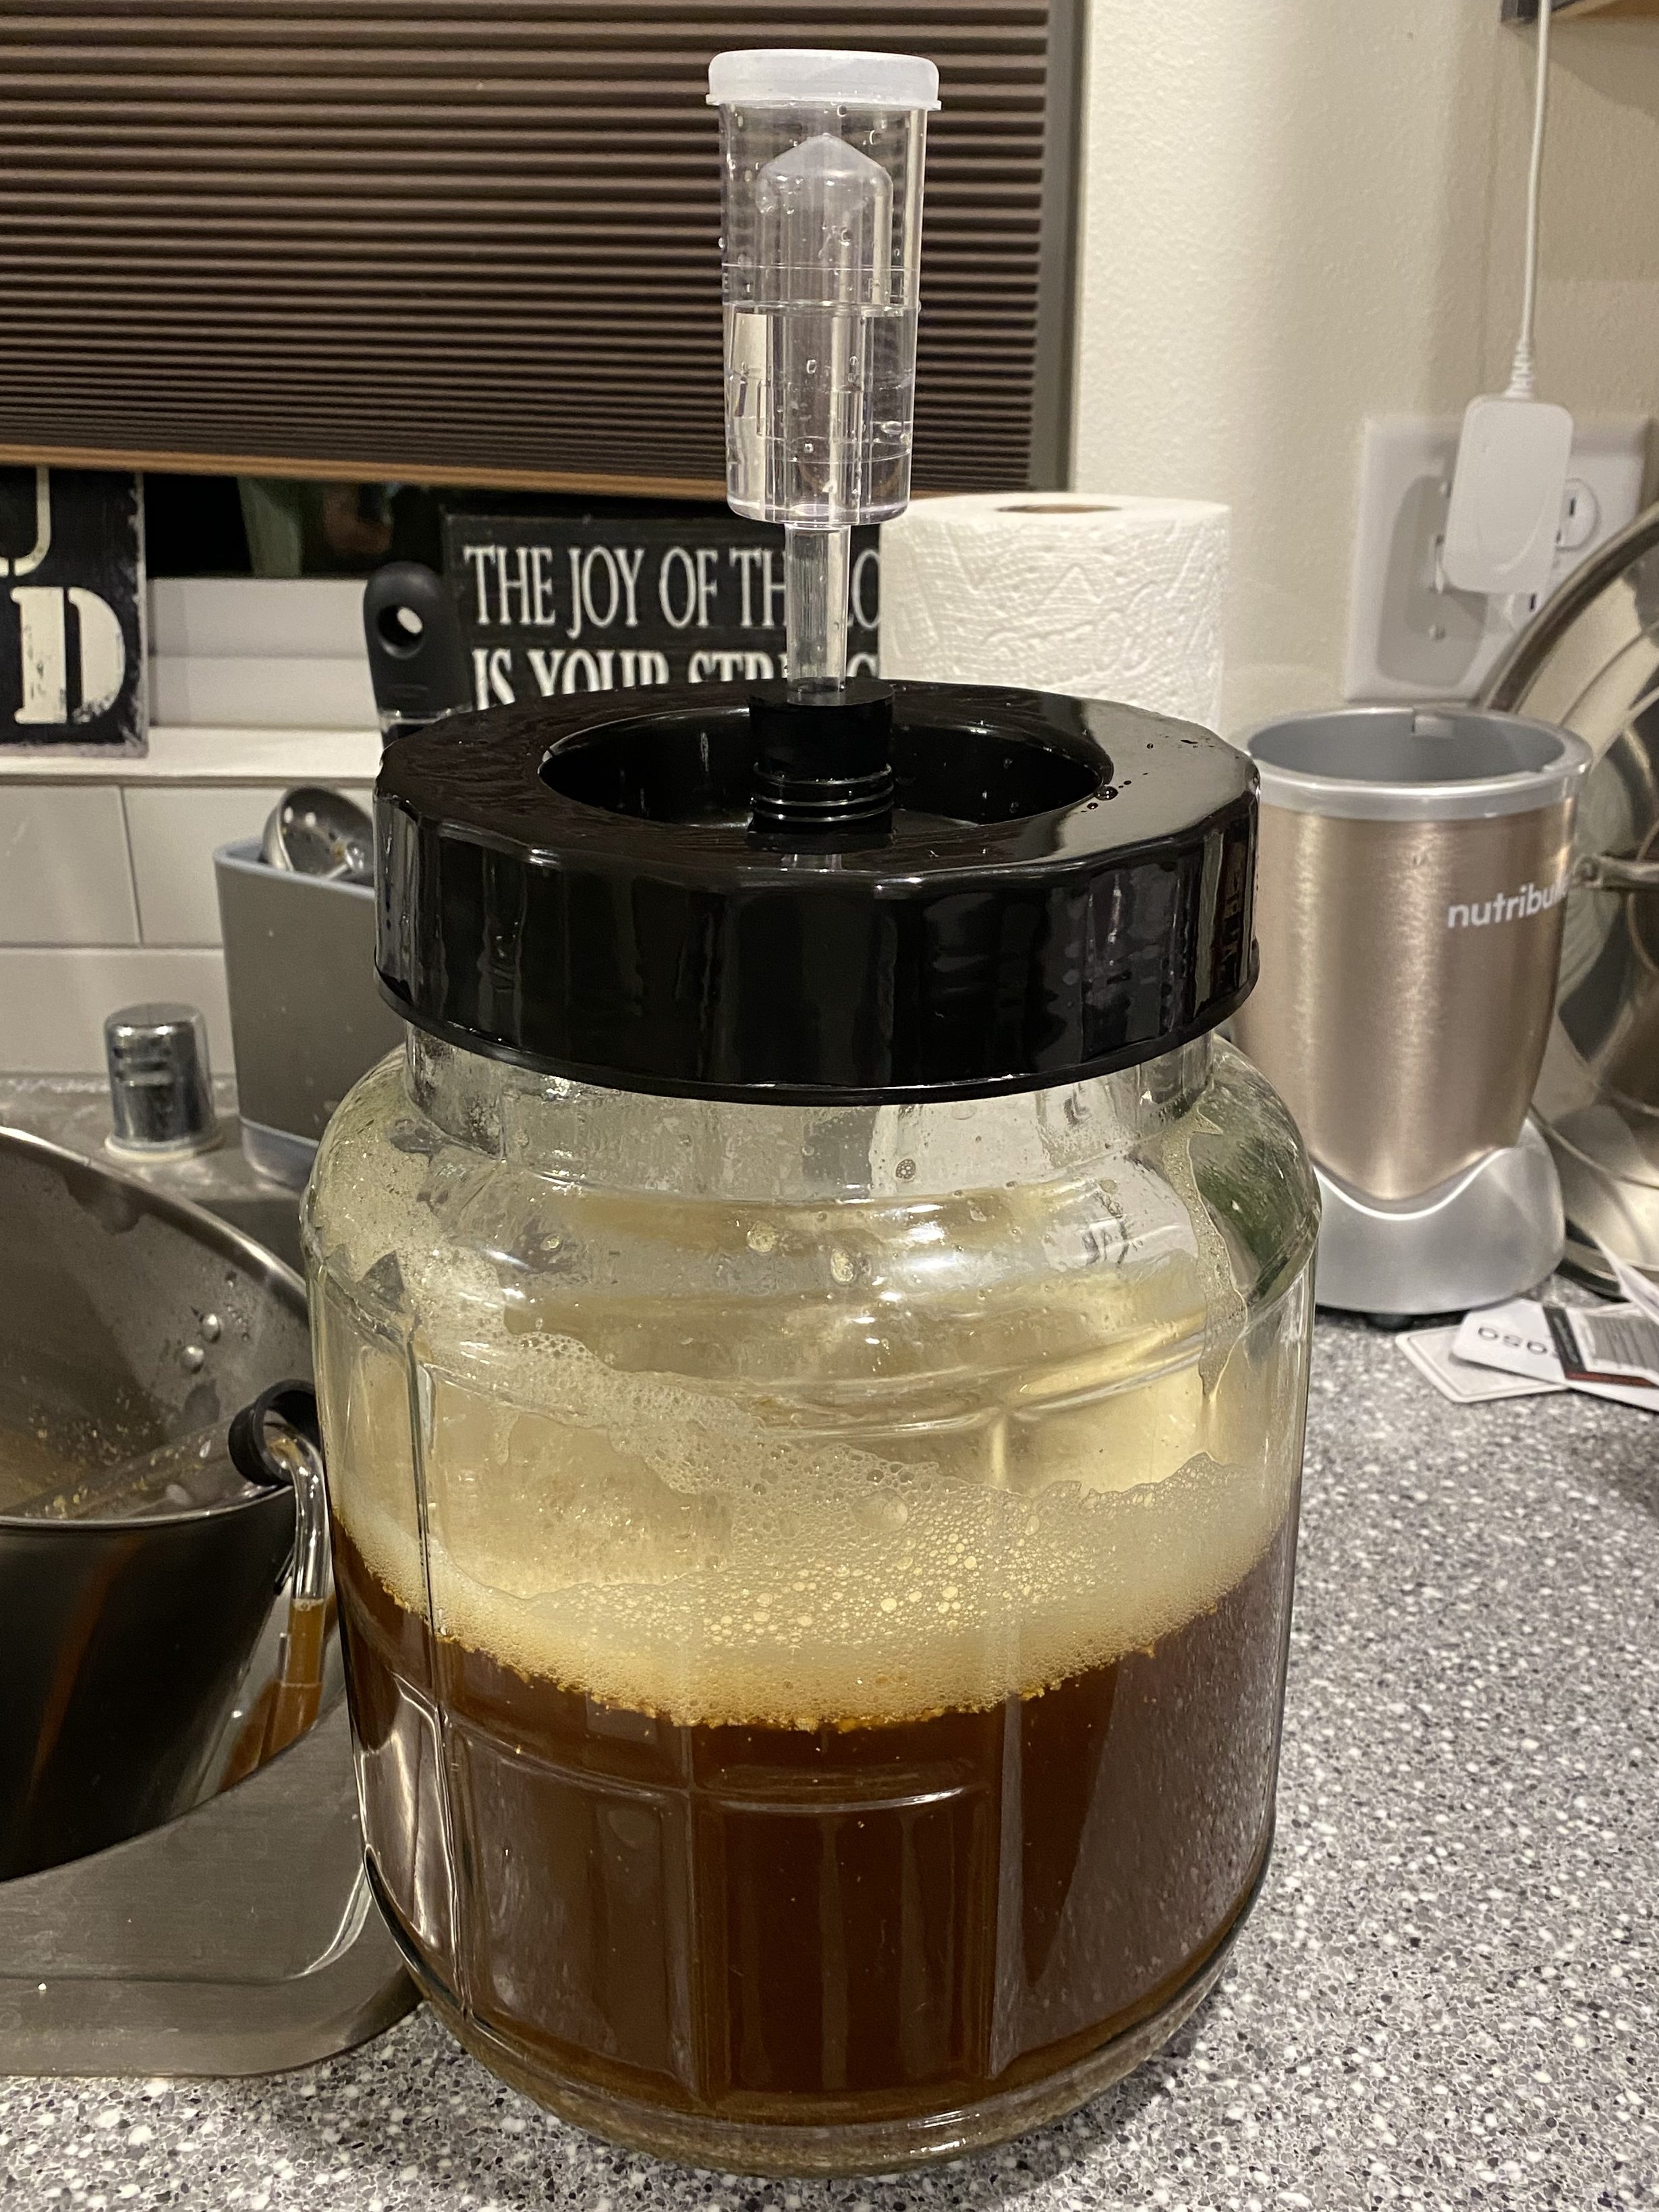
I aerated the wort before I screwed it tight and then sloshed the wort around after I had screwed it on to mix air in. I opened the top and dumped my
4 g of Bru Yeast (small batch) American Ale Dry Yeast.
I then officially sealed it off and set it in my closet for the next 2-2.5 weeks. I got really excited for how this was going to turn out and was checking on it daily to see the process of the beer inside the carboy. I saw that the bubbler was doing it’s thing, which got me even more excited because it meant I was on the right track for my first home brew.
When the two weeks had ended, I took my carboy out of the closet and headed over to one of my good friend Michael’s house. He helped me through the process of adding sugar for carbonation into the beer. We boiled up some sugar in water and then poured it into the carboy and mixed it up with my beer. We then siphoned the beer into each bottle and filled 8 bottles with my first brew.
This is when I took my final gravity (FG) reading which was a whopping 1.028.
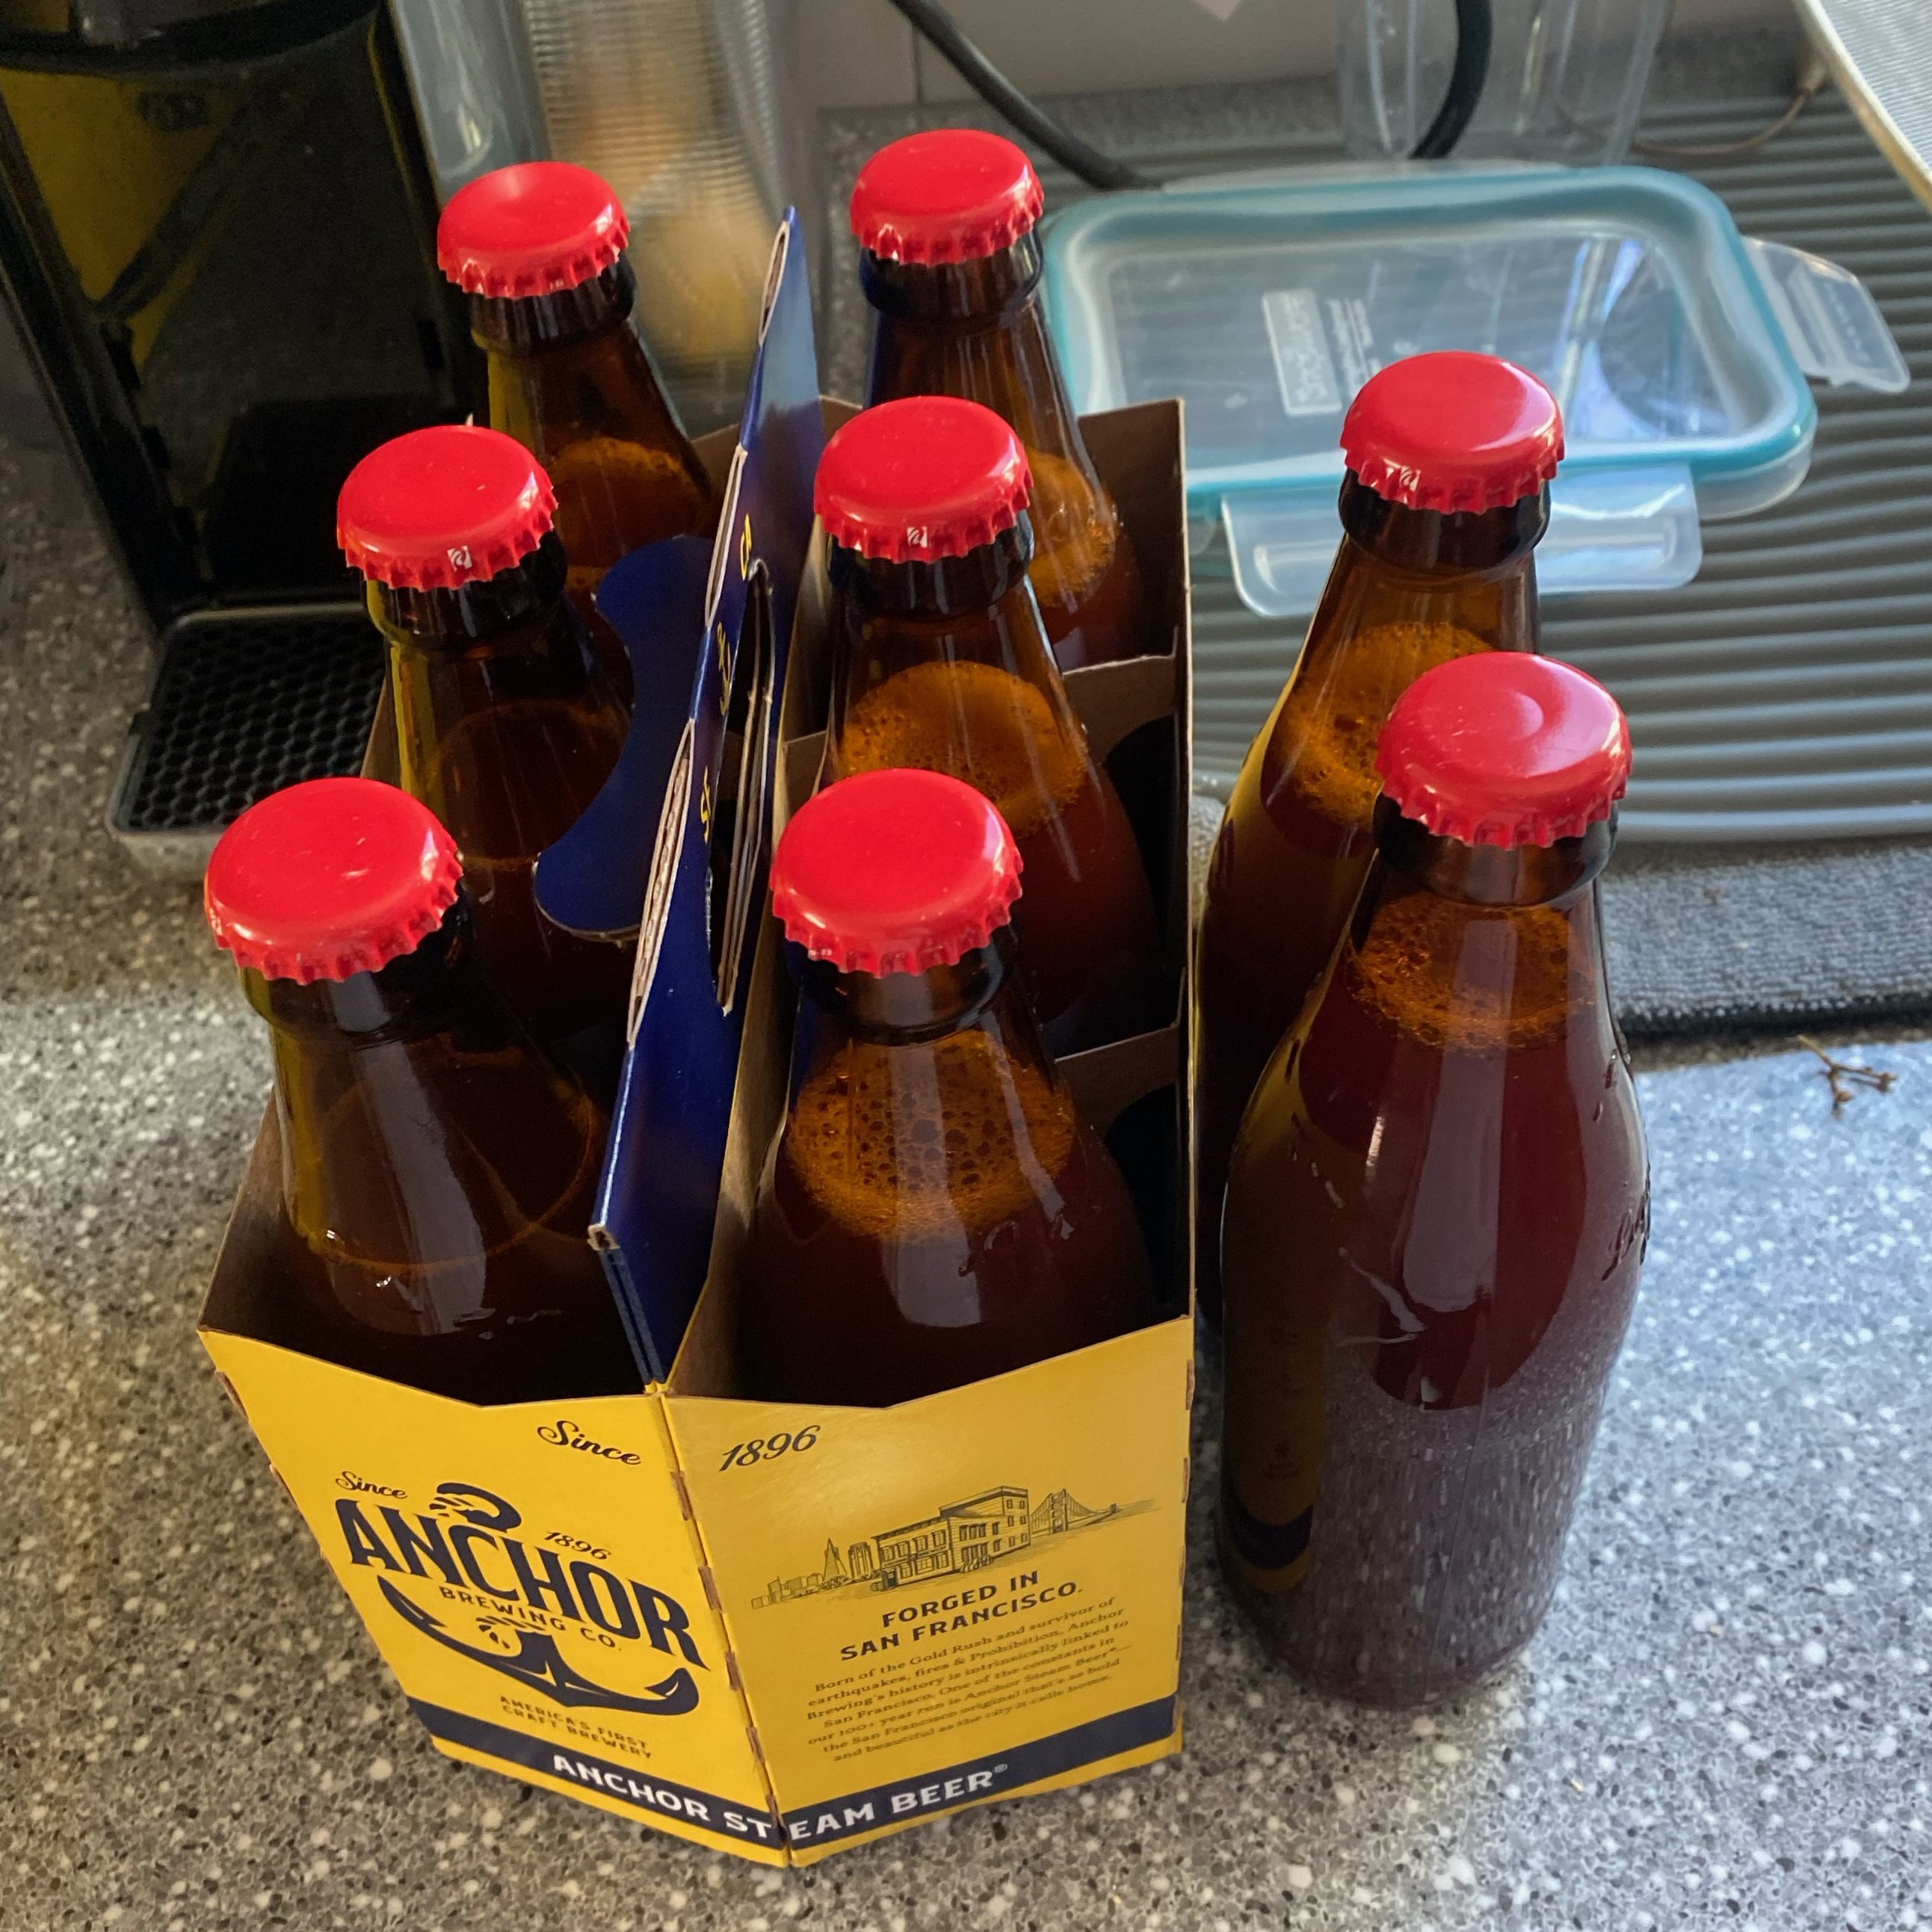
I took my bottles home and let them bottle condition for about another two weeks. After this time was up I put them into the fridge to get all nice and chilled for when I can finally open one and try it. It wasn’t till this last week that I opened one and tried it for the first time. It was very overpowering and had a lot of bitterness immediately from the taste. I didn’t notice any off flavors from the beer, however I am going to spend a day doing a full sensory panel for my new beer along with having other people to taste test to get a few different views on how my first home brew tastes. I had a wonderful time doing this experiment and can’t wait to brew more!
-
Taking Over Brewery Operations at a Microbrewery.
My First Three Brews as Head Brewer.
I am currently in my senior year at CWU studying Craft Brewing. I have my AA in Biology and relocated to the Central Washington area about two years ago. While studying at CWU, I took on a taproom position at Mule and Elk Brewery in Cle Elum. Over the course of my time there, I worked my way up to Assistant Brewer, then eventually Head Brewer in December 2022.
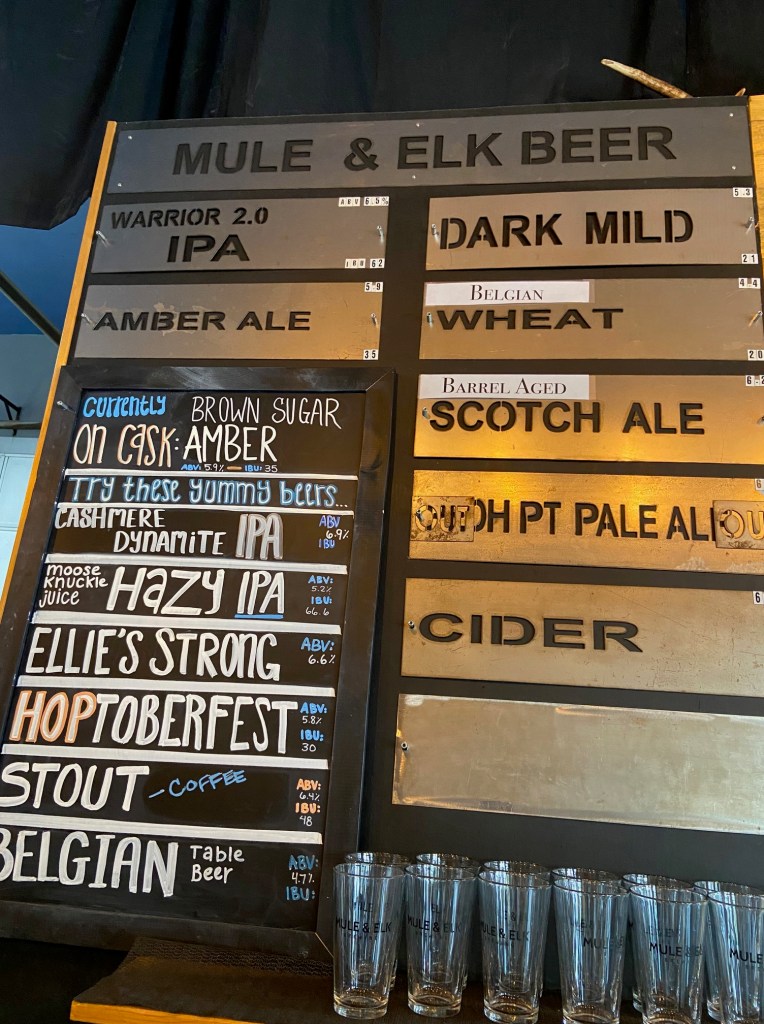
On Tap List at Mule and Elk This new position was overwhelming to say the least. My training to take over brewery operations was roughly two months long. I had a lot of new responsibilities, and the entire brewery would depend on how well of a job I would do. My first task was brewing three of Mule and Elk’s flagship beers, Amber Ale, Ellie’s Blonde and Dark Mild. I had previous recipes to follow, and guidelines given to me by management. I was given our suppliers’ list, a company credit card, and I was off running. All three of those flagship beers would end up with different fates…
The first brew was the Dark Mild. This would be my first 100% solo brew. I followed the flagship recipe and was asked to bring down the ABV. It was currently standing at 5.4%.
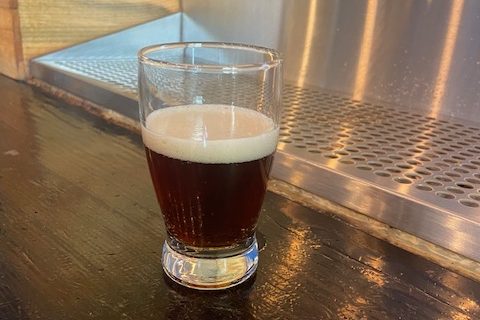
Taster glass with Dark Mild right off the tap. This brew would be the smoothest beginning to end. I had brand new yeast, which helped, and the beer turned out to be 4.4% ABV.
I also filled two firkins (a small cask) to put on our cask ale system (the only one in Kittitas County by the way). This beer was right on point when it came to taste, flavor, color, and I was able to bring down the ABV, restoring the session ale style of the Dark Mild.
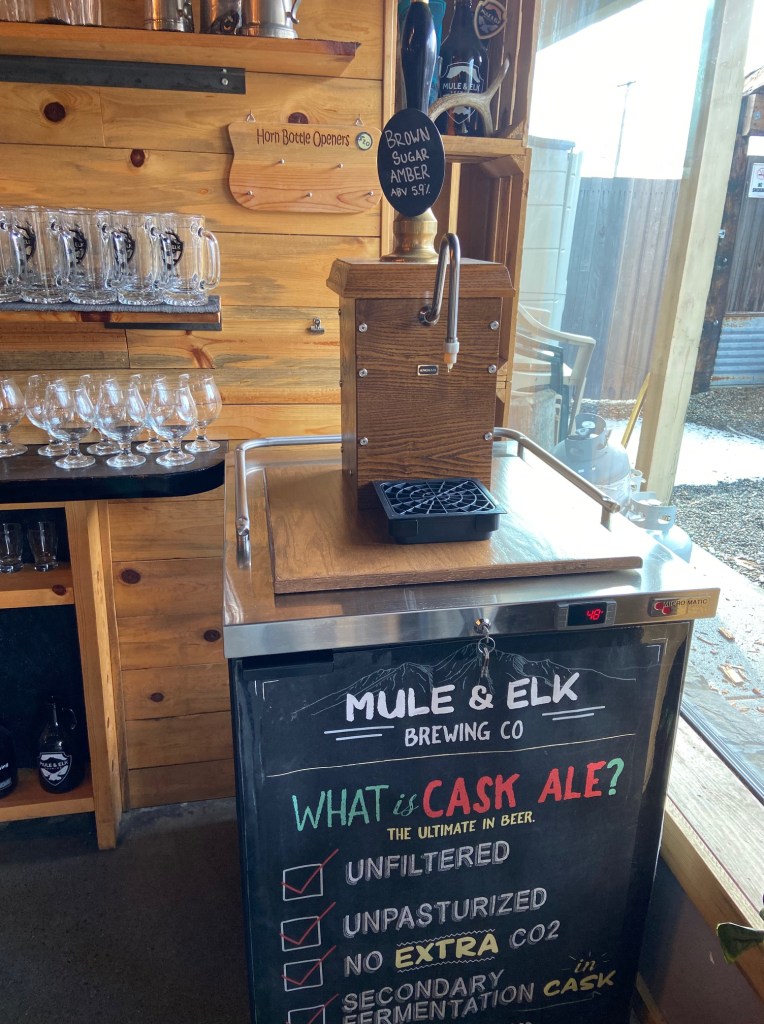
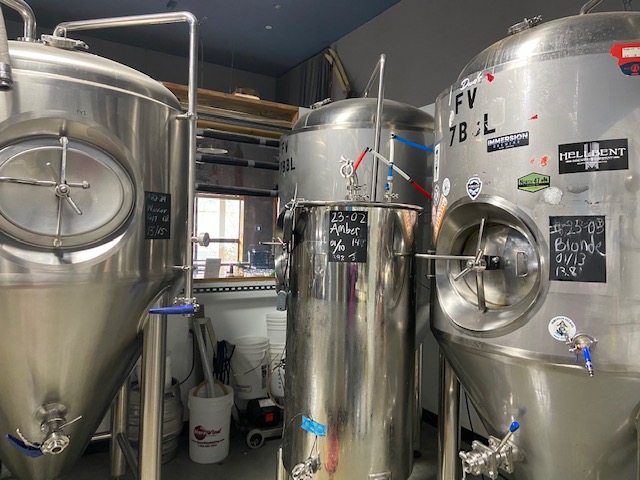
Amber Ale with brown sugar on our cask system The second brew was the Amber. I brewed extra so I could fill a 7-barrel fermenter and a 2-barrel fermenter. I re-pitched the yeast used in the Dark Mild brew from the week previous.
The 2-barrel batch turned out slightly higher in ABV than expected (5.6% vs 5.9%) but was right on the flagship style otherwise. The 7-barrel batch was taking a bit longer to ferment. The ABV was still very low after 10 days, and I was seeing very little fermentation. After discussion with management, we decided to perform a taste test and make an executive decision.
It tasted terrible. There was this plastic, band-aid taste and it wasn’t something we could ever serve. This was the well-known off -flavor: phenolic. The whole batch had to be dumped, there must have been a sanitation issue at the beginning. I ended up having to re-brew the Amber a few weeks later with much better success.
Blonde in the 7-barrel fermenter next to the Amber Ale in the 2-barrel fermenter. Warrior IPA (other flagship) is still in tank from previous brewer. The third flagship beer to brew would be the Ellie’s Blonde. This brew day was my most efficient and focused now that I was on my third brew. I would brew extra like I did with the Amber and separated the Blonde into two vessels: 2-barrel and 7-barrel.
The day after the brew when I was performing my after-brew checks, I noticed the temperature reader on the 2-barrel fermenter read correctly, but the outside of the tank was warm to the touch. The temperature probe was hanging on the wall reading the room temperature, not the tank temperature. This simple mistake caused me to think the liquid I was adding after brewing was the right temperature, but it was too hot. Like so hot the tank was still warm the next day. This killed all the yeast and there was no fermentation. I had only made hot sugary water. This 2-barrel batch would also be dumped.
The 7-barrel batch of Blonde saw a much better future than it’s 2-barrel sibling. This brew fermented a day or two longer than I should have let it, causing the ABV to be about 1% higher than normal: 5.5% to 6.6%. The taste was still great, so we decided to call it Ellie’s Strong. This beer has been a big hit at the taproom and a lot of customers say they prefer it to the previous one!
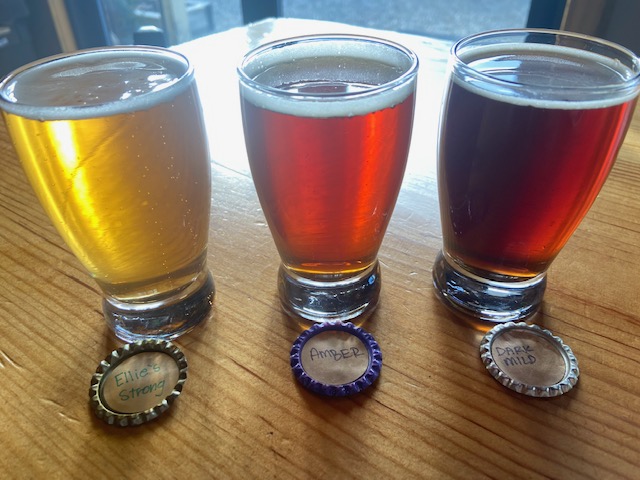
The three flagship beers in tasting glasses I have learned a whole lot since taking over operations in December. I have made some mistakes that have taught me valuable lessons for my brewing career. However, I’ve also been able to fill this role in a short amount of time and had successes as well.
There are a lot of responsibilities that come with this role that go beyond just brewing good beer. I still have a lot to learn and mistakes yet to be made that will shape me to be the best brewer I can be. At the end of the day, all I want is to serve good beer to my community, and every day in this position will help me make that happen.
-
Kimchi! Make it at Home.
Why Kimchi?
Hey there, I’m Angelina Fletcher and for my Craft Brewing Practicum, I really wanted to do something I can use in my house. Although I am doing a minor in the program and think craft brewing is very interesting, my interest in it peaked in the very interactive class about fermentation. As someone who is half-Japanese and lived in Japan, there are many foods that I grew up eating that I didn’t even realize were fermented. My fiancé also lived in Korea for a few years in his childhood and encouraged me to make sauerkraut or kimchi during that class, but I just didn’t have enough free time. When I learned that I could choose anything pertaining to the courses for my practicum, I thought what better time than now to try it out? Out of the many options, such as making my own Yakult or sourdough, I felt that kimchi would be the best. My partner loves kimchi, meaning he can be my taste-tester, and we need more vegetables in our diet. Making my own kimchi will allow me to adjust the spiciness to my taste.

Challenges Faced
My original plan was to buy ingredients and make multiple small batches over about two months and adjust the recipe as I went. The most unfortunate event was that the Gochugaru that I purchased on amazon which was only supposed to take one week to arrive got delayed and took three whole weeks instead. There was also a monetary issue with the supplies and ingredients. I had ingredients that I bought during the second week, that I had to either throw out or use in a rush in a different recipe since I was continuously waiting for the last ingredient to be delivered. As a college student in their senior year working part-time, I also underestimated how much time it would take to prepare the dish. I think it makes more sense why people make them in such large batches, as making one small batch and a very large one does not differ much in the total amount of time taken to prepare it. I need to wait until I have a little bit more money to spend before I make another batch, as I need to buy bigger bowls, the ingredients, and more jars to make more at a time and be able to give to some friends and family. Finally, I overestimated how often we would eat kimchi. With our current schedules, my fiancé and I rarely have time to make and eat anything at home unless it is frozen. We like to eat it with rice, seaweed, and another dish, which can get repetitive pretty quickly.
The Result
Supplies needed:
- Cutting board
- Knife
- Large bowls
- Colander
- Food processor
- Small spatula
- Gloves
- Paper towels
- 2 wide mouth mason jars (1 qt) Link to jars
- Fermenting lids and weights Link to fermenting lids and weights
Recipe is based off: https://www.feastingathome.com/how-to-make-kimchi/
Ingredients:
- 1 Large napa cabbage, cut into 1-inch pieces
- ¼ cup Iodine-free sea salt or kosher slat
- 1 gallon Distilled water
- 2 cups Daikon radish (or carrots if unavailable), cut into matchstick strips
- 4 Scallions trimmed and cut into 1-inch pieces
- 1 tsp Ginger, peeled and sliced
- 6 cloves Garlic, peeled
- 1 Shallot, quartered
- 1 tsp Sugar
- 2 Tbs fish sauce Link to Fish Sauce
- 4 Tbs Korean red pepper flakes (Gochugaru) Link to Gochugaru
Instructions:
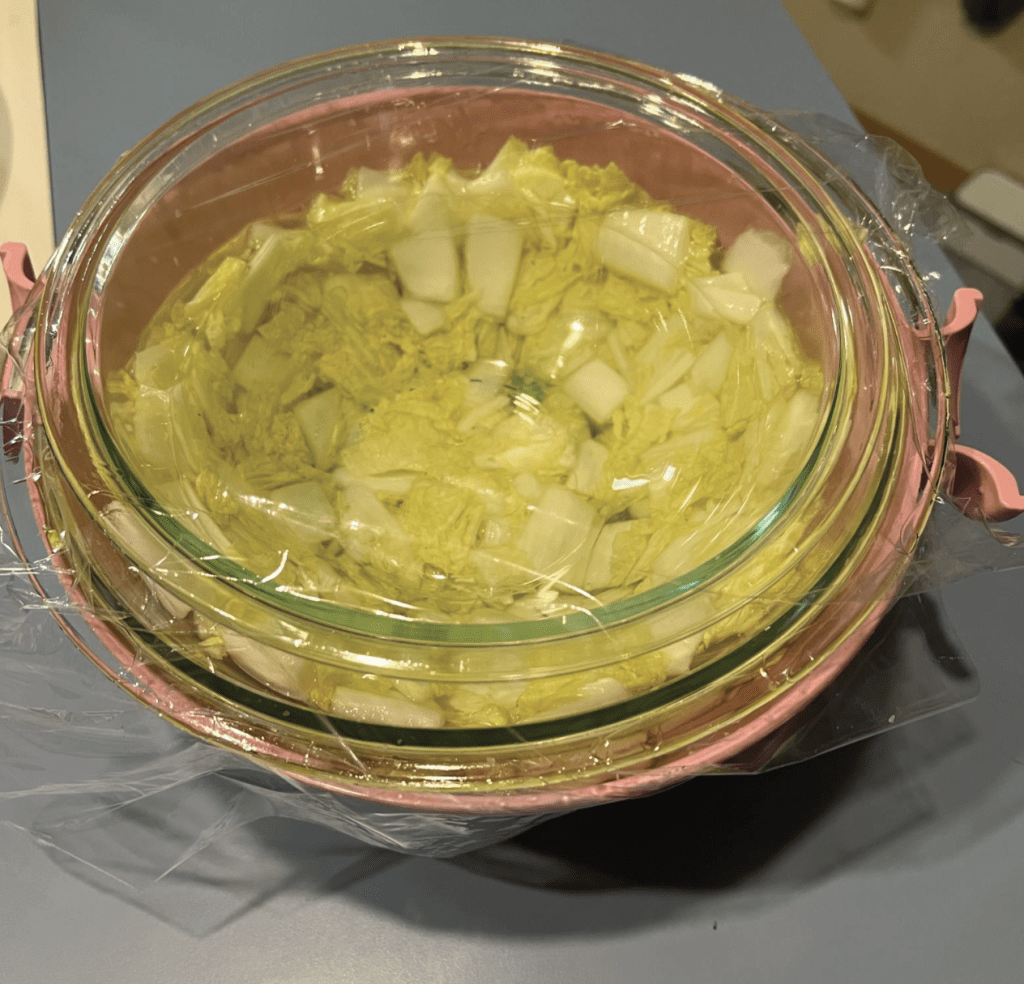
- Salting the cabbage. The night before making the dish, first wash and dry all utensils to make sure they are clean. Reserve 2-3 outer leaves of the napa cabbage, wrap them in plastic and refrigerate for later use. Cut the remaining cabbage into 1 inch pieces and place them in a large bowl. Add salt and toss until coated. Add enough distilled water to cover the cabbage and stir until the salt is dissolved. Use a plate or bowl to keep the cabbage submerged and let stand at room temperature overnight.
- Prepping the ingredients. Drain the cabbage, saving the brine to use later. Rinse the cabbage lightly, drain, and squeeze out any excess water. Blot them with paper towels and place them back in the bowl. Wash and cut the daikon radish into matchstick strips, and the scallions into 1 inch pieces. Add the daikon radish and scallions into the bowl with the cabbage. Peel and slice the ginger, peel the garlic, and peel and quarter the shallot. (Tip: Wash all utensils you will not be using anymore as you go to make the cleaning process easier).

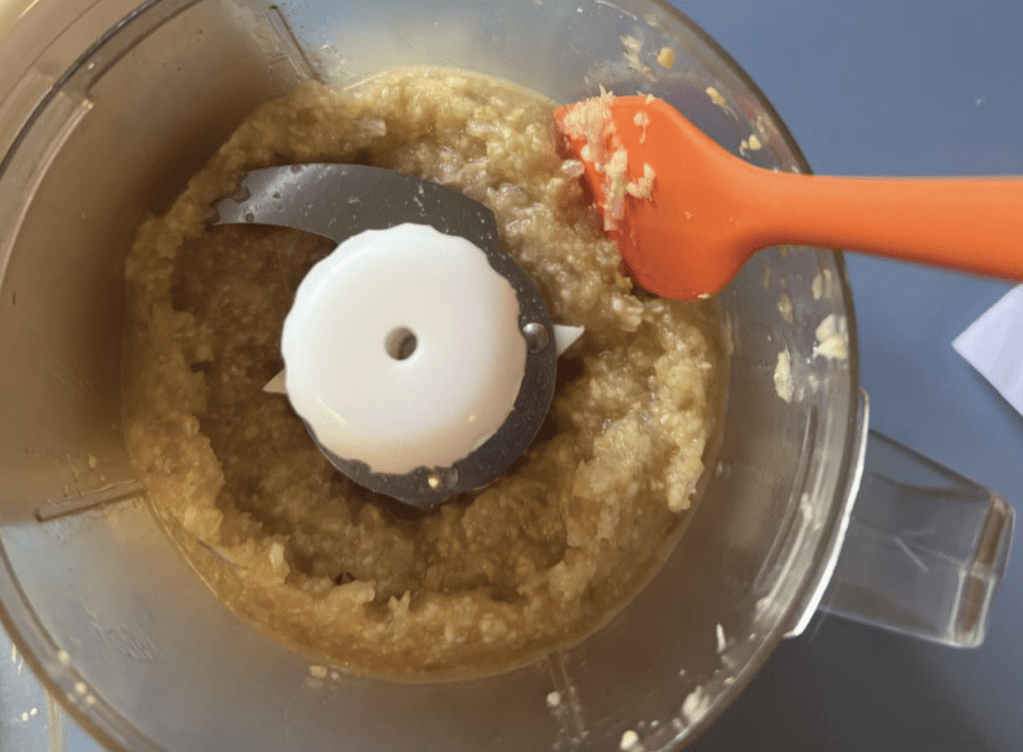
- Making the paste. Place the ginger, garlic, shallot, sugar, fish sauce, and Gochugaru (2 Tbs for mild, 4 for medium, and 6 for spicy) in the food processor. Process until well combined until it becomes a thick paste. Utilize the spatula when necessary.
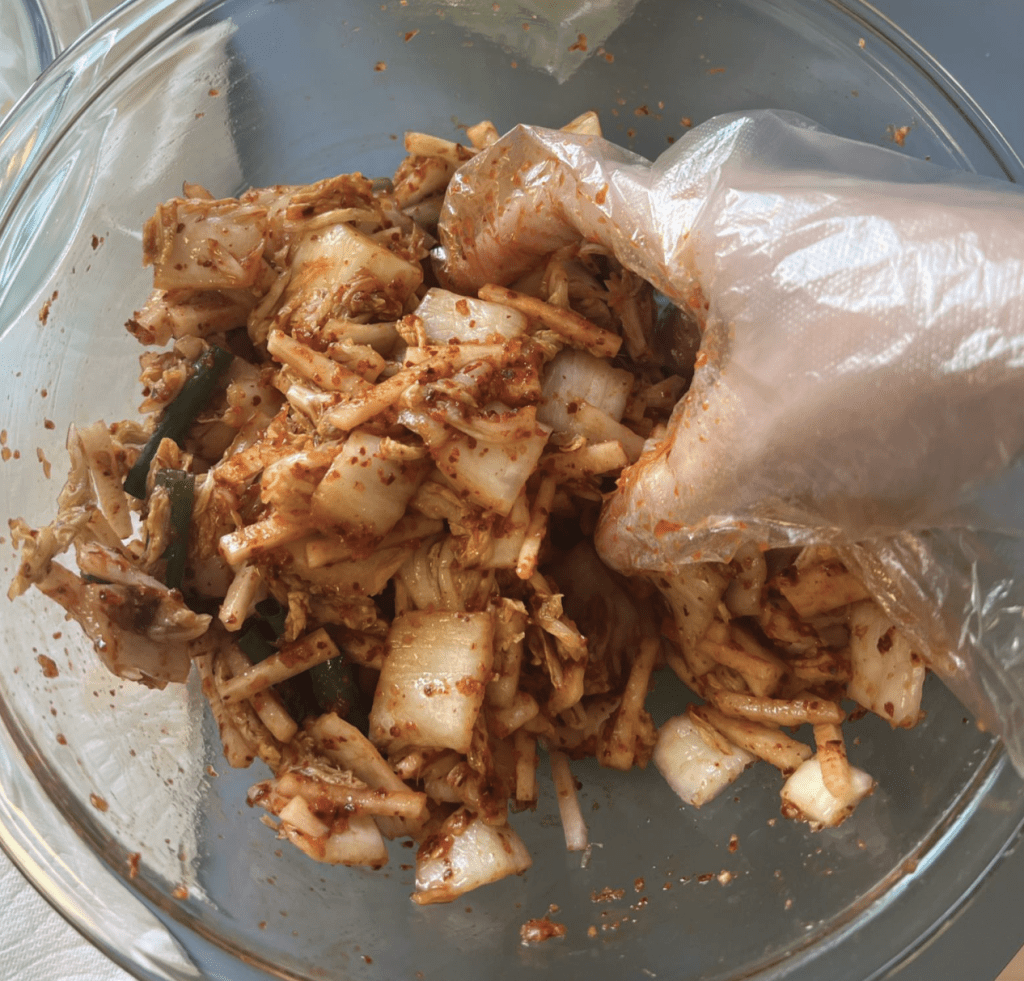
- Mixing it all. Scoop the paste over the cabbage mix. Use gloves to mix and massage the vegetables with the red pepper mixture together until well coated.
- Packing the jar. Pack it all into the jars, leaving almost 2 inches of room from the top of the jar. As it ferments, there will be juices that get released. Add a little of the reserved brine, enough to cover the vegetables. Place the cabbage leaf from step 1 over top, pressing down to make sure all vegetables are submerged under the brine. Place the fermentation weight over the top of the leaf. Anything that is not submerged and touches air may mold.
- Fermenting the kimchi. Screw on the fermentation lid, making sure it is properly filled with water. Leave the jars somewhere dark and cool, ideally between 55 and 65 degrees Fahrenheit, for at least 3 days. A basement or lower, cooler cabinet in the pantry or kitchen away from appliances works best. Check the jars daily to marvel at your work and make sure they are not overflowing and making a mess. The juice level should rise daily, with some bubbles showing fermentation is happening.

- Refrigerate when ready. After you see bubbles (usually 3-5 days) the kimchi is ready, but it won’t achieve its full flavor and complexity until about 2 weeks slowly fermenting in the fridge. The longer you ferment the more complex and tangy it will taste. The kimchi will keep for months in the fridge if it is submerged in brine and will continue to ferment very slowly, getting more and more flavorful. Feel free to remove the cabbage leaf and just press the kimchi down under the brine after each use. There are many ways to enjoy kimchi, both as a side dish and to incorporate into cooking!
Result Analysis
When I split my batch into mild and spicy portions, I used the equivalent of 2 tablespoons of red pepper flakes for the mild and 6 tablespoons for the spicy portions. The mild one allowed more of the ingredient flavors to come through, and I did not have any problems eating it, even as someone who has a hard time with anything spicy. My fiancé had more of the spicy kimchi, which he liked the flavor of more but said he liked the tangy taste of the mild one better. Once I have the large bowls and fresh ingredients, I will be making one homogenous mixture of 4 tablespoons to make one in-between in spiciness.
Future Plans
Along with making a medium spicy batch of kimchi, I would love to try fermenting some for longer and comparing the tanginess. There are also many other recipes out there I would love to try, experimenting with different methods and ingredients to see which my fiancé and I prefer the most. Finally, between different batches of kimchi, I would also love to use the supplies I have to make sauerkraut, going through the same process of experimentation to find the perfect recipe.
